SDP zero trust
This help contains the following topics:
Introduction
The software-defined perimeter (SDP) zero trust feature allows the device to act as an SDP gateway and cooperate with the SDP controller for user access control. It performs authentication to achieve centralized control over identities and permissions of users that access to the specified applications or APIs, avoiding illegal accesses.
vSystem support information
Support of non-default vSystems for this feature depends on the device model. This feature is available on the Web interface only if it is supported.
Configure SDP zero trust
Prerequisites
Complete the following tasks before you configure this feature:
Assign IP addresses to interfaces on the
Network >Interface Configuration >Interfaces page.Configure routes on the
Network >Routing page. Make sure the routes are available.Create security zones on the
Network >Security Zones page.Add interfaces to security zones. You can add interfaces to a security zone on the
Security Zones page or select a security zone for an interface on theInterfaces page.Configure security policies to permit the target traffic on the
Policies >Security Policies page.
Analysis
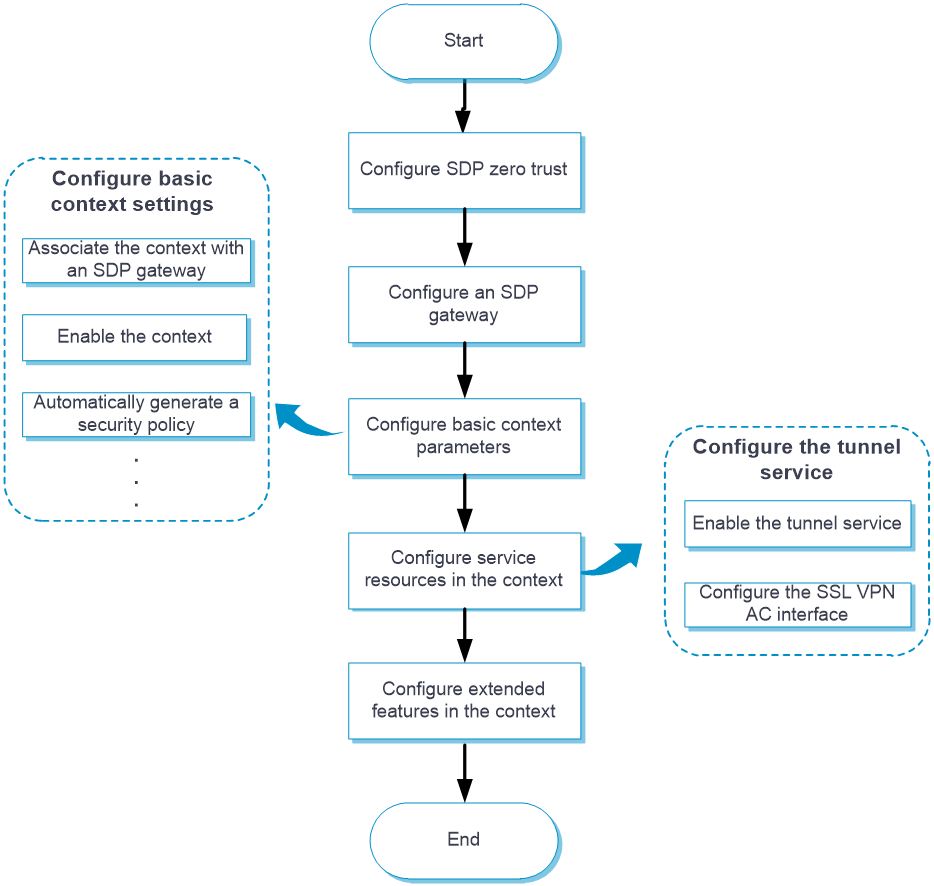
The configuration workflow for SDP zero trust in IP access mode is as shown in Figure-1.
Figure-1 Configuring SDP zero trust in IP access mode
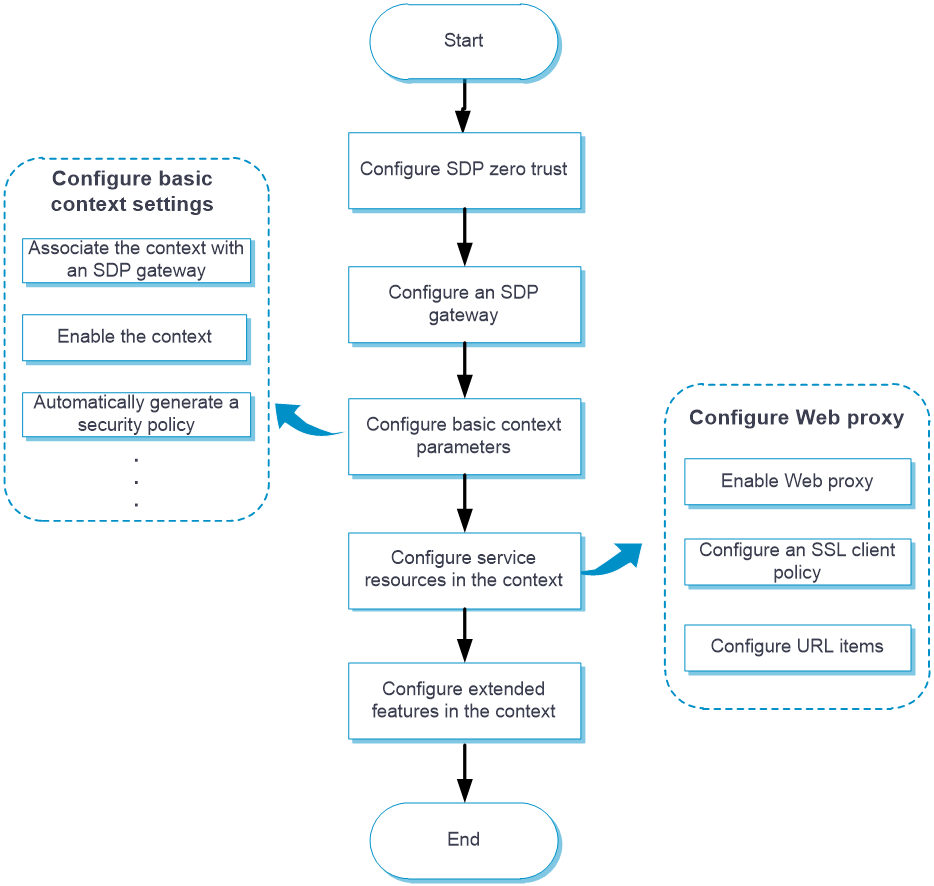
The configuration workflow for SDP zero trust in Web access mode is as shown in Figure-2.
Figure-2 Configuring SDP zero trust in Web access mode
In mix access mode, you can access internal resources in IP access mode or Web access mode. Then, you can configure SDP zero trust as needed.
Access internal resources in IP access mode
The IP access mode is suitable for internal networks of traditional enterprise that require strict access control for fixed networks and devices. For example, resources like databases and file servers within an enterprise's internal network need stable connections to ensure their security and stability.
Configure SDP zero trust settings
Click the
Policies tab.In the navigation pane, select
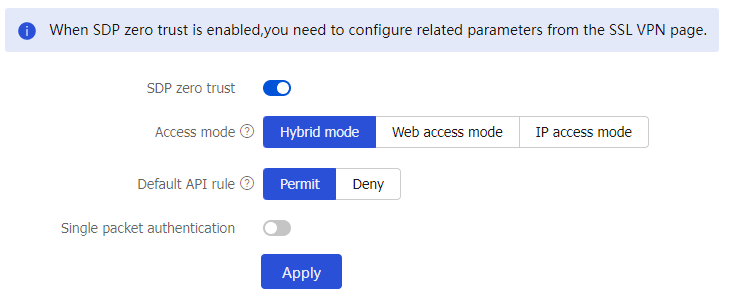
Zero Trust >SDP Zero Trust .Figure-3
SDP zero trust configuration 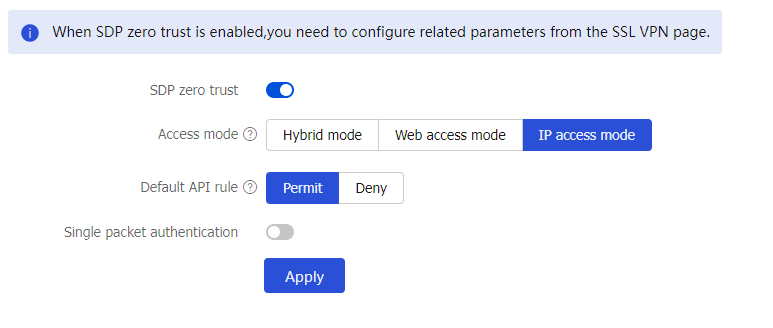
Configure SDP zero trust settings.
Table-1 SDP zero trust configuration items
Item
Description
SDP zero trust
Select this item to enable SDP zero trust, and then configure SDP zero trust settings. Click
Apply after configuring SDP zero trust settings. Then, the device will act as an SDP gateway and cooperate with the SDP controller for access control. The SDP controller issues user permissions to internal resources to the SDP gateway for users to access these internal resources through the SDP gateway.Access mode
Select the IP access mode.
Default API rule
Select a default API rule. Options include:
Permit .Deny .
Single packet authentication
Select this item to enable single packet authentication. After single packet authentication is enabled, the client must send an SPA packet to before accessing the SDP gateway. The SDP gateway identifies whether the client is legal. If the client is legal, the SDP gateway will permits the subsequent access request from the client. If not, the SDP will deny the access request from the client.
This feature is supported only in mix access mode and IP access mode.
Click
Apply .
Configure an SDP gateway
Click the
Network tab.In the navigation pane, select
VPN >SDP Zero Trust >SSL VPN Gateways .Click
Create .Figure-4 SDP gateway configuration

Figure-5 Creating an SDP gateway
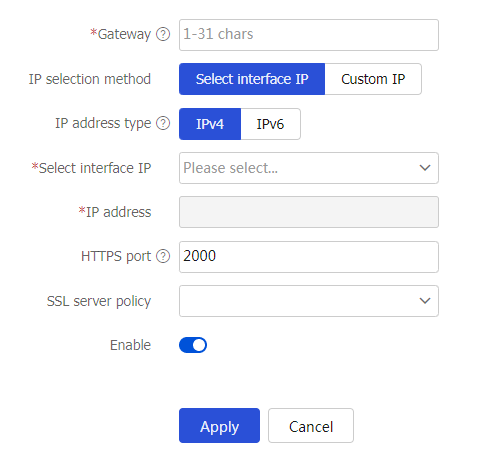
Table-2 SDP gateway configuration items
Item
Description
Gateway
Enter a name for the SDP gateway.
IP selection method
Select an IP selection method, including
Select Interface IP andCustom IP .IP address type
Select
IPv4 orIPv6 as the IP address type.Select interface IP
Select an interface from the drop-down list. The IP address of this interface will be used as the address of the SDP gateway.
You cannot specify the management address of the device as the address of the SDP gateway.
IP address
Select the IP address of the SSL VPN gateway.
HTTPS port
Specify the HTTPS port number of the SDP gateway.
SSL server policy
Select an SSL server policy to be associated with the SDP gateway.
VRF
Select the VRF to which the SDP gateway belongs.
This field is available only when you edit an SDP gateway.
Enable
Select whether to enable the SDP gateway.
Click
Apply .
Configure basic context settings
Perform this task to configure basic context settings, including the gateway associated with the context and enabling status of the context.
To configure basic context settings:
Click the
Network tab.In the navigation pane, select
VPN >SSL VPN >SSL VPN Contexts .Click
Create .Figure-6 Context configuration

On the
Basic settings page, configure basic context settings as required.Figure-7 Configuring basic context settings
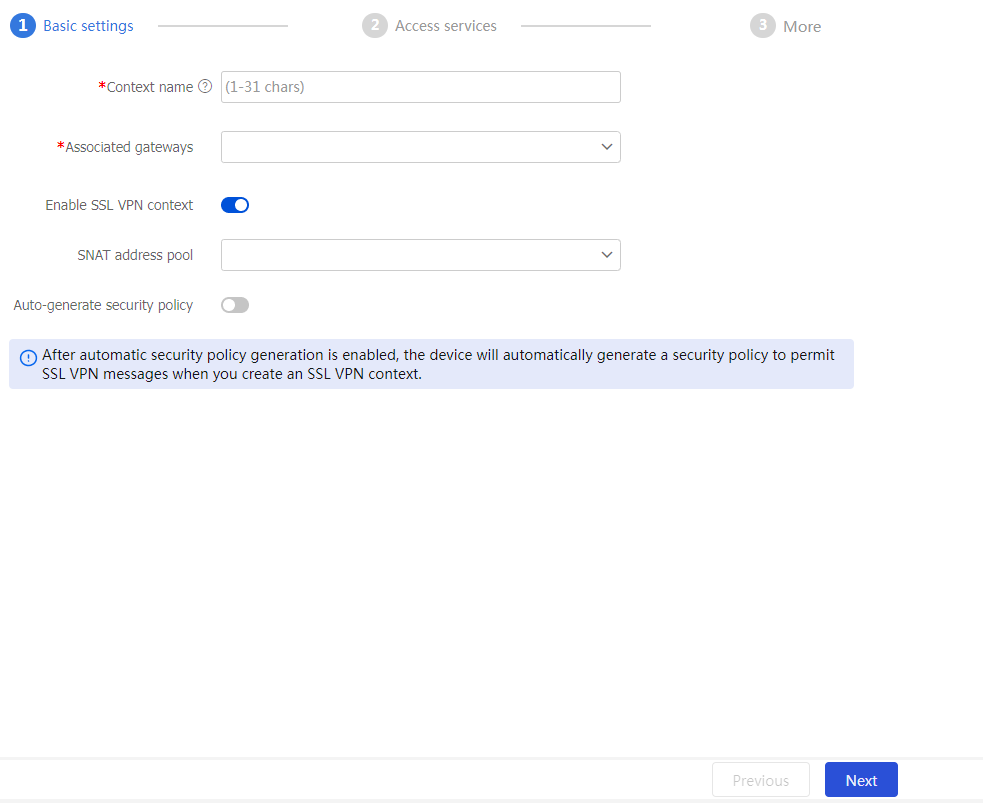
Table-3 Configuration items for basic context settings
Item
Description
Context name
Enter a context name.
Associated gateways
Configure the gateways associated with the context.
You can select an associated gateway from the drop-down list. If no SSL VPN gateway exists, you can click
Add associated gateways to add an SSL VPN gateway.When multiple contexts are associated with the same gateway, you can assign different domain names or host names to these contexts. If you do not specify any domain name or host name, a gateway can only be associated with one context
Enable SSL VPN context
Select whether to enable the context.
SNAT address pool
If the device has more than one engine module, create an SNAT address pool and specify it for the context. The addresses in an SNAT address pool must be on the same subnet as the IP address of the interface on the gateway connecting to the internal server. In addition, make sure the number of addresses in the SNAT address pool must exceed the number of engine modules.
Auto-generate security policy
With this feature enabled, the device will automatically create security policies to allow packets of the SDP zero trust service when the device creates a context.
Click
Next .
Configure access services for a context
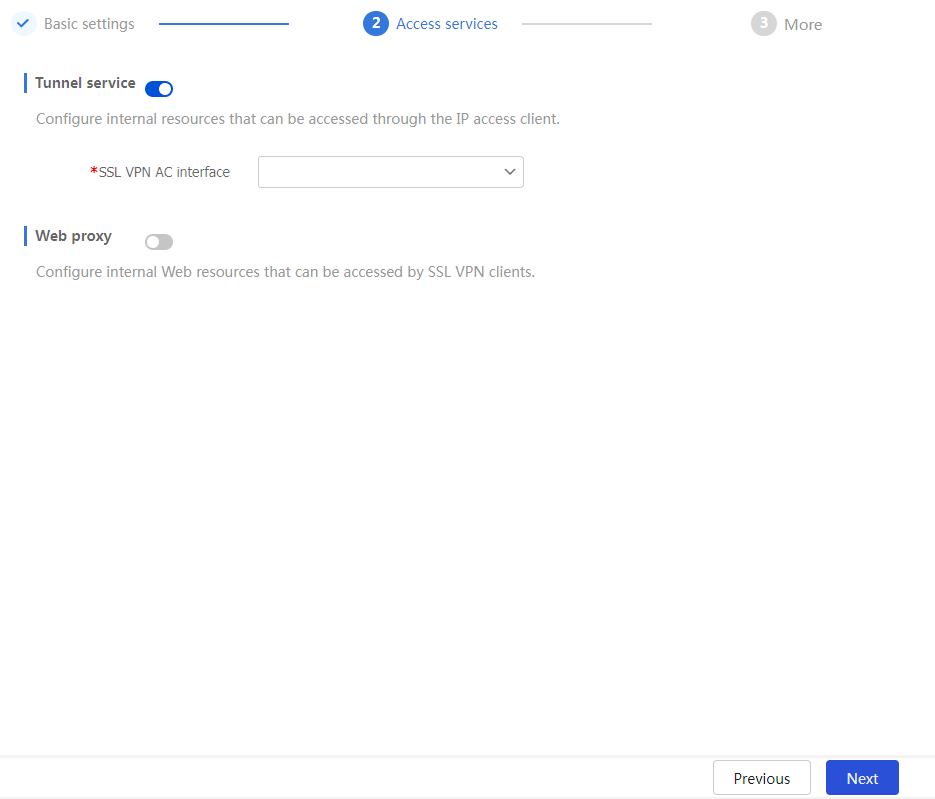
To configure access services in IP access mode:
On the
Access services tab, click the toggle button to theTunnel s ervice field.Select an interface from the
SSL VPN AC interface field.Figure-8 Configuring the tunnel service
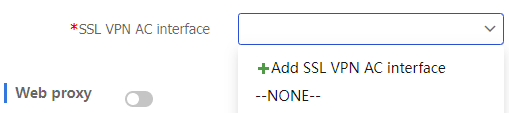
To add an SSL VPN AC interface:
Click
Add SSL VPN AC interface from theSSL VPN AC interface drop-down list.Figure-9 Adding an SSL VPN AC interface
Enter an interface number and click
OK .Figure-10 Creating an interface

On the
Modify Interface Settings page, configure the security zone and IP address.Figure-11 Modifying interface settings
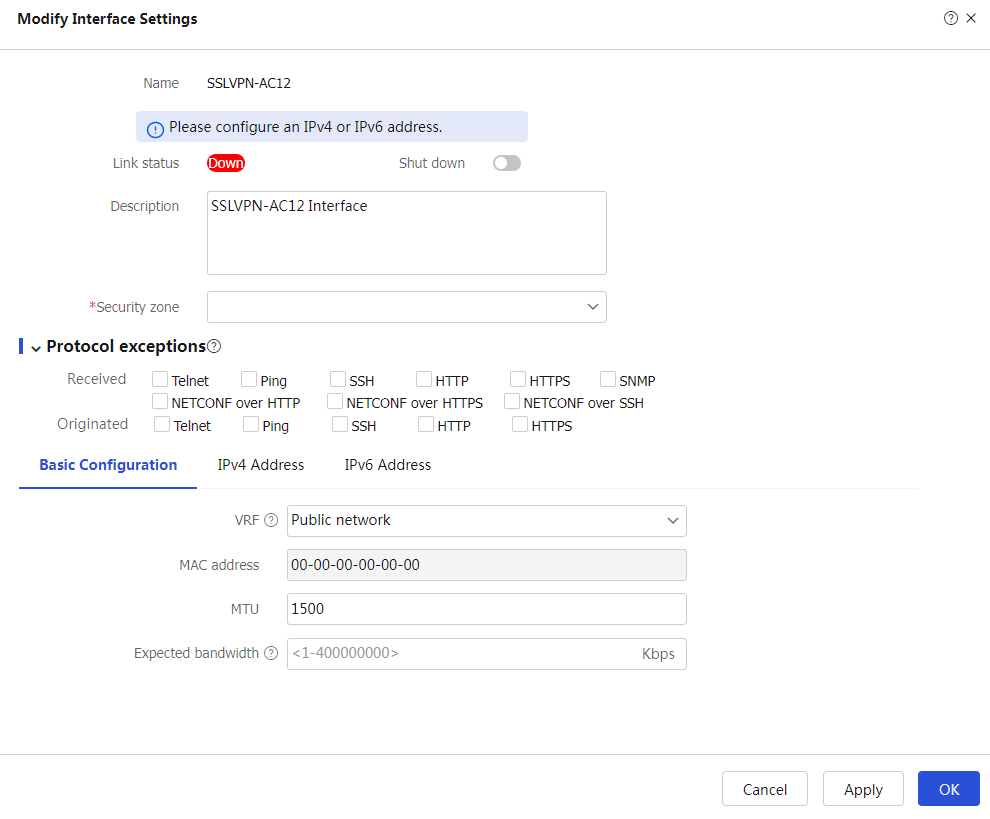
Click
OK .
Click
Next to access theMore page. On this page, configure extended features as needed, and then clickFinish .
View SDP zero trust statistics
To view SDP zero trust statistics, including online user statistics and online user information, navigate to the
(Optional) Configure more settings in a context
On the
More page, click theBasic Settings tab and configure the parameters as needed.Figure-12 Configuring basic settings
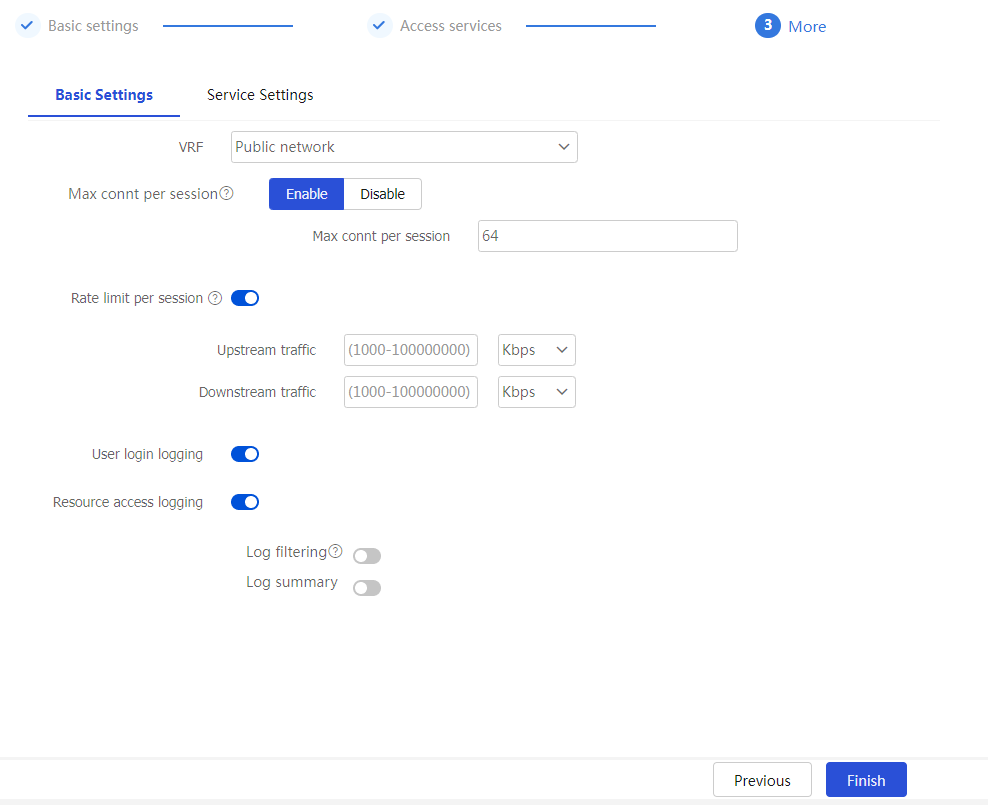
Table-4 Configuration items for basic settings
Item
Description
VRF
Select the VPN instance to which the SSL VPN context belongs.
Max connt per session
Select whether to enable limiting the number of connections in a session. After you enable this field, if the number of connections in an SDP zero trust session on a card reaches the limit, new connection requests for the session will be rejected with a 503 Service Unavailable message.
Rate limit per session
When the packet transmission rate in a direction of the SDP zero trust session exceeds the specified limit, subsequent packets in that direction will be dropped. Upstream traffic refers to the traffic sent from users to the server. Downstream traffic refers to the traffic sent from the server to users.
User login logging
Select this item to enable logging for user login and logout events on the SDP gateway.
Resource access logging
Select this item to enable logging for resource access on the SDP gateway. Then, the SDP gateway generates log messages when users access resources.
After you enable resource access logging, enable Log filtering and Log summary as a best practice. This ensures that only one log message is generated per user for repeated access to the same access resource within one minute. Such a log message displays only the access resource’s address and port number. This effectively reduces the number of log messages and improves log readability.
Click the
Service Settings tab and configure the parameters as needed.Figure-13 Configuring service settings
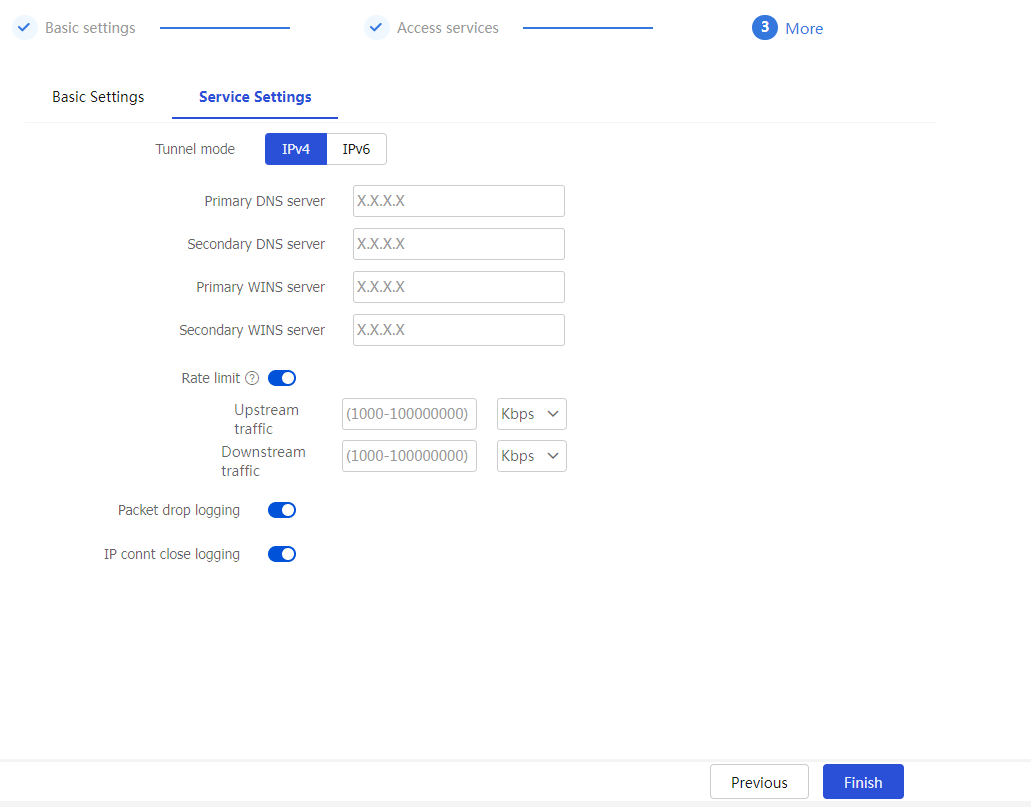
Table-5 Configuration items for service settings
Item
Description
Tunnel mode
IP address type, including IPv4 and IPv6.
Primary DNS server
Specify the IP address of the internal primary DNS server.
Secondary DNS server
Specify the IP address of the internal secondary DNS server.
Primary WINS server
Specify the IP address of the internal primary WINS server. Only IPv4 addresses are supported.
Secondary WINS server
Specify the IP address of the internal secondary WINS server. Only IPv4 addresses are supported.
Rate limit
Specify rate limits for upstream traffic and downstream traffic in IP access mode. Upstream traffic refers to the traffic sent from users to the internal server. Downstream traffic refers to the traffic sent from the internal server to users.
Packet drop logging
Select this item to enable logging for IP access packet drop events. The SDP gateway generates log messages when packets for SDP IP access users are dropped.
IP connt close logging
Select this item to enable logging for IP access connection close events. The SDP gateway generates log messages when the connections established for SDP IP access users are closed.
Click
Finish .
Access internal resources in Web access mode
The Web access mode is suitable for scenarios where remote employees flexibly access enterprise resources via a browser. It allows employees to securely access internal Web applications, portals, internal management systems, and cloud services from different locations and devices, without installing additional client software. This mode simplifies access management and enhances user convenience while maintaining security standards for accessing sensitive resources.
Configure SDP zero trust settings
Click the
Policies tab.In the navigation pane, select
Zero Trust >SDP Zero Trust . Configure SDP zero trust settings as required.Figure-14 SDP zero trust page
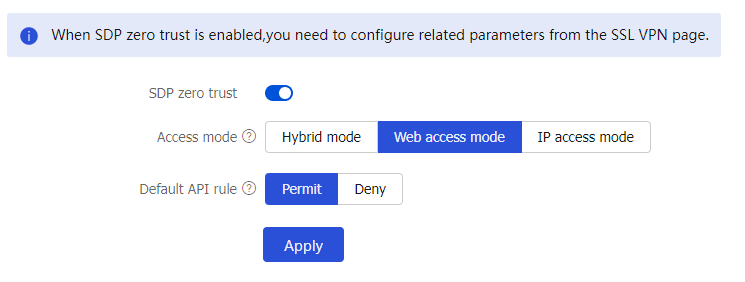
Table-6 Configuration items for SDP zero trust settings
Item
Description
SDP zero trust
Select this item to enable SDP zero trust, configure the parameters as needed, and then click Apply. Then, the device will act as an SDP gateway to interact with the SDP controller. The SDP controller deploys user access permissions to internal resources to the SDP gateway, and users then access internal resources through the SDP gateway.
Access mode
Select Web access mode.
Default API rule
Select the default API access action, including:
Permit Deny
Click
Apply .
Configure an SDP gateway
The procedure for configuring an SDP gateway in Web access mode is the same as that in IP access mode. For more information, see "
Configure basic context settings
The procedure for configuring basic context settings in Web access mode is the same as that in IP access mode. For more information, see "
Configure access services for a context
To configure access services in Web access mode:
On the
Access services page, click the toggle button to theWeb p roxy field.Figure-15 Configuring Web proxy settings
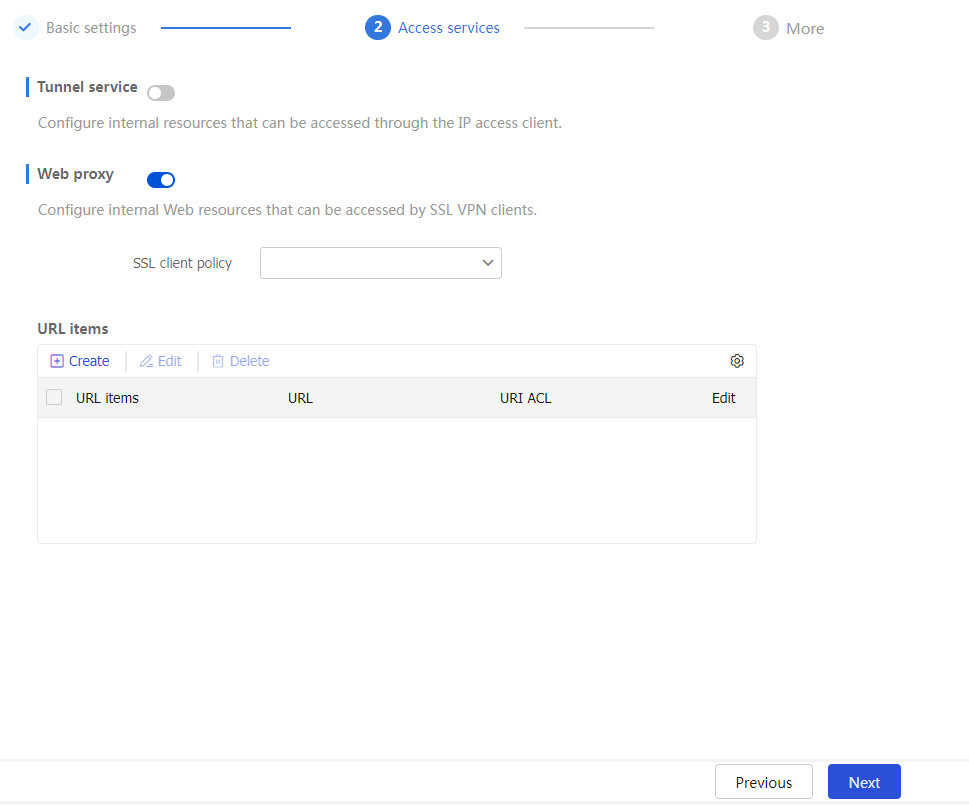
In the SSL client policy field, select an SSL client policy from the drop-down list for the SDP gateway to establish connections with the HTTPS server. If you do not select any SSL client policy the SDP gateway uses the default SSL client policy that uses cipher suite
rsa_rc4_128_md5 .In the
URL items section, clickCreate , and then configure a URL item.Figure-16 Creating a URL item
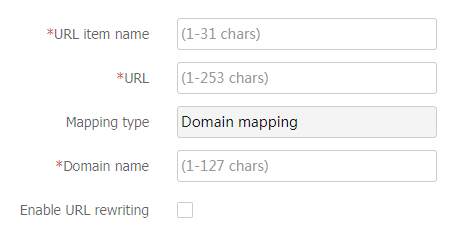
Table-7 Configuration items for a URL item
Item
Description
URL item name
Enter a URL item name, which is also the link name for a URL. Each URL item corresponds to an internal Web resource.
URL
Enter a URL for the resource in the URL item.
Mapping type
The SSL VPN gateway rewrites the resource URL returned from the internal server before sending the URL to the request user. The URL mapping type determines how the gateway rewrites the URL. Only domain mapping is supported in the current software version.
Take an internal server with URL
https://www.server.example.com:4430 as an example. When this URL is mapped to domain namewww.domain.example.com , there is a one-to-one mapping relationship betweenwww.domain.example.com and internal resourcehttps://www.server.example.com:4430 . The resource URL returned from the internal server to the request user is displayed ashttps://www.domain.example.com:4430 .Domain
Mapped domain name.
Enable URL rewriting
After you select this item, users will not obtain the real address of the internal server to be accessed.
Click
OK .Click
Next to access theMore page. On this page, configure extended features as needed, and then clickFinish .
View SDP zero trust statistics
To view SDP zero trust statistics, including online user statistics and online user information, navigate to the
Configure more settings in a context
The procedure for configuring more settings in Web access mode is the same as that in IP access mode. For more information, see "
Access internal resources in hybrid access mode
The hybrid access mode is suitable for complex enterprise environments that require support for both fixed and mobile device access. It allows flexible access to various types of resources, such as Web applications, internal enterprise applications, cloud services, and data center resources.
In hybrid access mode, to configure SDP zero trust, you must select Hybrid mode. The procedure for configuring other settings in hybrid access mode is the same as that in Web or IP access mode.
Figure-17 Configuring SDP zero trust settings in hybrid access mode