Overview
|
|

Log in to the Web interface
Web browser requirements
As a best practice, use the following Web browsers:
Google Chrome 40 or higher.
Mozilla Firefox 19 or higher.
Internet Explorer 10 or higher.
To access the Web interface, you must use the following browser settings:
Accept the first-party cookies (cookies from the site you are accessing).
To ensure correct display of webpage contents after software upgrade or downgrade, clear data cached by the browser before you log in.
Enable active scripting or JavaScript, depending on the Web browser.
If you are using a Microsoft Internet Explorer browser, you must enable the following security settings:
Run ActiveX controls and plug-ins.
Script ActiveX controls marked safe for scripting.
By default, the device uses GB18030 encoding. To ensure that Chinese characters configured via the CLI can be displayed correctly on the webpage, the administrator must use GB18030 encoding when entering Chinese from the CLI.
Log in to the Web interface for the first time
The device supports user login through HTTP and HTTPS. By default, HTTPS is enabled.
The following default settings for the first login are an example only. To obtain the default login information of the device, see the device nameplate.
Item | Setting |
IP address of the device management interface | 192.168.0.1/24 |
Username | admin |
Password | admin |
User role | network-admin |
To log in to the Web interface:
Use an Ethernet cable to connect the configuration terminal to an Ethernet port on the device.
Assign the login host an IP address in the same subnet as the device.
Open the browser, and then enter login information:
In the address bar, enter the IP address of the management interface on the device
, .https://192.168.0.1 On the login page, enter the default username and password.
Click
Login .
Edit the login information:
After you click
Login , a dialog box automatically opens to force you to change the default password. To ensure system security, configure a new password that is complex enough. Then, clickOK in the dialog box to log in to the Web interface.To change the device IP address, go to the
Network >I nterface Configuration I nterfaces page.To add new user accounts and assign access permissions to different users, go to the
System >Administrators >Administrators page.
Log out of the Web interface
|
|

Use one of the following methods to save the current configuration.
Click the
Save icon in the upper-right corner of the Web interface.
Go to the
System >M aintenance >Configuration Management page to save the configuration.
Click
Logout icon in the upper-right corner of the Web interface, and then click
 Log o ut .
Use the Web interface
Web interface layout
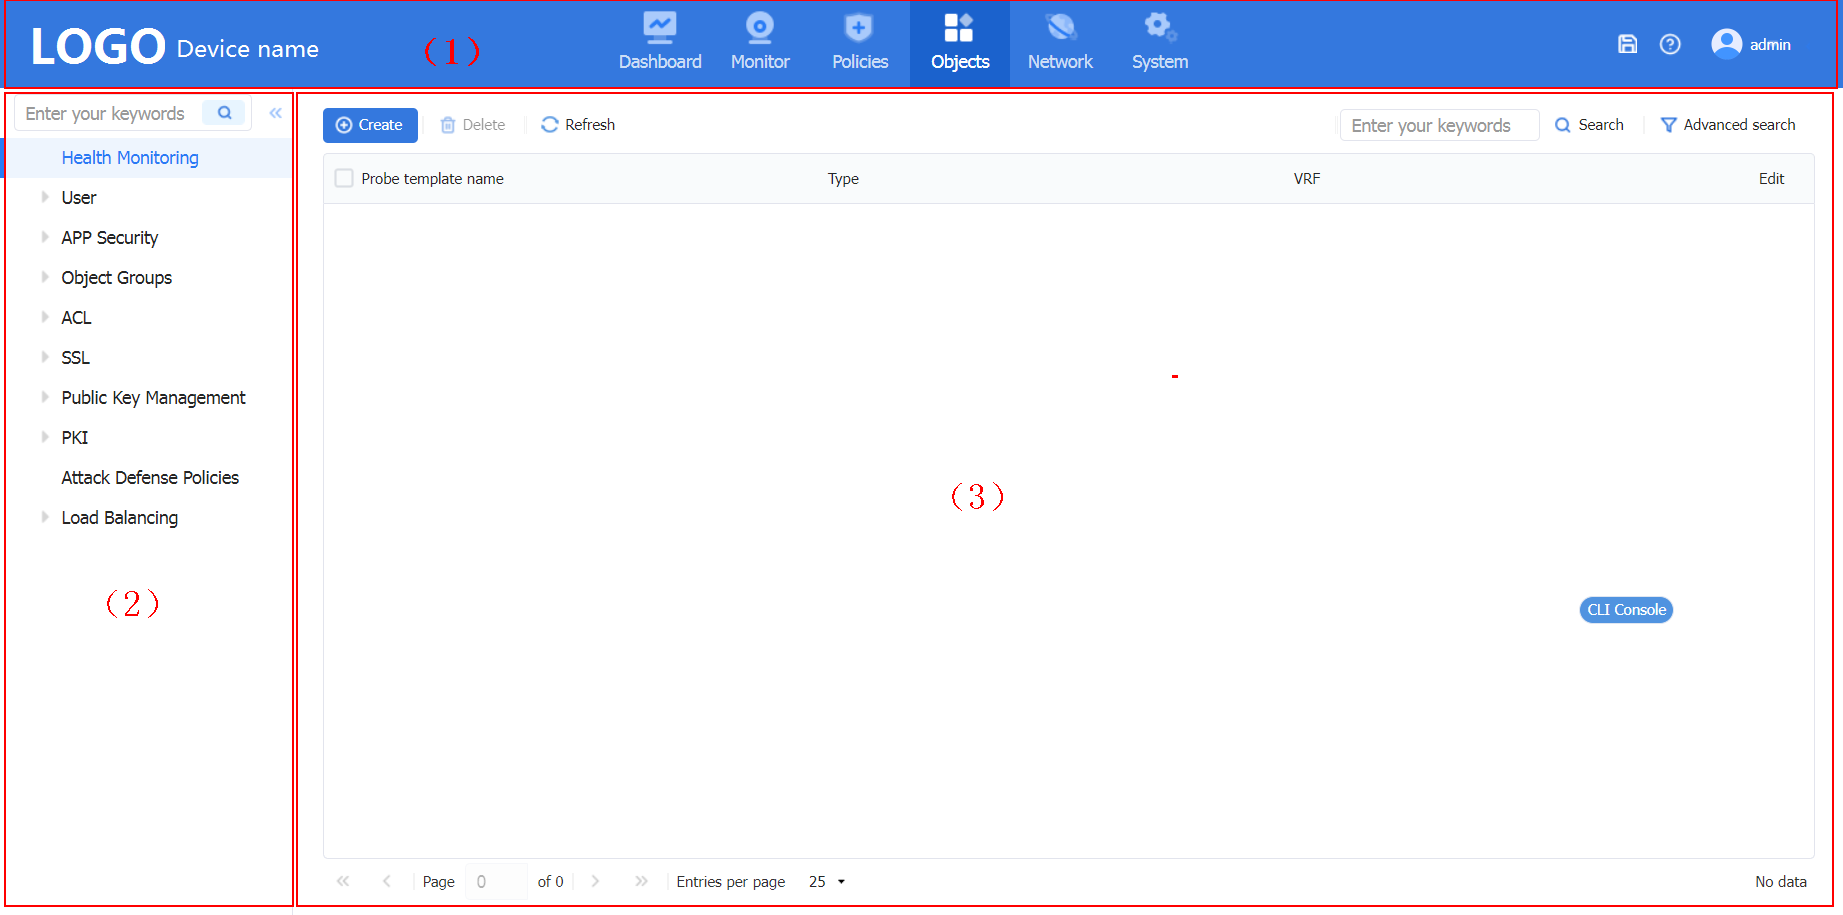
(1) Banner and admin section | (2) Navigation pane | (3) Work pane | (4) CLI console |
As shown in Figure-1, the Web interface contains the following areas:
Area | Description |
(1) Banner and admin section | Contains the following items:
|
(2) Navigation pane | Contains menus of all features and functionalities. To search for a menu, specify keywords in the search box, and then click the search icon |
(3) Wok pane | Displays information and provides an area for you to configure features. Depending on the content in this pane, the webpages include the following types:
|
(4) CLI console | Click |
 — Click this icon to log out of the Web interface, change the login password, or switch to a virtual system from the drop-down list.
 —Click this icon to save the configuration.
 —Click this icon to access the online help.
  or click
  to jump to the CLI console from the Web interface for device management through CLI commands.
Types of webpages
Webpages include table and configuration pages. This section provides basic information about these pages.
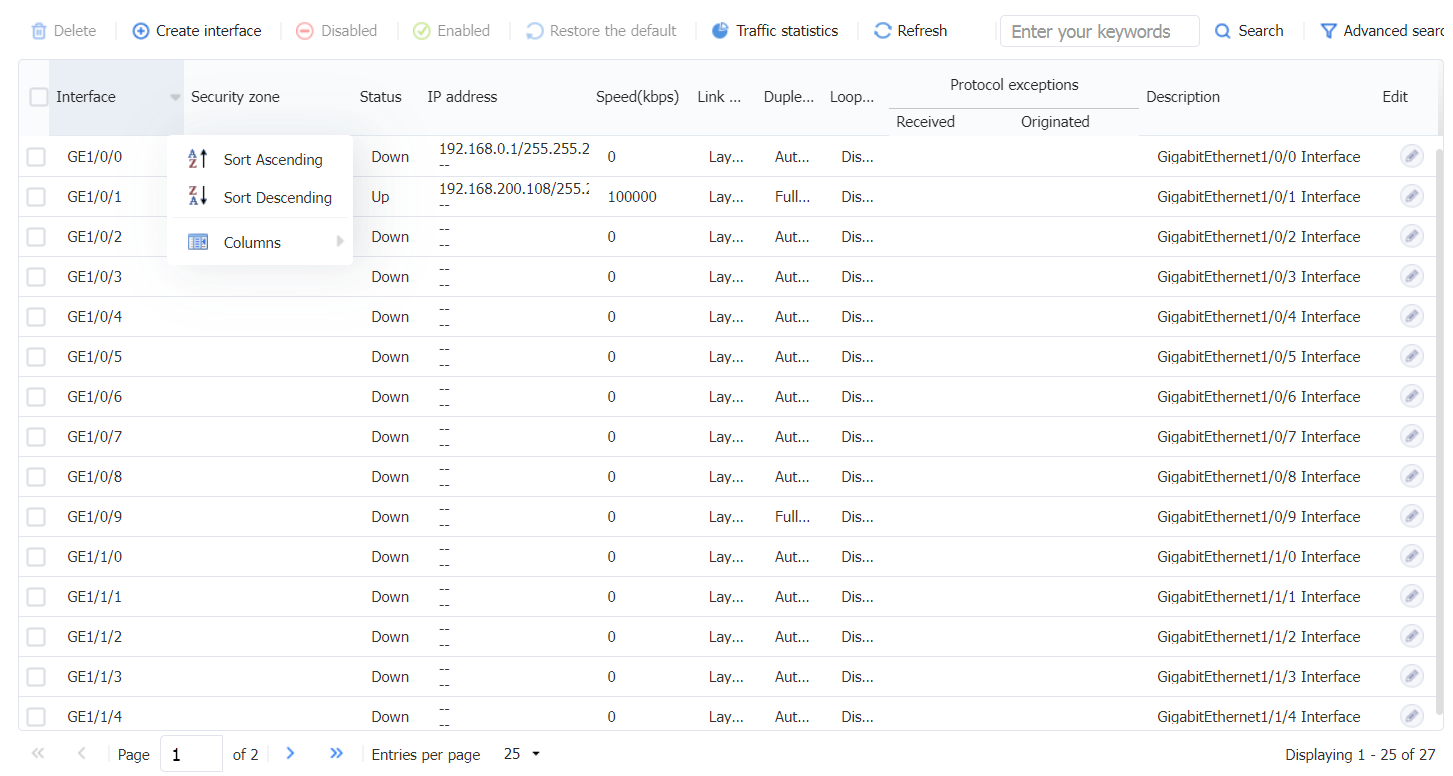
Use a table page
As shown in Figure-2, a table page displays entries in a table. To sort entries by a field in ascending or descending order, click  to the right of the field. You can also customize columns to be displayed on the page.
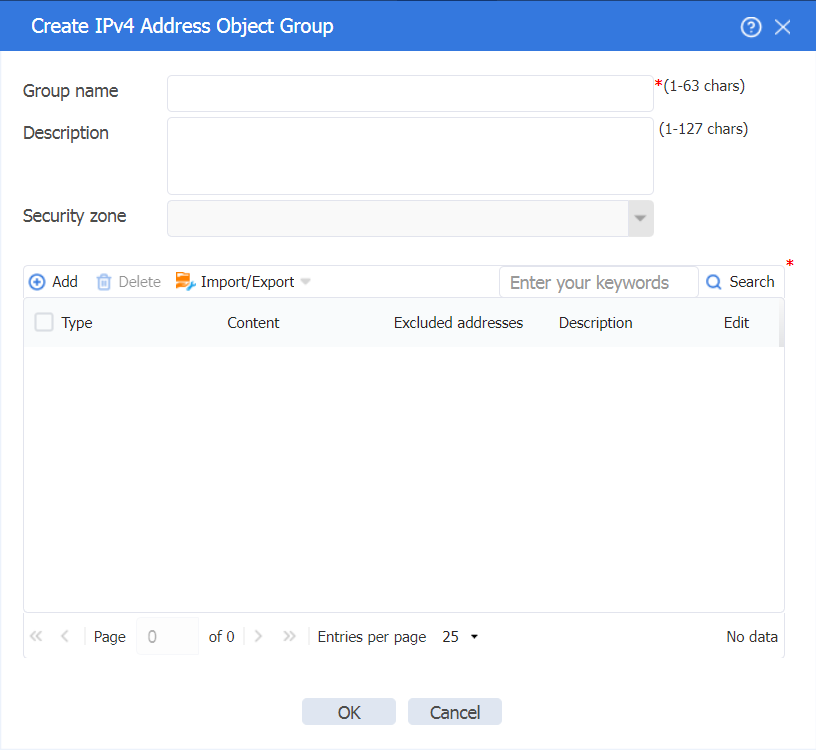
Use a configuration page
As shown in
Figure-3 Sample configuration page
Perform basic tasks
This section describes the basic tasks that must be frequently performed when you configure or manage the device.
Use shortcuts
Shortcuts allow you to reach frequently used menus and functions faster and more efficiently, saving time spent searching across multiple pages.
To use shortcuts:
Click
 to access the
 Shortcuts page.Edit shortcuts. You can search for and add the target menus to the
Shortcuts page, or remove menus from the as needed theShortcuts page.Access menus quickly by clicking the corresponding shortcuts. The
Shortcuts page displays the menus that are added, so you can click a menu directly from theShortcuts page without further navigation.
Save the configuration
Typically, settings take effect immediately after you create them. However, the system does not automatically save the settings to the configuration file. They are lost when the device reboots.
To prevent settings from being lost, use one of the following methods to save the configuration:
Click the
Save icon in the upper-right corner of the Web interface.
Go to the
System >M aintenance >Configuration Management page, and then clickSave running configuration .
Reboot the device
Reboot is required for some settings (for example, IRF) to take effect.
To reboot the device:
Save the configuration.
Click the
System tab.In the navigation pane, select
Maintenance >Reboot .The
Reboot page opens, clickReboot the device .
Search box on the webpage
The search box on the webpage helps you quickly locate target pages, enhancing search efficiency. After you enter keywords in the search box, the system will display all matching page paths. To access a matching page, click it in the search results.
Access the CLI console
To manage the device from the CLI, enter a page and click  to quickly access the CLI console.
| The following might cause a CLI console access failure:
|

Feature navigator
Menu items and icons available to you depend on the user roles you have. By default, you can use any user roles to display information. To configure features, you must have the
After you log in with the
For example:
To change the default device name, go to the
System >Maintenance >Settings >Device Info page.To delete an IPv4 ACL, go to the
Objects >ACL s >IPv4 ACLs page.