Web example: Configuring domain name-based security policies
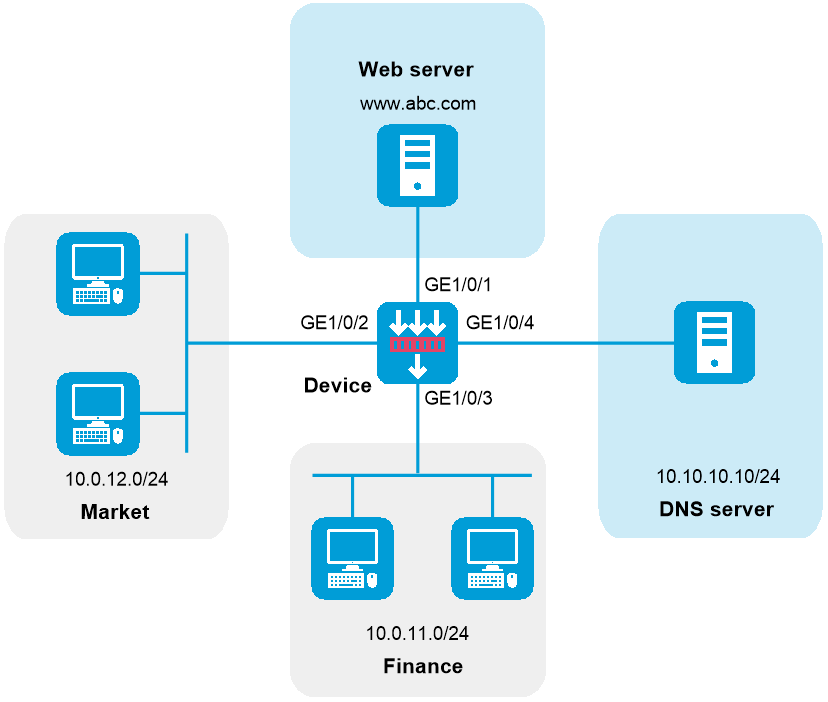
Network configuration
As shown in
Software versions used
This configuration example was created and verified on R9900P2705 of the F5000-AI-55-G device.
Procedure
Create a security zone.
# On the top navigation bar, click
Network .# From the navigation pane, select
Security Zones .# Perform the following tasks:
Create a security zone named
web , and add GigabitEthernet 1/0/1 to the zone.Create a security zone named
market , and add GigabitEthernet 1/0/2 to the zone.Create a security zone named
finance , and add GigabitEthernet 1/0/3 to the zone.Create a security zone named
dns , and add GigabitEthernet 1/0/4 to the zone.
Assign IP addresses to interfaces.
# On the top navigation bar, click
Network .# From the navigation pane, select
Interface Configuration >Interfaces .# Click the
Edit icon for GE 1/0/1.# In the dialog box that opens, configure the interface:
On the
IPv4 Address tab, enter the IP address and mask of the interface. In this example, enter 10.0.0.1/24.Click OK.
# Set the IP addresses of GE 1/0/2, GE 1/0/3, and GE 1/0/4 to 10.0.12.1/24, 10.0.11.1/24, and 10.0.10.1/24, respectively, in the same way you configure GE 1/0/1.
Create an IPv4 address object.
# On the top navigation bar, click
Objects .# From the navigation pane, select
Object Groups >IPv4 Address Object Groups .# Create an IPv4 address object group named
web and specify the host name aswww.abc.com .Configure DNS settings.
# On the top navigation bar, click
Network .# From the navigation pane, select
DNS >DNS Client .# On the page that opens, enter domain server address
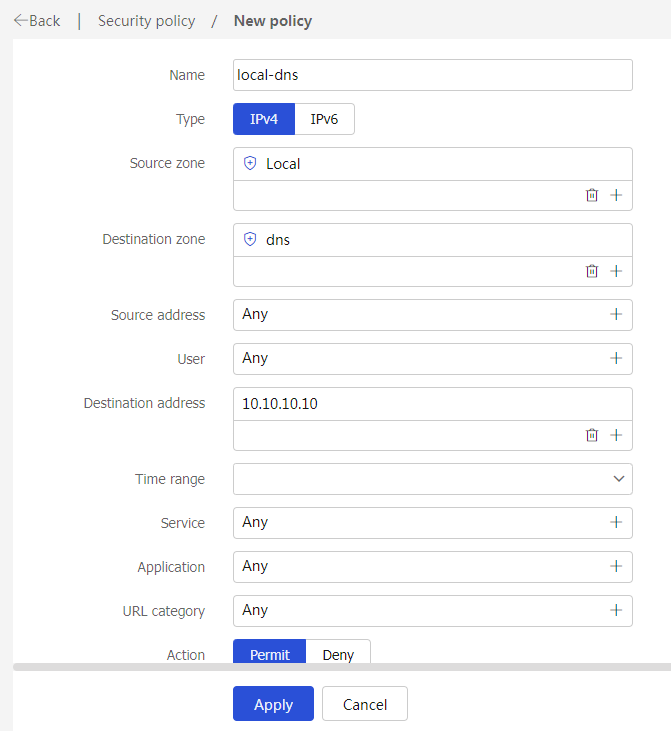
10.10.10.10 , and then click the plus icon to add a DNS server.Create a security policy from security zone
local to security zonedns to allow the device to access the DNS server for host name translation.# On the top navigation bar, click
Policies .# From the navigation pane, select
Security Policies >Security Policies .# Click
Create .# In the dialog box that opens, create a security policy as shown in Figure-2:
Figure-2 Create a security policy for the device to access the DNS server
# Click
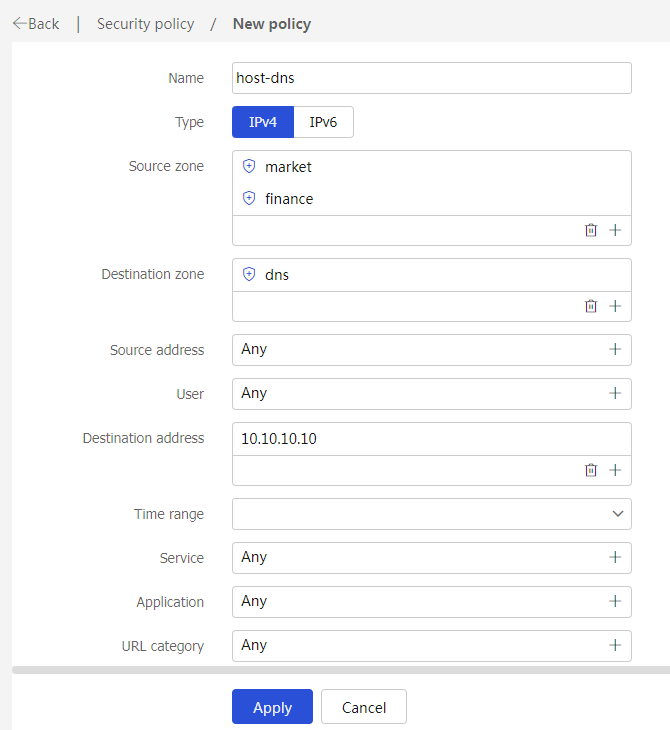
OK .Create a security policy from security zones
market andfinance to security zonedns to allow hosts in the internal network to access the DNS server for host name translation.# On the top navigation bar, click
Policies .# From the navigation pane, select
Security Policies >Security Policies .# Click
Create .# In the dialog box that opens, create a security policy as shown in
Figure-3 Create a security policy for the internal network
# Click
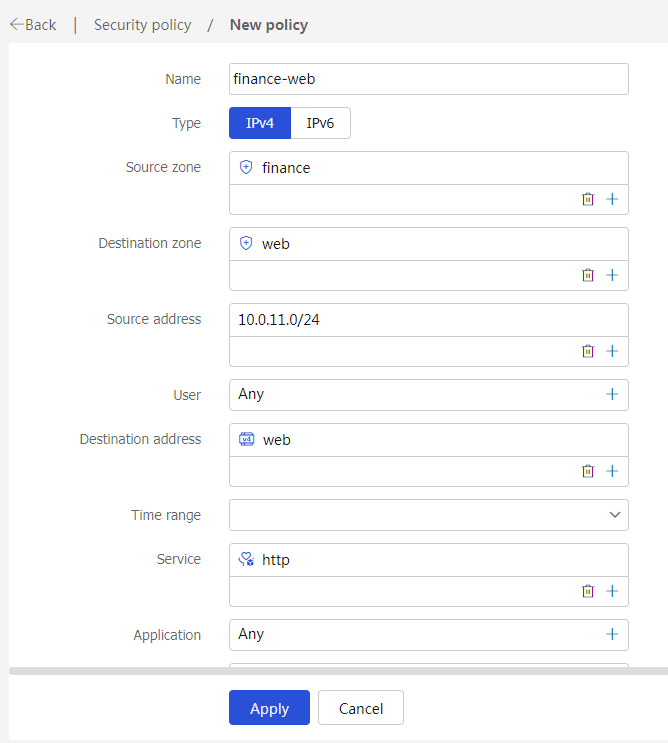
OK .Create a security policy from security zone
finance to security zoneweb for the financial office to access the financial Web server through HTTP.# On the top navigation bar, click
Policies .# From the navigation pane, select
Security Policies >Security Policies .# Click
Create .# In the dialog box that opens, create a security policy as shown in Figure-4:
Figure-4 Create a security policy for the financial office
# Click
OK .Create a security policy from security zone
market to security zoneweb to forbid the marketing office from accessing the financial Web server through HTTP at any time.# On the top navigation bar, click
Policies .# From the navigation pane, select
Security Policies >Security Policies .# Click
Create .# In the dialog box that opens, create a security policy as shown in Figure-5:
Figure-5 Create a security policy for the marketing office

# Click
OK .
Verifying the configuration
# Use a PC in each office to access the Web service of the financial server through the browser.