CLI example: Configuring login to the device Web interface using USB key-based method
Network configuration
As shown in Figure-1, configure the host to log in to the firewall using the USB key-based method, and to access the Web interface of the firewall through HTTPS. This provides higher security for authentication, effectively preventing data leakage and unauthorized access.

Software versions used
This configuration example was created and verified on R9900P2705 of the F5000-AI-55-G device.
Restrictions and guidelines
Make sure the system clock of the device is synchronized with that of the CA certificate server, allowing the device to request certificates properly.
Procedures
Obtaining the certificates
| Before requesting the certificates, first install a CA certificate server (this example uses a Windows 2012 server). During the installation of the CA certificate server, set the server's name to |

Requesting a root certificate
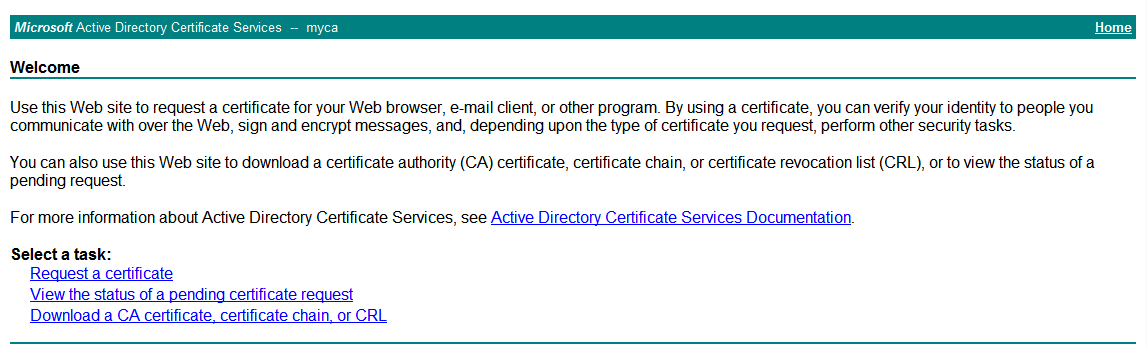
Open an IE browser, and type
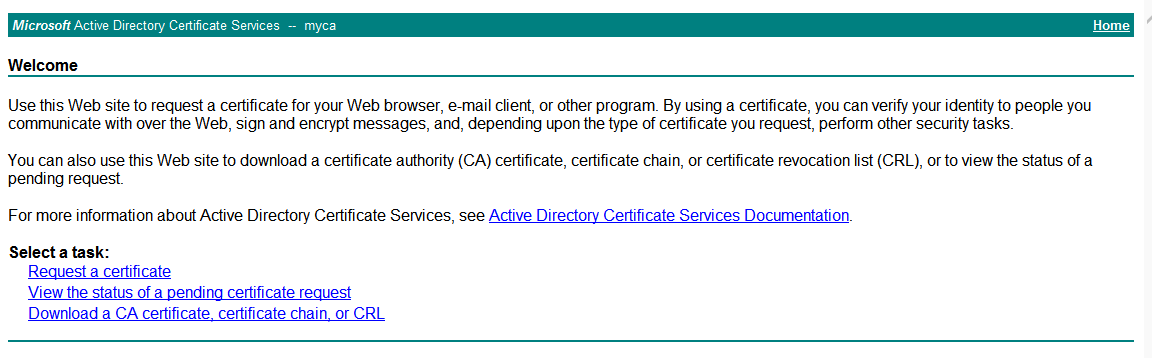
http://192.168.200.201/certsrv in the address bar. On the login page, enter the account and password for logging in to the CA certificate server.Figure-2 Certificate homepage

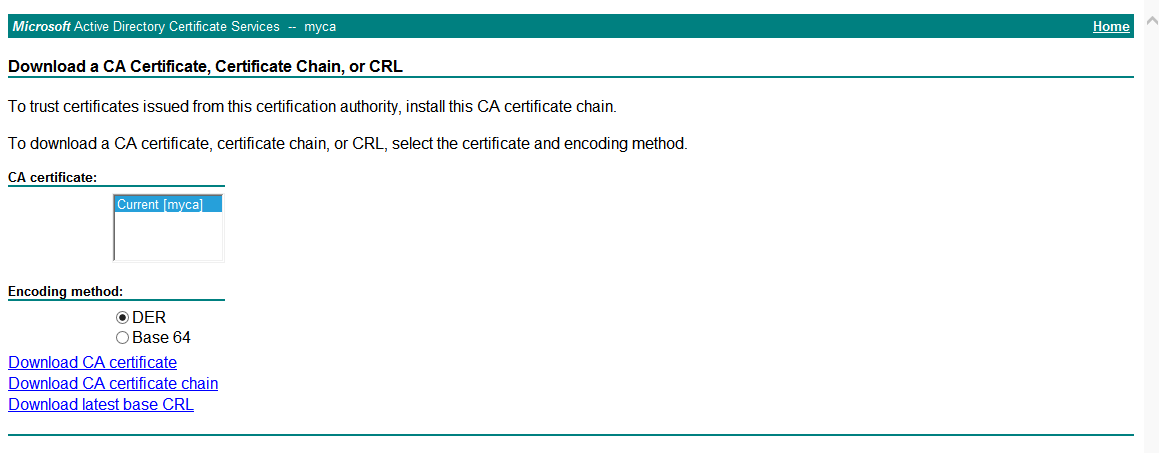
Click
Download a CA certificate, certificate chain, or CRL .Figure-3 CA certificate download
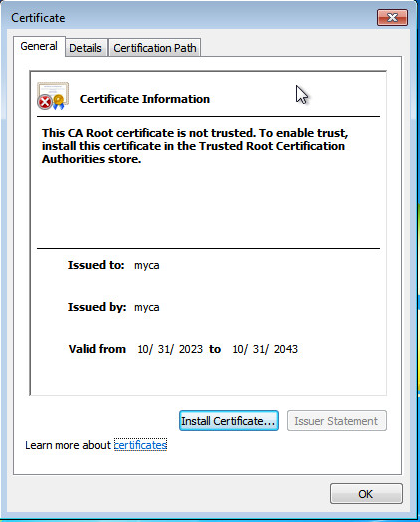
Click
Download CA certificate . Select the downloadedcertnew.cer file, and double-click to view it.Figure-4 Root certificate

Requesting server certificates
Type
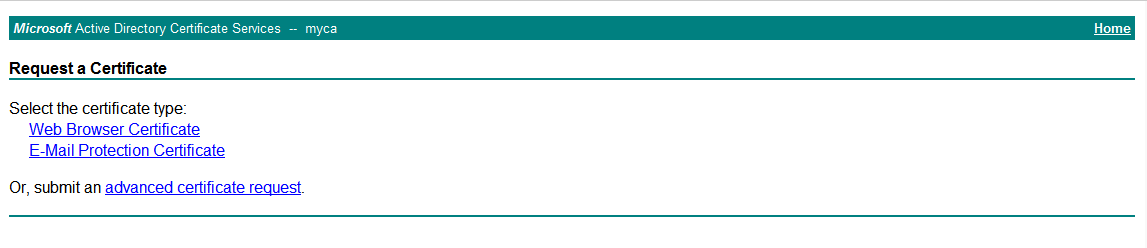
http://192.168.200.201/certsrv in the address bar of the browser. On the homepage, clickRequest a certificate .Figure-5 Requesting a certificate
On the page that opens, click
advanced certificate request .Figure-6 Requesting an advanced certificate
Click
Create and submit a request to this CA .Figure-7 Creating a request

Configure the server authentication certificate parameters. Select
Mark keys as exportable .Figure-8 Requesting a server certificate

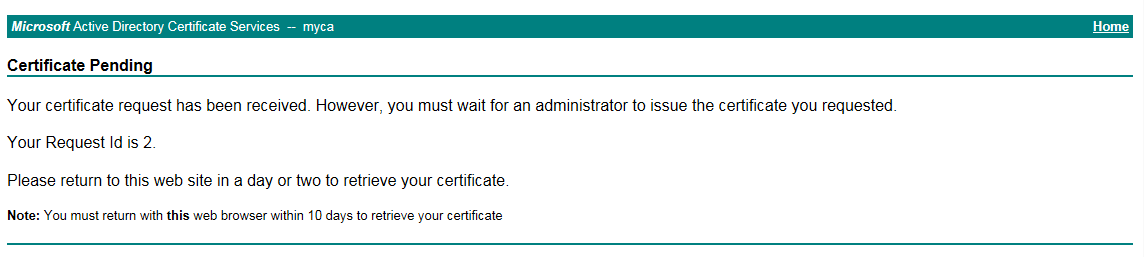
Click
Submit . The status of the certificate is pending.Figure-9 Certificate pending
Issuing certificates
Log in to the CA certificate server. Open the
Server Manager , clickTools , and then selectCertification Authority . You can view the pending requests.Figure-10 Pending requests

Right click the target pending request, and then select
All Tasks >Issue to issue the certificate.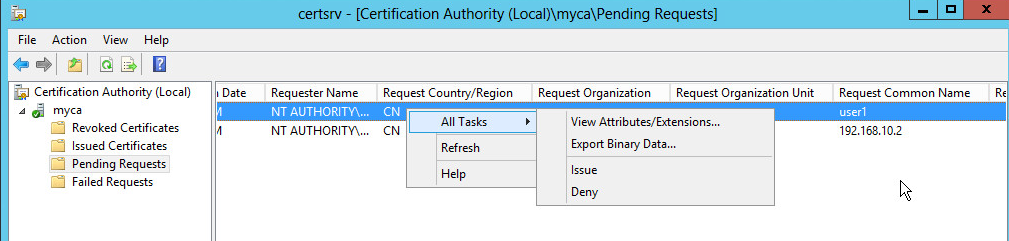
Exporting the server certificate
On the certificate request homepage, click
View the status of a pending certificate request .Figure-11 Viewing certificates

Select the server certificate for installation. The status of the certificate becomes issued.
Figure-12 Certificate status
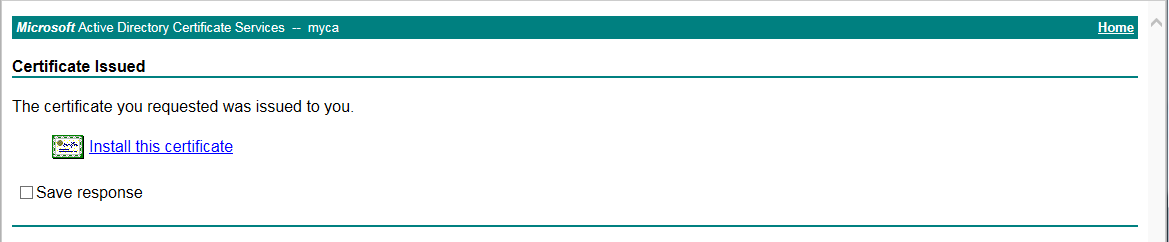
Click
Install this certificate to complete the certificate installation.Figure-13 Installation completed

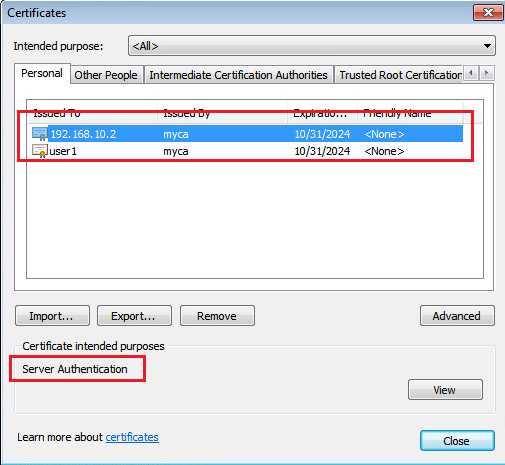
Open the Internet Explorer. Click
Tools , selectInternet Options , click theContent tab, and then clickCertificates .Figure-14 Installed certificates
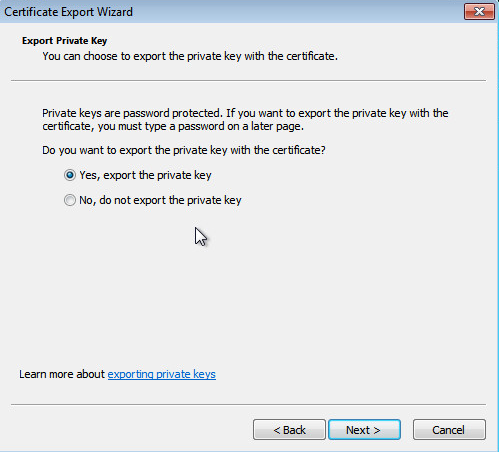
Select the server certificate, click
Export… , and then selectYes, export the private key .Figure-15 Private key export setting
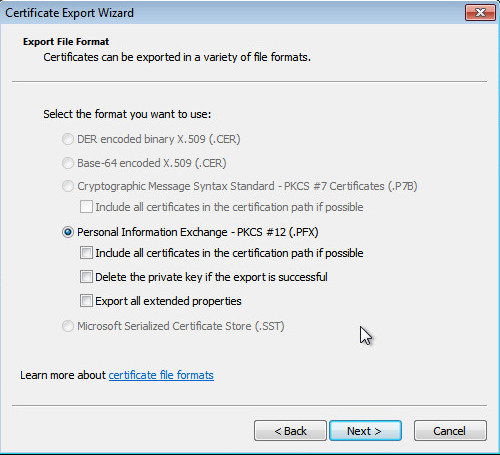
Click
Next .Figure-16 Export format settings
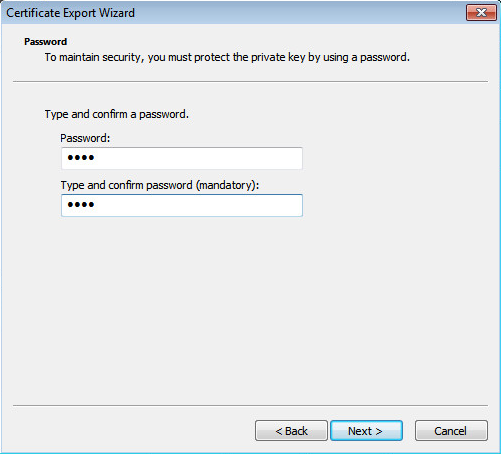
Set a password for the private key and a name for the export file.
Figure-17 Setting a password
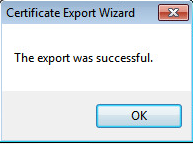
Export local certificate
server.pfx .Figure-18 Successful local certificate export
Configuring the device
Assigning IP addresses to interfaces
<Device> system-view
[Device] interface gigabitethernet 1/0/1
[Device-GigabitEthernet1/0/1] ip address 192.168.10.2 255.255.255.0
[Device-GigabitEthernet1/0/1] quit
[Device] interface gigabitethernet 1/0/2
[Device-GigabitEthernet1/0/2] ip address 192.168.20.2 255.255.255.0
[Device-GigabitEthernet1/0/2] quit
Adding interfaces to security zones
[Device] security-zone name trust
[Device-security-zone-Trust] import interface gigabitethernet 1/0/1
[Device-security-zone-Trust] quit
[Device] security-zone name untrust
[Device-security-zone-Untrust] import interface gigabitethernet 1/0/2
[Device-security-zone-Untrust] quit
Configuring a static route
This example takes static routing as an example. Select the routing configuration method as needed in the actual network.
# Configure a static route as needed. In this example, the next hop IP address of the route to the CA server is 192.168.20.5.
[Device] ip route-static 192.168.200.192 26 192.168.20.5
Configuring a security policy
# Configure a rule named
[Device] security-policy ip
[Device-security-policy-ip] rule 0 name trust-untrust
[Device-security-policy-ip-0-trust-untrust] source-zone trust
[Device-security-policy-ip-0-trust-untrust] destination-zone untrust
[Device-security-policy-ip-0-trust-untrust] action pass
[Device-security-policy-ip-0-trust-untrust] quit
# Configure a rule named
[Device] security-policy ip
[Device-security-policy-ip] rule 1 name untrust-trust
[Device-security-policy-ip-1-untrust-trust] source-zone untrust
[Device-security-policy-ip-1-untrust-trust] destination-zone trust
[Device-security-policy-ip-1-untrust-trust] action pass
[Device-security-policy-ip-1-untrust-trust] quit
[Device-security-policy-ip] quit
Configuring a PKI domain
# Create PKI domain
[Device] pki domain aaa
[Device-pki-domain-aaa] public-key rsa general name aaa
# Disable CRL checking.
[Device-pki-domain-aaa] undo crl check enable
[Device-pki-domain-aaa] quit
Uploading and importing the server certificate to the device
# Use FTP/TFTP to upload the server certificate obtained in "
[Device] pki import domain aaa der ca filename certnew.cer
The trusted CA's finger print is:
MD5 fingerprint:52F5 B43F 5D19 7752 EAC8 840D 0458 F66D
SHA1 fingerprint:208B 1668 DCE9 3AF6 D9B2 9A82 1825 D357 E0F8 DA05
Is the finger print correct?(Y/N):y
# Import the server certificate into the PKI domain. Enter the password as prompted.
[Device] pki import domain aaa p12 local filename server.pfx
Please input the password:
[Device]
Configuring an SSL server policy
# Create an SSL server policy named
[Device] ssl server-policy sss
[Device-ssl-server-policy-sss] pki-domain aaa
# Enable mandatory SSL client authentication.
[Device-ssl-server-policy-sss] client-verify enable
[Device-ssl-server-policy-sss] quit
Creating an administrator
# Create a device management user using the @ sign in the emailAddress field of the client certificate as the username.
[Device] local-user abc class manage
[Device-luser-manage-abc] service-type https
[Device-luser-manage-abc] password simple Admin@1234
[Device-luser-manage-abc] authorization-attribute user-role network-admin
[Device-luser-manage-abc] authorization-attribute user-role network-operator
[Device-luser-manage-abc] quit
Configuring the HTTP service and login authentication mode
# Disable the HTTP and HTTPS services.
[Device] undo ip http enable
[Device] undo ip https enable
# Specify the port number for the HTTPS service. Configure the HTTPS service to use SSL server policy
[Device] ip https port 4430
[Device] ip https ssl-server-policy sss
# Set the HTTPS login authentication and authorization mode to
[Device] web https-authorization mode certificate
# Use the string before the @ sign in the emailAddress field of the certificate as the username.
[Device] web https-authorization username email-prefix
# Enable the HTTP and HTTPS services.
[Device] ip http enable
[Device] ip https enable
Verifying the configuration
Viewing device certificate information
Viewing the root certificate
[Device] display pki certificate domain aaa ca
Certificate:
Data:
Version: 3 (0x2)
Serial Number:
7a:42:0d:16:02:e5:fb:a7:43:d4:82:f6:1e:ec:28:60
Signature Algorithm: sha1WithRSAEncryption
Issuer: CN=myca
Validity
Not Before: Sep 14 02:55:28 2023 GMT
Not After : Sep 14 03:05:28 2033 GMT
Subject: CN=myca
Subject Public Key Info:
Public Key Algorithm: rsaEncryption
Public-Key: (2048 bit)
Modulus:
00:be:df:6c:1f:b5:4b:c6:2f:03:ea:06:ea:1e:8d:
b6:b0:88:01:2b:f7:e6:5c:89:d0:9e:d7:57:94:9f:
36:78:e7:95:76:bf:24:bc:7c:9a:c6:15:eb:da:5d:
db:8e:45:40:7b:d2:cc:87:5c:3d:77:51:ae:69:3a:
21:3a:9e:be:6c:43:a0:52:03:ba:a6:6a:17:4e:a8:
4a:98:3b:a7:e0:cf:a2:1c:df:c0:6e:8f:cf:bf:90:
60:7c:f5:e6:30:3b:dc:68:5b:f4:02:6a:42:a7:e7:
a1:c1:56:54:de:03:1f:41:dd:8b:18:99:f2:b8:83:
7e:ef:a7:ae:a1:cc:94:e4:5f:c3:35:1d:18:2f:a0:
e7:d4:21:de:de:38:f3:90:31:e5:b5:f7:01:17:f4:
76:8b:4b:d4:95:a9:98:4f:6f:ca:b4:d9:c2:5b:c7:
f5:77:fb:0d:1e:b3:1c:6e:99:0d:24:9c:f7:c2:d1:
50:9b:a1:40:20:39:42:15:89:0a:82:d4:69:79:9e:
f9:5d:af:d6:f4:9d:37:ee:8a:cf:75:45:65:53:f6:
40:33:db:88:7e:66:72:f1:e5:c1:56:a8:9a:c9:67:
f2:bb:89:52:6f:bd:8e:ad:3f:12:ea:a0:41:f6:8e:
fb:14:f0:db:24:32:d1:85:86:30:84:9c:20:f4:91:
12:c3
Exponent: 65537 (0x10001)
X509v3 extensions:
X509v3 Key Usage:
Digital Signature, Certificate Sign, CRL Sign
X509v3 Basic Constraints: critical
CA:TRUE
X509v3 Subject Key Identifier:
D9:59:9F:66:D3:72:C1:07:44:18:F2:98:63:7D:DE:DF:41:D2:9D:4E
1.3.6.1.4.1.311.21.1:
Signature Algorithm: sha1WithRSAEncryption
3e:2b:fb:98:9b:b3:ac:26:01:2e:25:84:14:92:52:82:82:37:
c6:b2:a3:5b:d6:e0:41:1f:91:76:b5:a2:ba:86:26:f9:2d:28:
f5:e3:1a:2b:8c:4e:49:e6:50:12:64:44:d8:09:75:01:42:08:
b3:f2:a9:9d:ed:21:fc:cc:cb:b7:ec:62:14:45:51:74:ab:11:
04:78:02:16:f2:7c:84:cb:16:c4:e1:b7:69:95:80:c8:ca:5c:
b9:2e:96:9f:8e:1c:10:76:6c:fd:7a:96:b5:0b:2b:3e:e7:e0:
f7:50:d5:97:aa:8a:28:73:ce:c5:33:d8:3b:99:7c:6f:ca:dc:
4c:7a:bd:d9:2f:e4:d0:19:cd:b3:62:80:ec:8e:58:c8:72:b2:
2e:57:a7:fa:fb:e3:d4:54:44:12:92:d2:95:2a:81:72:c8:67:
09:10:6e:e5:32:40:06:5c:f0:66:33:84:54:ec:4c:28:1f:ea:
b7:e8:a4:6e:52:a2:98:a7:c8:74:21:ba:db:27:8d:71:3e:3b:
cd:bf:15:32:ad:cd:1e:7c:93:3e:4f:19:65:fc:6f:ac:ed:6c:
ca:c9:b5:be:83:bb:24:07:eb:c4:03:e5:0e:f8:a3:e8:51:7d:
46:6e:a5:3d:03:3e:c1:ab:12:d3:d1:67:db:5a:34:7e:1c:75:
e8:3a:58:12
Viewing the server certificate
[Device] display pki certificate domain aaa local
Certificate:
Data:
Version: 3 (0x2)
Serial Number:
17:00:00:00:17:da:42:78:2d:a5:18:1a:01:00:00:00:00:00:17
Signature Algorithm: sha1WithRSAEncryption
Issuer: CN=myca
Validity
Not Before: Sep 20 03:22:16 2023 GMT
Not After : Sep 20 03:32:16 2024 GMT
Subject: C=CN,CN=192.168.10.2,[email protected]
Subject Public Key Info:
Public Key Algorithm: rsaEncryption
Public-Key: (2048 bit)
Modulus:
00:c1:dc:d1:6a:28:ea:5f:b5:37:c5:b1:f3:b6:5d:
ae:11:79:95:2d:36:6c:2f:4f:4a:45:ab:d4:73:4e:
ac:7e:44:db:29:7a:c5:aa:78:96:79:dc:37:cd:db:
62:70:d3:d7:41:cb:35:89:88:65:1e:ca:3a:6b:4d:
f3:f2:a4:7f:9e:fe:a4:75:a7:35:2f:ad:d8:5b:46:
70:73:65:00:5e:9b:e7:c1:8b:b6:4d:a9:48:d4:e5:
7f:7c:f3:08:c5:ae:4e:db:05:25:f5:04:7d:c2:cc:
99:1b:7f:55:9e:c1:b9:16:81:2d:6a:44:bc:78:f6:
2f:a0:46:69:65:88:ac:8c:ee:92:20:80:16:9d:f5:
1c:dd:5c:c7:c3:58:4d:bf:23:8f:6e:b3:e6:35:1d:
93:26:51:64:e3:54:06:0d:4b:c5:06:4d:88:78:df:
c4:df:49:38:ae:7b:ed:37:5c:a1:7e:8a:ec:7b:c8:
a0:16:f3:0b:06:75:ef:20:f3:6b:e9:78:26:35:f3:
05:f6:3a:56:fa:49:d8:10:78:b6:75:de:66:9c:95:
7b:cd:51:12:ea:6d:6e:84:69:5d:df:9c:7d:c7:fc:
bb:8d:20:21:39:6c:cd:cf:32:4d:de:f5:4e:a1:e2:
0f:54:c1:d8:70:52:27:bd:1a:ce:34:1e:9d:fa:87:
0f:9f
Exponent: 65537 (0x10001)
X509v3 extensions:
X509v3 Key Usage: critical
Digital Signature, Non Repudiation, Key Encipherment, Data Encip
herment
X509v3 Extended Key Usage:
TLS Web Server Authentication
X509v3 Subject Key Identifier:
30:B4:FC:8B:BC:6C:8B:5B:33:4D:85:E0:0C:0F:58:3B:E9:AC:05:6C
X509v3 Authority Key Identifier:
keyid:D9:59:9F:66:D3:72:C1:07:44:18:F2:98:63:7D:DE:DF:41:D2:9D:4E
X509v3 CRL Distribution Points:
Full Name:
URI:file://12DC-CN-x64/CertEnroll/myca.crl
Authority Information Access:
CA Issuers - URI:file://12DC-CN-x64/CertEnroll/12DC-CN-x64_myca.
crt
X509v3 Basic Constraints: critical
CA:FALSE
Signature Algorithm: sha1WithRSAEncryption
11:90:80:b3:f1:da:7b:93:38:a4:04:5a:76:fb:74:08:76:cf:
9c:b8:4f:ae:b9:ec:e5:8f:1b:f6:22:06:24:b7:57:cf:1d:0e:
51:b2:02:8d:b3:e0:56:b3:7b:42:9b:66:34:36:2f:d0:19:d1:
75:c8:7a:74:45:89:42:22:87:f6:01:3a:2e:a5:3c:fe:f5:ac:
d2:8f:57:66:be:0a:1b:bb:df:0a:af:51:16:5e:87:3c:35:55:
c9:9e:d5:3c:4c:1d:0f:d6:8a:76:5a:fc:17:90:31:fe:19:63:
70:f7:64:d4:2c:92:35:b8:bd:d5:f6:27:e1:6e:db:a6:c6:2d:
45:1c:fd:24:e3:f5:11:9b:f3:ac:cb:dd:37:1d:2e:0f:c8:da:
13:b5:ac:70:6a:8a:f8:b2:d5:db:c5:91:cf:7f:c5:bc:73:b5:
90:22:b6:99:5d:cb:50:44:1b:25:db:25:a0:47:00:8f:b3:9d:
f7:ae:89:3e:47:c7:12:d0:33:8b:47:58:c5:e7:b6:fe:8e:c3:
64:fe:2c:62:e1:67:15:b8:5c:1c:70:53:d7:0a:50:03:2c:80:
0e:4c:2c:8b:34:56:5a:c1:04:2a:0e:fe:3f:57:9e:7f:20:ae:
9c:f7:0f:4a:52:a0:87:5a:bf:b1:c2:7f:48:7b:3d:63:a5:4b:
c7:0b:0e:22
Verifying login
Verify that you can log in to the device's Web interface:
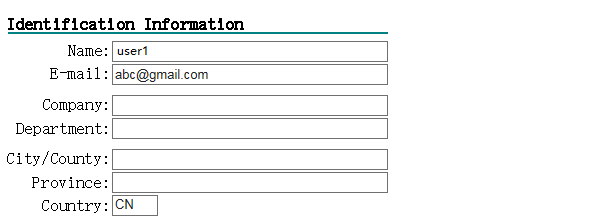
Obtain the USB key.
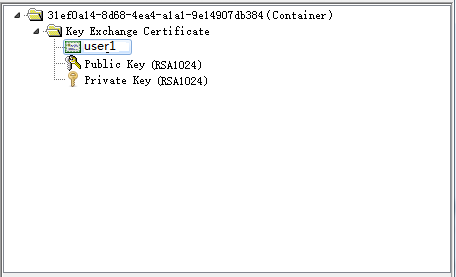
Install the USB key obtained from the administrator to the host or create your own USB Key. For information about creating a USB key, see "Appendix: Creating a USB key." When you create a USB Key, the device in this example uses the email-prefix field of the certificate for login verification. Therefore, the email prefix in the requested client certificate must match the username, which is
abc in this example, created on the device.Figure-19 Identification information in the client certificate
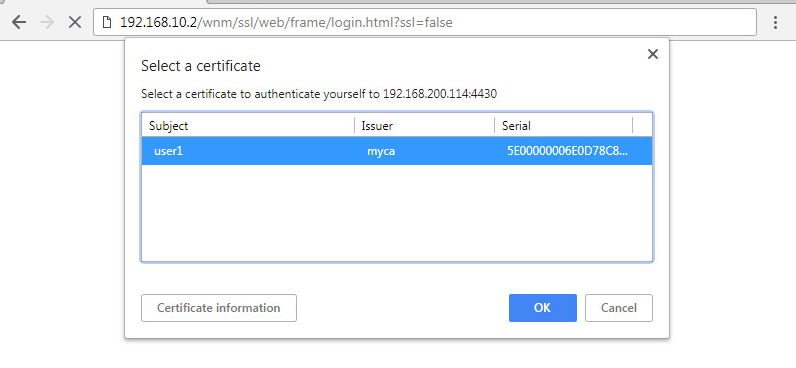
Open a browser, insert the USB with the client certificate, enter the IP address of the device in the address bar, and then select the client certificate for authentication.
Figure-20 Web login
On the device login page, click
Other login methods .Figure-21 Clicking Other login methods
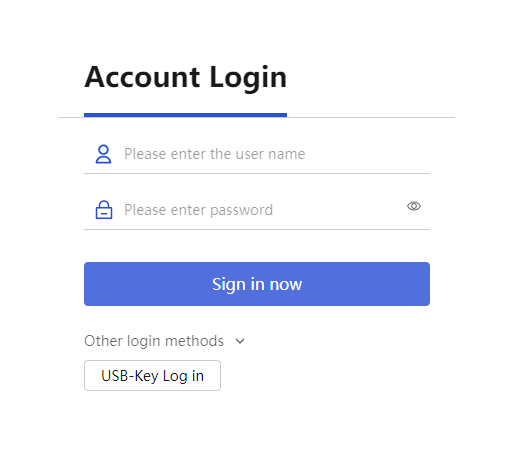
Click
USB -K ey Log in to log in to the device. Verify that you can log in as userabc .Figure-22 Successful login to the device
Configuration files
Device
#
interface GigabitEthernet1/0/1
ip address 192.168.10.2 255.255.255.0
#
interface GigabitEthernet1/0/2
ip address 192.168.20.2 255.255.255.0
#
security-zone name Trust
import interface GigabitEthernet1/0/1
#
security-zone name Untrust
import interface GigabitEthernet1/0/2
#
ip route-static 192.168.200.192 26 192.168.20.5
#
local-user abc class manage
password hash $h$6$kEnRxrjkMV2btaA+$Fp0Qq8IRg6uzj5ewCAJsgBeY36okplMU+jRz6zJOfhEcAm99sn+nKPOEizmk7P27qdVvwXaeFK40jueH/6lctQ==
service-type https
authorization-attribute user-role network-admin
authorization-attribute user-role network-operator
#
pki domain aaa
public-key rsa general name aaa length 2048
undo crl check enable
#
ip https port 4430
ip https ssl-server-policy sss
ip http enable
ip https enable
web https-authorization mode certificate
web https-authorization username email-prefix
#
ssl server-policy sss
pki-domain aaa
client-verify enable
version ssl3.0 disable
version tls1.0 disable
undo version tls1.1 disable
#
security-policy ip
rule 0 name trust-untrust
action pass
source-zone trust
destination-zone untrust
rule 1 name untrust-trust
action pass
source-zone untrust
destination-zone trust
#
Appendix: Creating a USB key
To create a USB key on the administrator's PC:
Configure the IP address and gateway on the PC to ensure that the PC can reach the CA server. This example uses Windows 2008 server as a CA server.
Figure-23 Creating a USB key

Request a USB key client certificate:
# Enter
http://192.168.100.247/certsrv in the address bar of the browser to access the certificate request page.Figure-24 Requesting a certificate
# Click
Request a certificate . The following page opens.Figure-25 Requesting a certificate

# Click
advanced certificate request , and then selectCreate and submit a request to this CA on the page that opens to request a client certificate. Configure the parameters as shown in Figure-26.Figure-26 Requesting a client certificate
# Keep the default settings for the other options, and click
Submit at the bottom of the page to submit the client certificate request.# After you submit the request successfully, a dialog box opens. In the dialog box, enter the user password of the USB key as prompted and then click
Login .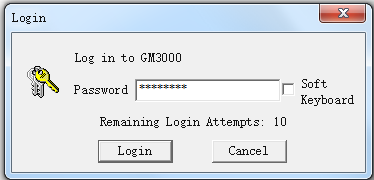
Figure-27 Installing the client certificate into the USB key

# Click
Install this certificate . ClickYes in the potential script conflict dialog box that opens. The client certificate will be directly installed into the USB key.Figure-28 USB key client certificate
At this point, the USB key creation is complete.