DLP
This help contains the following topics:
Introduction
Data Loss Prevention (DLP) monitors and analyzes the traffic passing through network devices to identify and classify the data transmission and take the configured preventive actions against illegal data transmission.
DLP policies
A DLP policy defines one or more signatures to identify illegal data transmission and defines defensive actions, for example, output alarm logs, and send alarm emails.
A DLP policy contains the following rules:
Detection rules —Used to match keywords, file names, and other contents in the transmitted data.Identity rules —Used to match the IP addresses, email addresses, and other identity attributes of the senders.R esponse rules —Used to take preventive measures for data that matches detection rules and identity rules.
vSystem support information
Support of non-default vSystems for this feature depends on the device model. This feature is available on the Web interface only if it is supported.
Restrictions and guidelines
Support of non-default contexts for this feature depends on the device model. This feature is available on the Web interface only if it is supported.
Deleting a resource in the resource management page might cause the cascade deletion as follows:
Deleting a regular expression will also delete all match conditions of detection rules that use the selected regular expression and might delete a DLP policy if no match conditions of detection rules exist in the DLP policy.
Deleting an email server will also delete all actions that apply to the selected email server and might delete a response rule if no actions exist in the response rule.
Deleting a file server simultaneously deletes all actions that apply to the selected file server and might delete a response rule if no actions exist in the response rule.
Configure DLP
Analysis
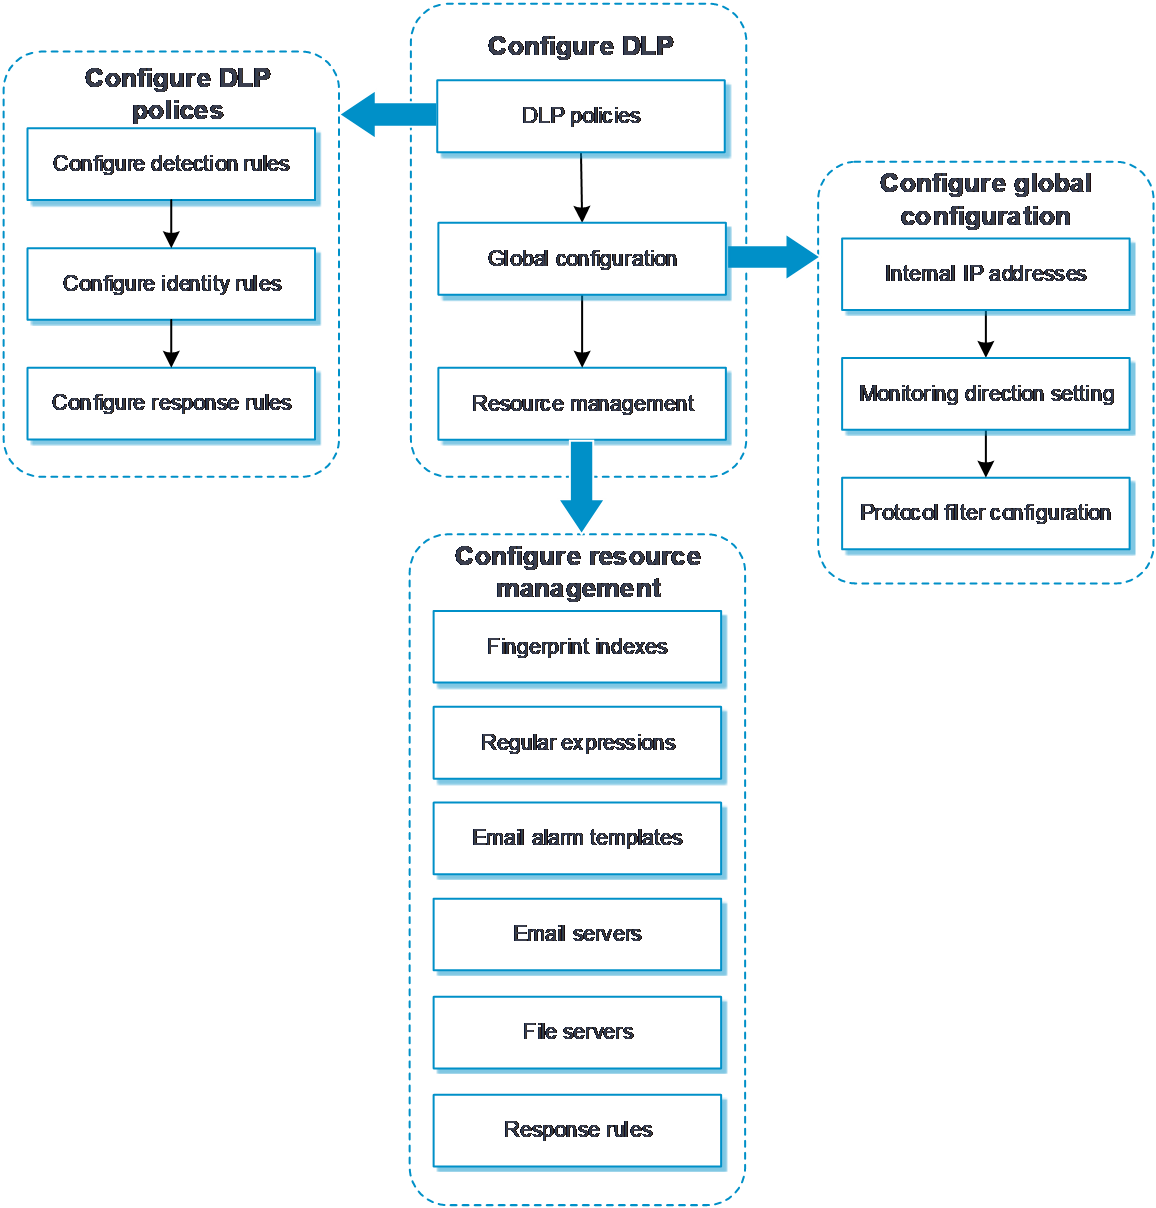
Configure DLP as shown in Figure-1.
Figure-1 DLP configuration procedure
Prerequisites
Complete the following tasks before you configure this feature:
Assign IP addresses to interfaces on the
Network >Interface Configuration >Interfaces page.Configure routes on the
Network >Routing page. Make sure the routes are available.Create security zones on the
Network >Security Zones page.Add interfaces to security zones. You can add interfaces to a security zone on the
Security Zones page or select a security zone for an interface on theInterfaces page.Configure security policies to permit the target traffic on the
Policies >Security Policies page.
Configure a DLP policy
Configure a DLP policy, and then configure detection rules, identity rules, and response rules in the policy according to actual network security requirements.
Procedure
Click the
Policies tab.In the navigation pane, select
DLP >DLP policies .Click
Create .Figure-2 Clicking Create

Figure-3 Creating a DLP policy
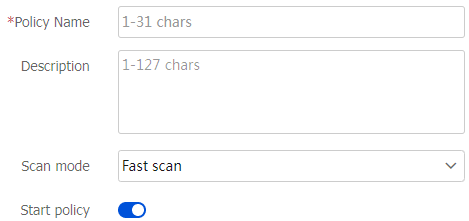
Configure parameters for the DLP policy.
Table-1 DLP policy configuration items
Item
Description
Policy name
Enter the name of the DLP policy. The name is case sensitive and valid characters include Chinese characters, letters, digits, underscores (_), and hyphens (-).
Description
Enter a description for the DLP policy.
Scan mode
Select a scan mode:
Fast scan.
Complete scan.
Start policy
Select whether to start the DLP policy.
Click the
Detection rules tab.Click
Create in theAdd rule area to create a detection rule.Click
Create in theExceptional rules area to create an exceptional rule.
If the data matches an exceptional rule, the data does not match any detection rule. You can configure multiple detection rules and exceptional rules in a DLP policy.
Figure-4 Clicking Create

Figure-5 Creating a rule

Table-2 Detection rule configuration items
Item
Description
Name
Enter the name of a detection rule. The name is case sensitive and valid characters include Chinese characters, letters, digits, underscores (_), and hyphens (-).
Severity level
Select the severity level of an event matching the detection rule:
High.
Medium.
Low.
Informational.
Click
Create in theMatch condition area.Configure the match condition parameters.
Figure-6 Clicking Create

Figure-7 Creating a match condition
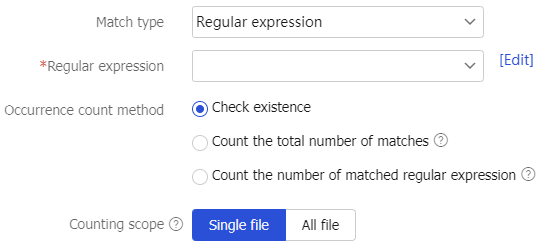
Table-3 Match condition configuration items
Item
Description
Match type
Select a match type for the detection rule:
Regular expression.
Keyword.
Fingerprint file.
File name.
File size.
File type.
Protocol.
Occurrence count method
Select an occurrence count method:
Count the number of matched regular expression —Select this method when the match type is set toRegular expression .Check existence —Select this method when the match type is set tokeyword .Count the total number of matches —Select this method when the match type is set tofingerprint file .
This field is available only when the match type is set to
Regular expression ,keyword , orfingerprint file .Counting scope
Select a counting scope:
Single file.
All file.
This field is available only when the match type is set to
Regular expression orkeyword .Regular expression
Enter a regular expression.
This field is available only when the match type is set to
Regular expression .Case sensitive
Select whether the keyword for matching is case sensitive.
This field is available only when the match type is set to
keyword .Keyword
Select a criterion for keyword matching:
Match keywords —A true keyword match.Match neighbor keywords —A fuzzy keyword match. You can configure left neighbor keyword, right neighbor keyword, and maximum distance.
This field is available only when the match type is set to
keyword .Match whole word only
Select whether to match whole word only.
This field is available only when the match type is set to
keyword . This field takes effect only for English keywords.Fingerprint file
Select a fingerprint file for matching.
This field is available only when the match type is set to
Fingerprint file .Threshold
Enter a matching threshold with the sample file contents.
This field is available only when the match type is set to
Fingerprint file .File type
Select a file type for matching.
This field is available only when the match type is set to
File type .File name
Enter a file name.
This field is available only when the match type is set to
File name .Maximum
Enter the maximum file size.
This field is available only when the match type is set to
File size .If both the maximum file size and the minimum file size are set to 0, the file size is not limited.
Minimum
Enter the minimum file size.
This field is available only when the match type is set to
File size .If both the maximum file size and the minimum file size are set to 0, the file size is not limited.
Protocol
Select a protocol for matching.
This field is available only when the match type is set to
Protocol .Click
OK .Click the
I d entity Rules tab.Click
Create in theAdd rule area to create an identity rule.Click
Create in theExceptional rules area to create an exceptional rule.
If the data matches an exceptional rule, the data does not match any identity rule. You can configure multiple identity rules and exceptional rules in a DLP policy.
Figure-8 Clicking Create

Figure-9 Creating an identity rule

Table-4 Identity rule configuration items
Item
Description
Name
Enter the name of an identity rule. The name is case sensitive and valid characters include Chinese characters, letters, digits, underscores (_), and hyphens (-).
Severity level
Select the severity level of an event matching the identity rule:
High.
Medium.
Low.
Informational.
Click
Create in theMatch condition area.Configure the match condition parameters.
Figure-10 Clicking Create

Figure-11 Creating a match condition
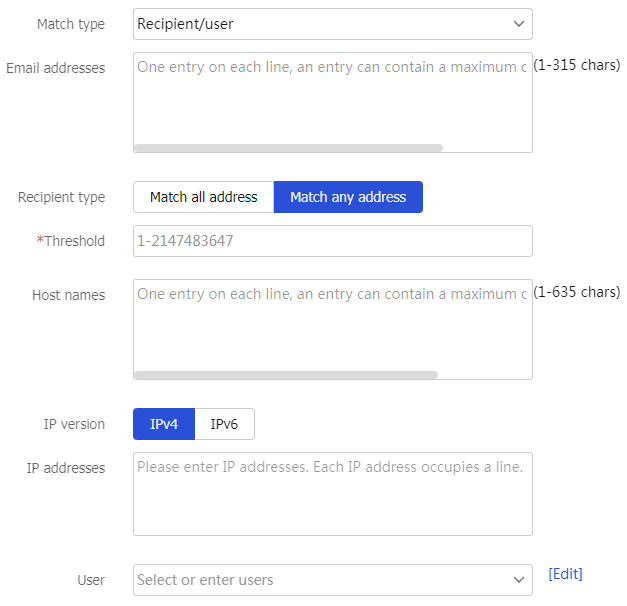
Table-5 Match condition configuration items
Item
Description
Match type
Select a match type for the identity rule:
Sender/user.
Recipient/user.
Email addresses
Enter email addresses for matching.
Recipient type
Select a recipient type:
Match all address —All destination email addresses match the entered email addresses.Match any address —Only a specific number of destination email addresses match the entered email addresses.
This field is available only when the match type is set to
Recipient/user .Threshold
Enter a matching threshold with the email addresses.
This field is available only when the recipient type is set to
Match any address .IP version
Select an IP version:
IPv4.
IPv6.
IP addresses
Enter IP addresses for matching.
User
Select or enter users for matching.
Host names
Enter host names for matching.
This field is available only when the match type is set to
Recipient/user .Click
OK .Click the
Response Rules tab.Create or select a response rule. You can configure multiple response rules for a DLP policy.
Figure-12 Response rule

Click
OK .
Configure global parameters
The global parameters apply to all DLP policies.
Procedure
Click the
Policies tab.In the navigation pane, select
DLP >Global Configuration .On the
Internal IP addresses tab, configure the IPv4 address object groups and IPv6 address object groups.Figure-13 Configuring internal IP addresses
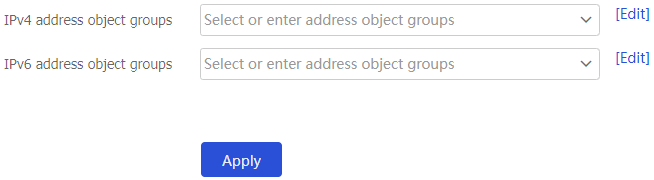
Click
Apply .Click the
Monitoring Direction Setting tab.Configure the monitoring direction parameters.
Figure-14 Configuring monitoring direction parameters

Table-6 Monitoring direction configuration items
Item
Description
Monitoring direction
Select a monitoring direction:
Bidirection —The DLP module monitors the packets sent to the internal network from the external network or packets sent to the external network from the internal network.External to internal —The DLP module monitors the packets sent to the internal network from the external network.Internal to external —The DLP module monitors the packets sent to the external network from the internal network.No monitoring —The DLP module does not monitor packets.
Click
Apply .Click the
Protocol filter configuration tab and configure the protocols to be monitored by the DLP module. Only the protocols that appear in the box can be monitored.Figure-15
Protocol filter configuration 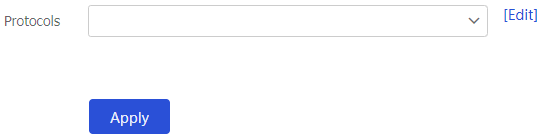
Click
Apply .
Configure resource management
Configure fingerprint indexes
Click the
Policies tab.In the navigation pane, select
DLP >Resource Management .On the
Fingerprint Indexes tab, clickCreate .Configure the fingerprint file resource parameters.
Figure-16 Clicking Create

Figure-17 Creating a fingerprint file resource
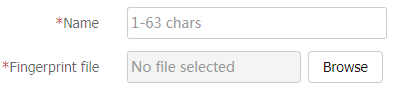
Table-7 Fingerprint file resource configuration items
Item
Description
Name
Enter the name of the fingerprint file resource.
Fingerprint file
Import a fingerprint file.
Click
OK .
Configure regular expressions
Click the
Policies tab.In the navigation pane, select
DLP >Resource Management .On the
Regular Expressions tab, clickCreate .Configure the regular expression parameters.
Figure-18 Clicking Create

Figure-19 Creating a regular expression

Table-8 Regular expression configuration items
Item
Description
Name
Enter the name of the regular expression.
Regular expression
Enter a regular expression.
Click
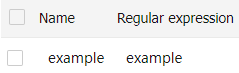
OK , and then you can view the newly created regular expression on theRegular Expressions tab.Figure-20 Created regular expression
Configure email alarm templates
Click the
Policies tab.In the navigation pane, select
DLP >Resource Management .On the
Email Alarm Templates tab, clickCreate .Configure the email alarm template parameters.
Figure-21 Clicking Create

Figure-22 Creating an email alarm template
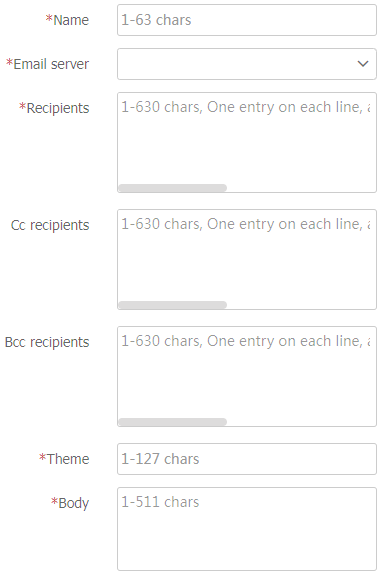
Table-9 Email alarm template configuration items
Item
Description
Name
Enter the name of the email alarm template.
Email server
Enter an email server for sending emails.
Recipients
Enter the recipient email addresses.
Cc recipients
Enter the recipient email addresses for carbon copy.
Bcc recipients
Enter the recipient email addresses for blind carbon copy.
Theme
Enter the theme of alarm emails.
Body
Enter the contents of alarm emails.
Click
OK , and then you can view the newly created email alarm template on theEmail Alarm Templates tab.Figure-23 Created email alarm template

Configure email servers
Click the
Policies tab.In the navigation pane, select
DLP >Resource Management .On the
Email Servers tab, clickCreate .Configure the email server parameters.
Figure-24 Clicking Create

Figure-25 Creating an email server
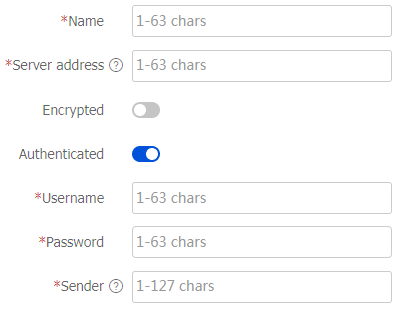
Table-10 Email server configuration items
Item
Description
Name
Enter the name of the email server.
Server address
Enter the IP address or host name of the email server.
Encrypted
Select whether to encrypt the interaction with the email server.
Authenticated
Select whether authentication is required for accessing the email server.
Username
Enter the username for accessing the email server.
Password
Enter the password for accessing the email server.
Sender
Enter the email address of the email server for sending emails.
Click
OK , and then you can view the newly created email server on theEmail Servers tab.Figure-26 Created email server

Configure file servers
Click the
Policies tab.In the navigation pane, select
DLP >Resource Management .On the
File Servers tab, clickCreate .Configure the file server parameters.
Figure-27 Clicking Create

Figure-28 Creating a file server
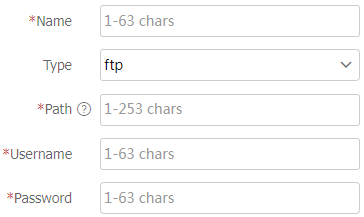
Table-11 File server configuration items
Item
Description
Name
Enter the name of the file server.
Type
Select a file server type:
Local.
FTP.
Path
Enter a file storage path, for example,
ftp://1.1.1.1/abc/ .This field is available only when the file server type is FTP.
Username
Enter the username for accessing the FTP server.
This field is available only when the file server type is FTP.
Password
Enter the password for accessing the FTP server.
This field is available only when the file server type is FTP.
Click
OK , and then you can view the newly created file server on theFile Servers tab.Figure-29 Created file server

Configure response rules
Click the
Policies tab.In the navigation pane, select
DLP >Resource Management .On the
Response Rules tab, clickCreate .Configure the response rule parameters.
Figure-30 Clicking Create

Figure-31 Creating a response rule

Table-12 Response rule configuration items
Item
Description
Name
Enter the name of the response rule. The name is case sensitive and valid characters include Chinese characters, letters, digits, underscores (_), and hyphens (-).
Description
Enter a description for the response rule.
Click
Create in theMatch condition area. You can configure multiple match conditions in a response rule.Figure-32 Clicking Create

Figure-33 Creating a match condition
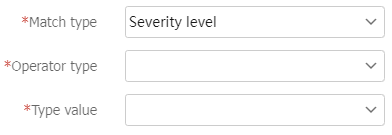
Table-13 Match condition configuration items
Item
Description
Match type
Select a match type for the response rule:
Severity level.
Protocol.
Operator type
Select an operator type:
Belong to —Indicates that the match type belongs to the specified type value.Not belong to —Indicates that the match type does not belong to the specified type value.
Type value
Select a type value.
The type value varies by the selected match type.
Click
OK .Click
Create in theAction area. You can configure multiple actions in a response rule.Figure-34 Clicking Create

Figure-35 Creating an action
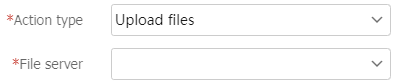
Table-14 Action configuration items
Item
Description
Action type
Select an action type for the response rule:
Upload files.
Add comments.
Send logs.
Send emails.
File server
Select a file server name.
This filed is available only when the action type is set to
Upload files .Comments
Enter the comments for suspicious data transmission.
This filed is available only when the action type is set to
Add comments .Email alarm template
Select an email alarm template.
This filed is available only when the action type is set to
Send emails .Click
OK .Click
OK , and then you can view the newly created response rule on theResponse Rules tab.Figure-36 Created a response rule
