Standalone SQL Server installation procedure
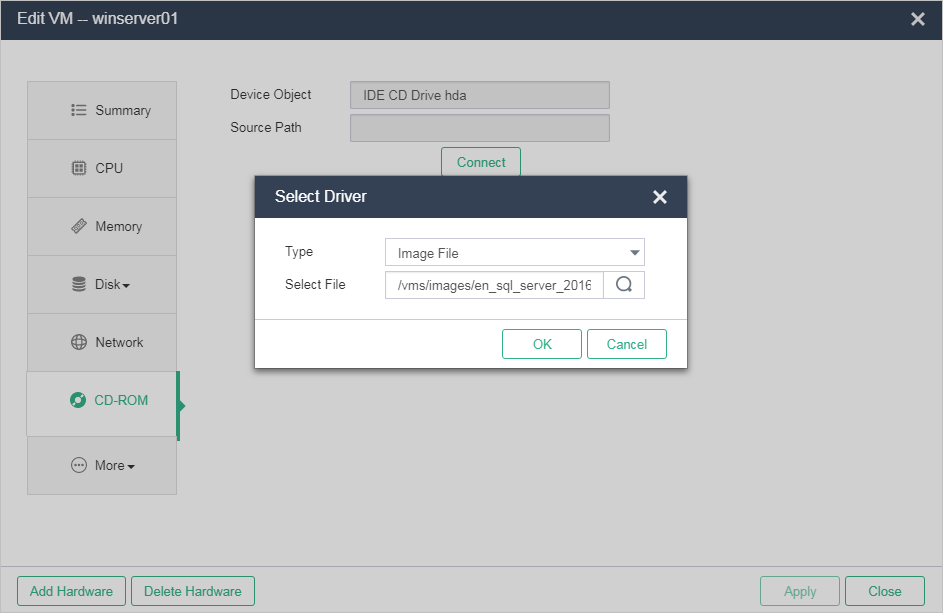
Mount an SQL Server 2016 image to the optical driver of a VM.
Figure-1 Mounting an image file
Select New SQL Server stand-alone installation or add features to an existing installation.
Figure-2 Selecting an installation option

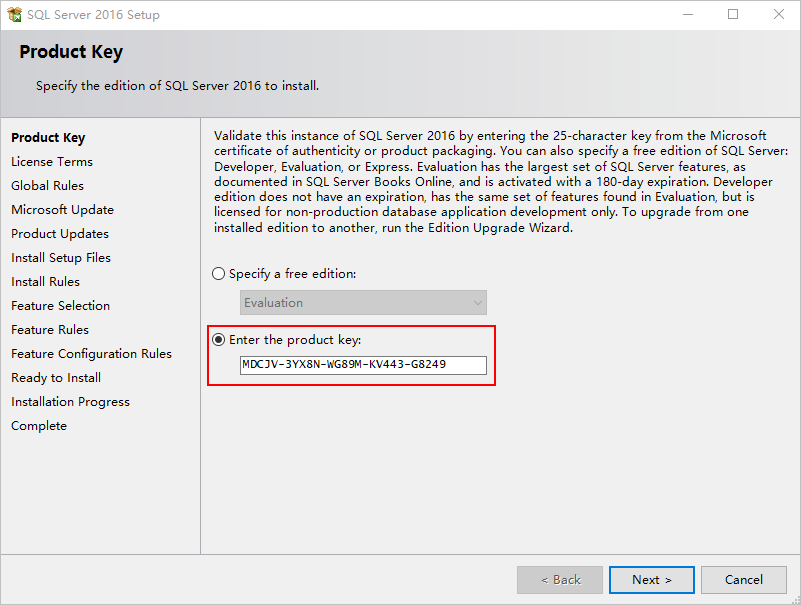
Enter your product key, and then click Next.
Figure-3 Entering a product key
Click Next.
Figure-4 Installation rules

Wait for the rule check to run.
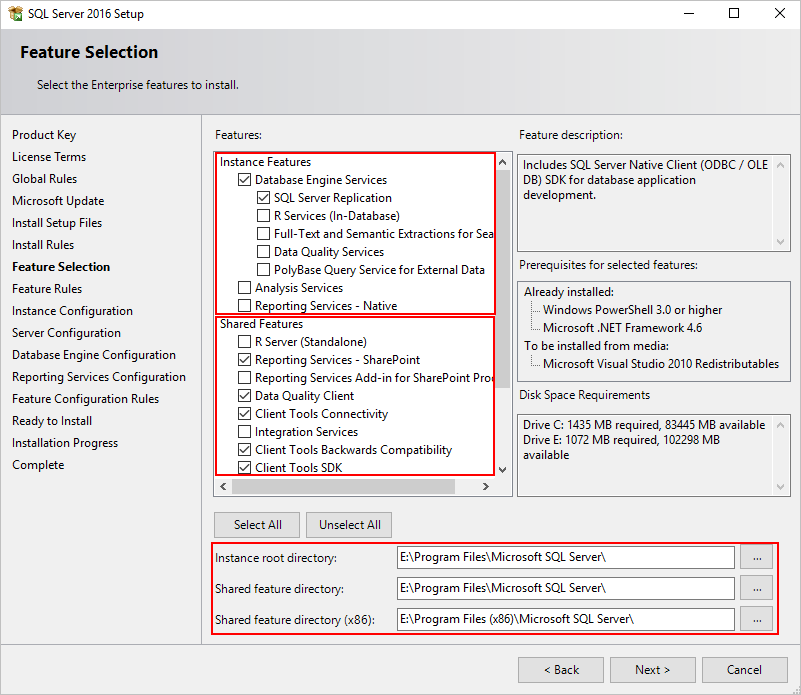
Select features:
Select SQL Server Replication in database engine services.
Select Reporting Services - SharePoint, Data Quality Client, Client Tools Connectivity, Client Tools Backwards Compatibility, and Client Tools SDK in shared features.
Place the instance root directory on the log disk, and place the shared feature directory and shared feature directory (x86) on the data disk.
Figure-5 Selecting features
Click Next.
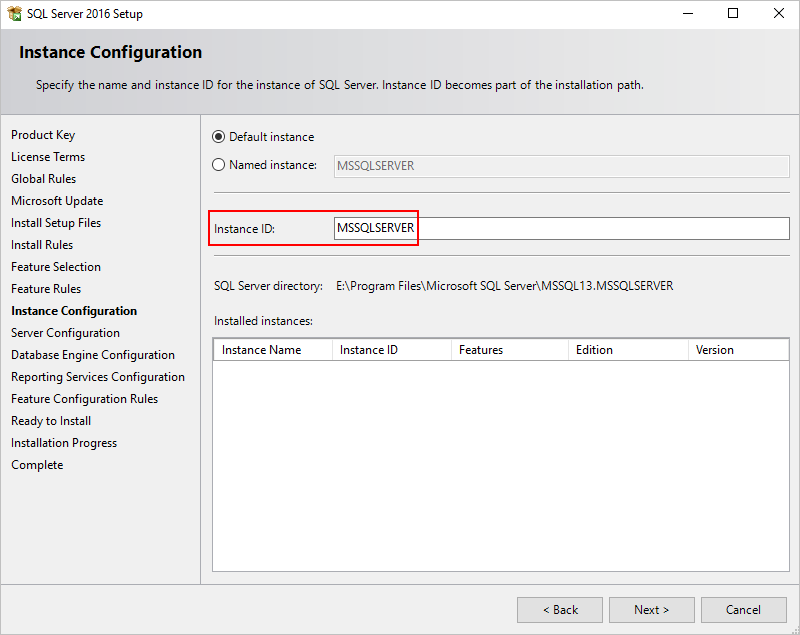
Modify the instance ID as needed, and then click Next.
Figure-6 Instance ID
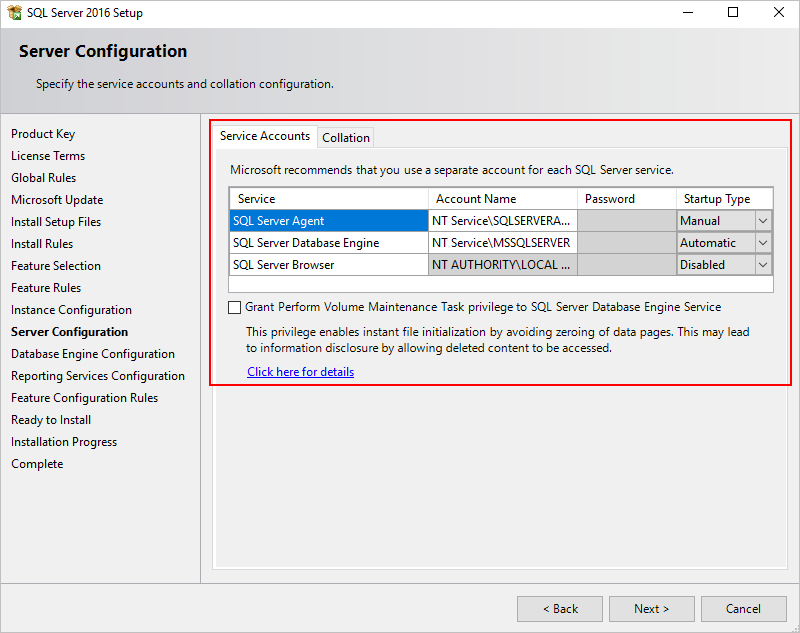
Click Next.
Figure-7 Server configuration
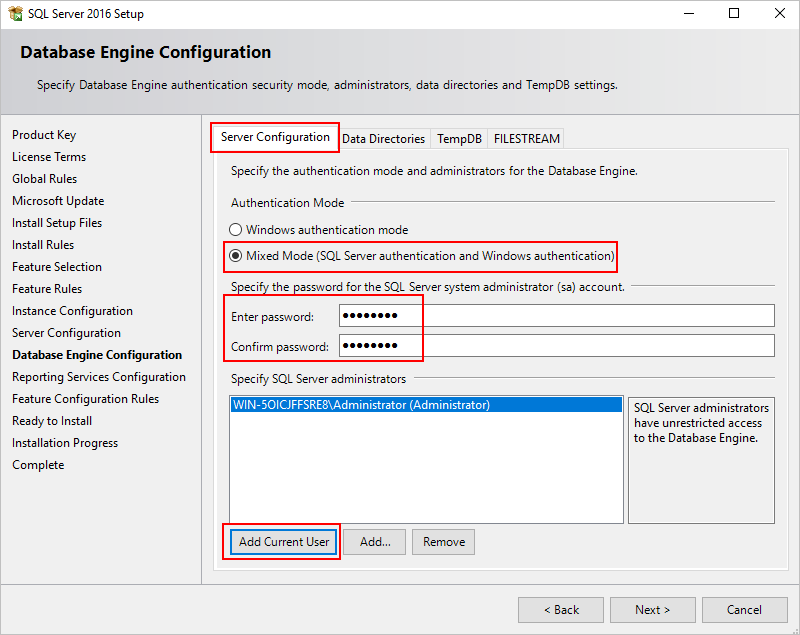
Configure database engine settings:
On the Server Configuration tab, select mixed authentication mode, and specify the current account as a SQL Server administrator.
Figure-8 Server Configuration tab
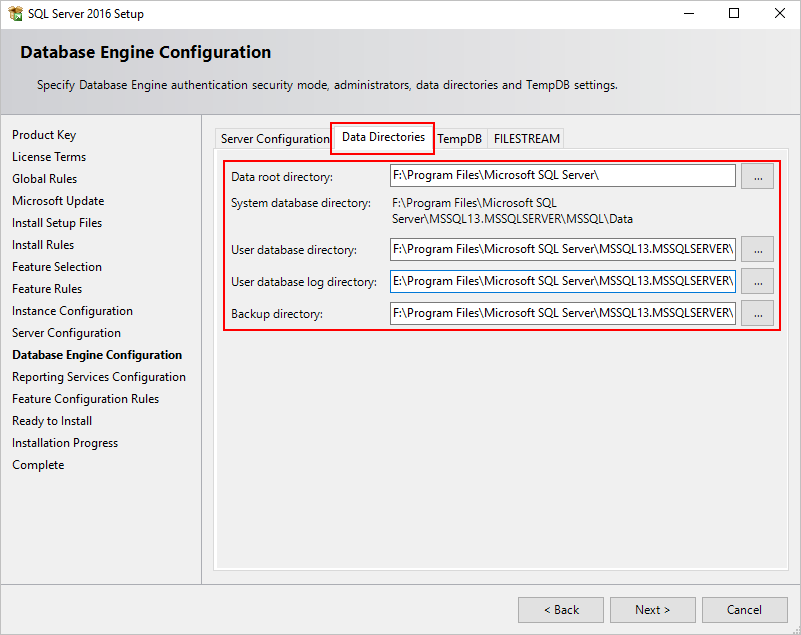
On the Data Directories tab, place log-related directories on the log disk, and place data-related disks on the data disk.
Figure-9 Data Directories tab
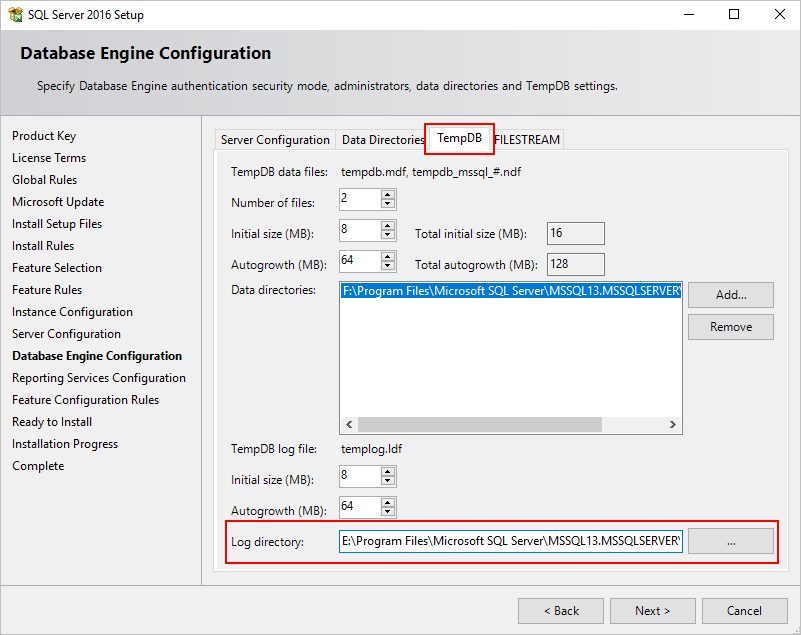
On the TempDB tab, place the log directory on the log disk, configure other parameters, and then click Next.
Figure-10 TempDB tab
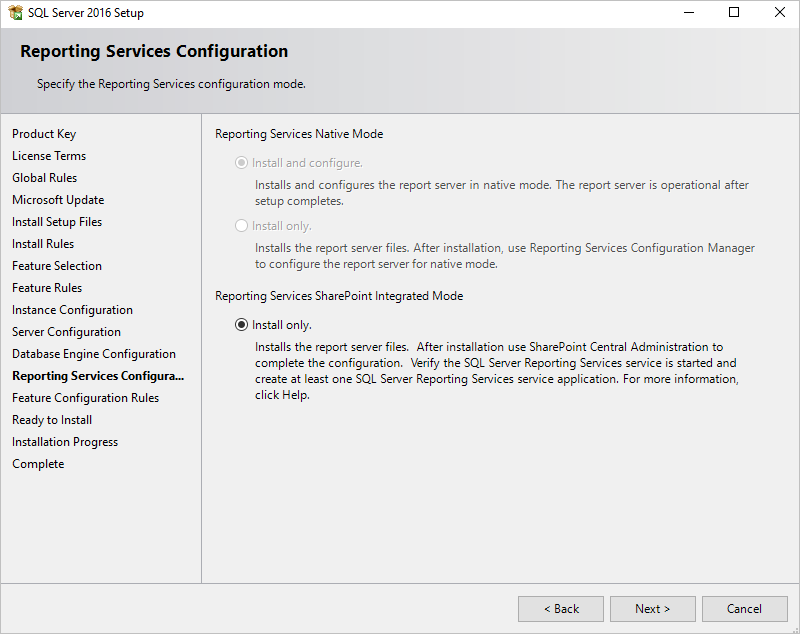
Click Next.
Figure-11 Reporting services configuration
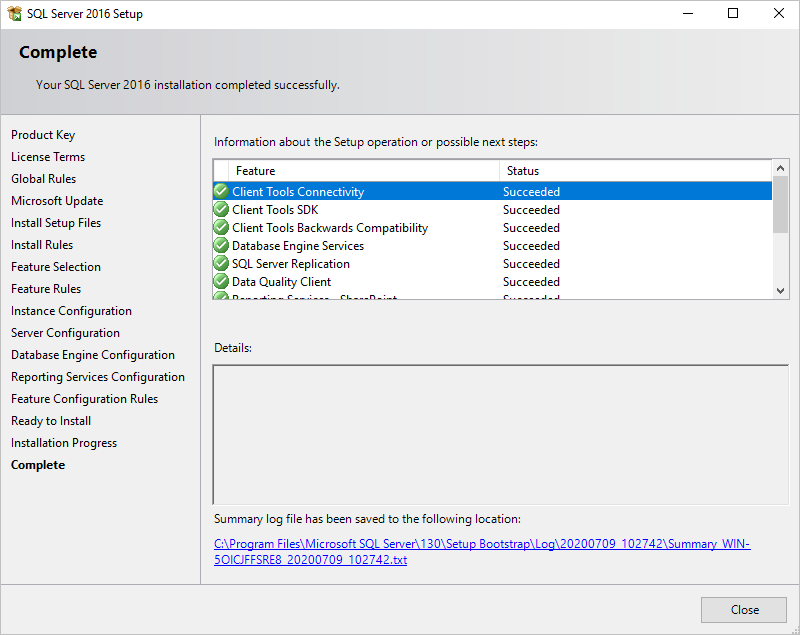
Click Install.
Figure-12 Installing SQL Server 2016
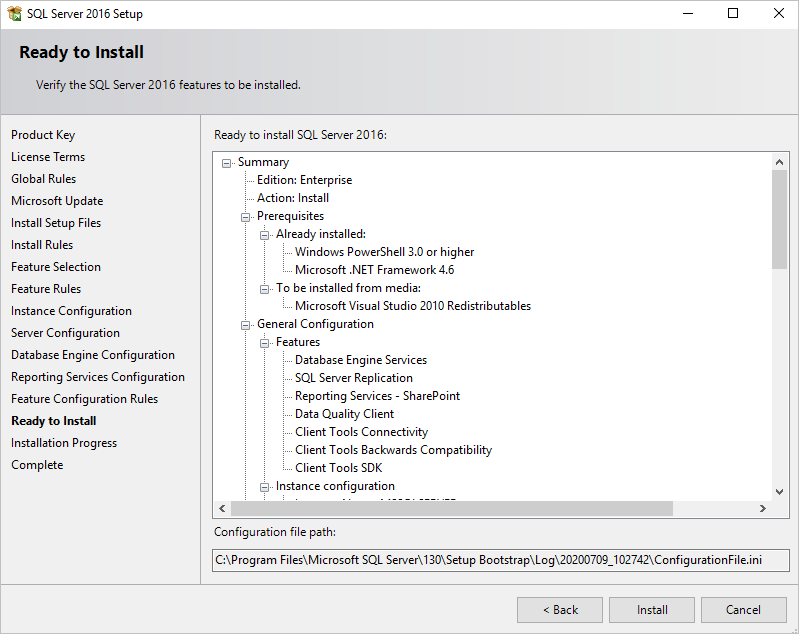
Figure-13 Installation finished