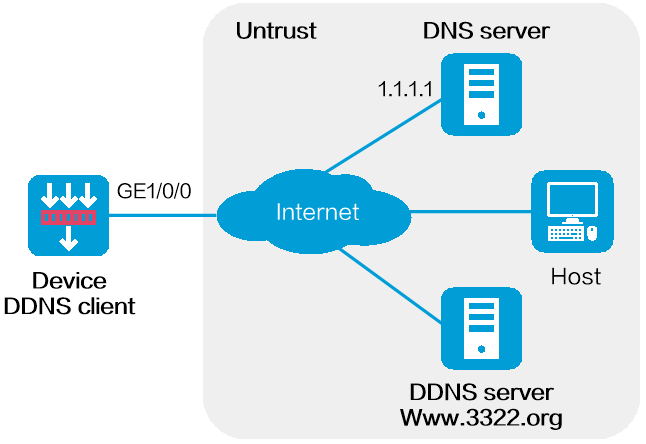
As shown in Figure 1, the device is a Web server with domain name whatever.3322.org and uses an IP address dynamically obtained through DHCP. To make sure the device can always provide Web services at whatever.3322.org when its IP address changes, perform the following tasks on the device:
Configure a DDNS policy to update the device's domain name-to-IP address mapping on the DDNS server. The DDNS server then updates the mapping on the DNS server.
Specify the IP address of the DNS server so that the device can access the DDNS server through domain name.
This configuration example was created and verified on E8371 of the F5000-AI160 device.
Before configuring DDNS on the device, perform the following tasks:
Register with username hell and password neve at http://www.3322.org/.
Create a mapping between the device's FQDN and IP address on the DNS server.
1. Configure security policy ddns-a.
# On the top navigation bar, click Policies.
# From the navigation pane, select Security Policies > Security Policies.
# Click Create and click Create a policy.
# In the dialog box that opens, configure policy parameters as follows:
Specify the policy name. In this example, the name is ddns-a.
Select the source zone. In this example, the source zone is Local.
Select the destination zone. In this example, the destination zone is Untrust.
Select IPv4 as the type.
Select Permit as the action.
Click OK.
2. Configure security policy ddns-b.
# On the top navigation bar, click Policies.
# From the navigation pane, select Security Policies > Security Policies.
# Click Create and click Create a policy.
# In the dialog box that opens, configure policy parameters as follows:
Specify the policy name. In this example, the name is ddns-b.
Select the source zone. In this example, the source zone is Untrust.
Select the destination zone. In this example, the destination zone is Local.
Select IPv4 as the type.
Select Permit as the action.
Click OK.
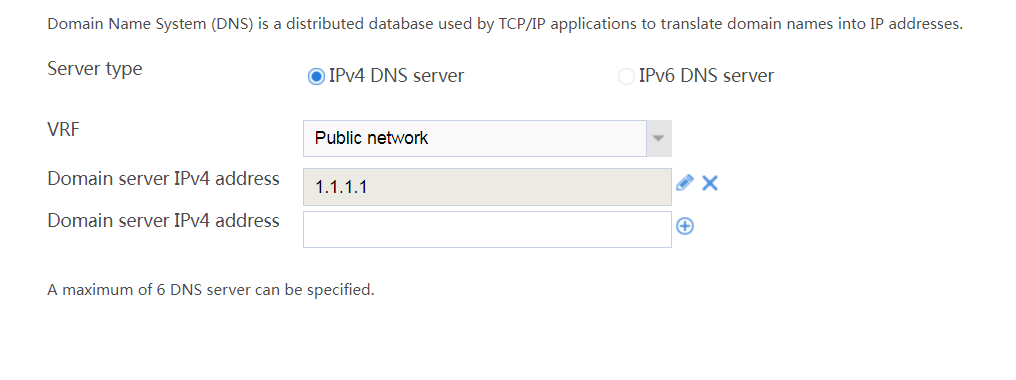
3. Specify the IP address of the DNS server.
# On the top navigation bar, click Network.
# From the navigation pane, select DNS > DNS Client.
# Add the IP address of the DNS server, as shown in Figure 2.
Figure 2 Specifying the DNS server
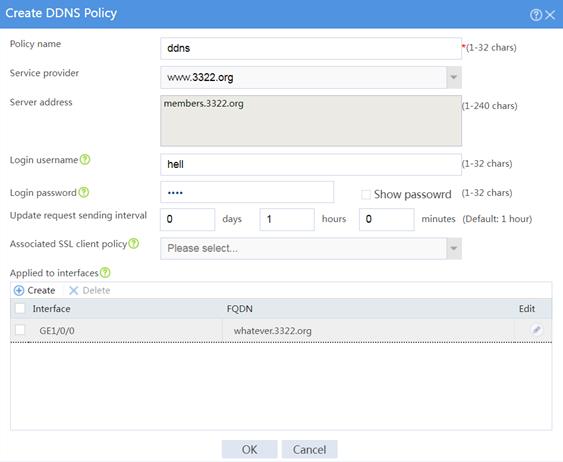
4. Configure a DDNS policy.
# From the navigation pane, select DNS > DDNS Policies.
# Click Create.
# In the dialog box that opens, create a DDNS policy, as shown in Figure 3.
Figure 3 Creating a DDNS policy
# Click OK.
Verify that the device can update its domain name-IP mapping through the DDNS provider www.3322.org when its IP address changes. The Internet users can resolve the correct IP address through the domain name whatever.3322.org to access the Web service.