Install Grid
Use the Grid account to log in to the target VM.
Open /u01/app/12.2.0/grid and execute the gridsetup.sh script.
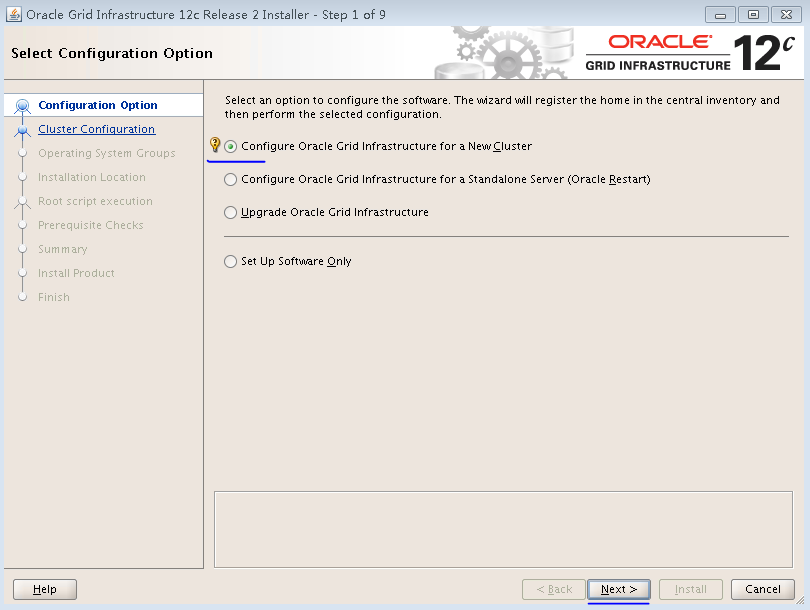
Select Configure Oracle Grid Infrastructure for a New Cluster, and then click Next.
Figure-1 Selecting a configuration option
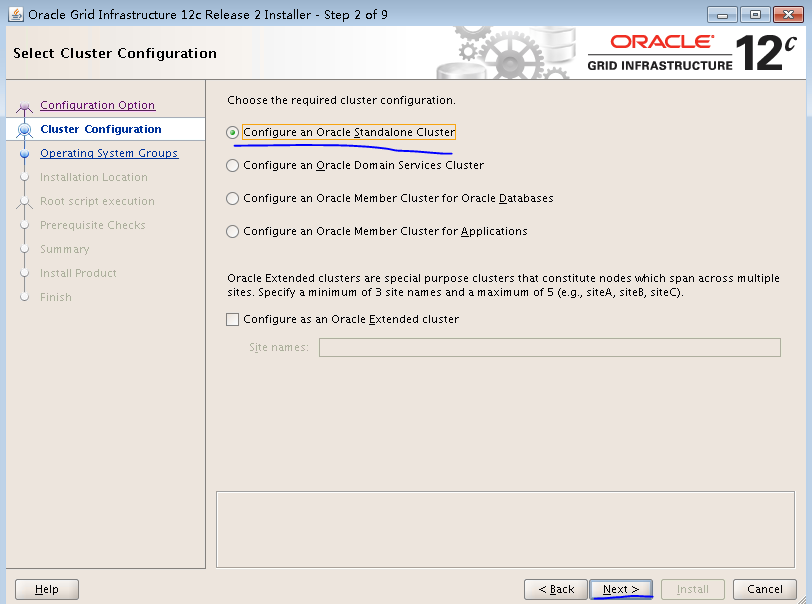
Select Configure an Oracle Standalone Cluster, and then click Next.
Figure-2 Cluster configuration
Uncheck Configure GNS, modify the value of SCAN Name to be the same as the scan name corresponding to the scan IP in /etc/hosts, and then click Next.
Figure-3 Grid Plug and Play Information

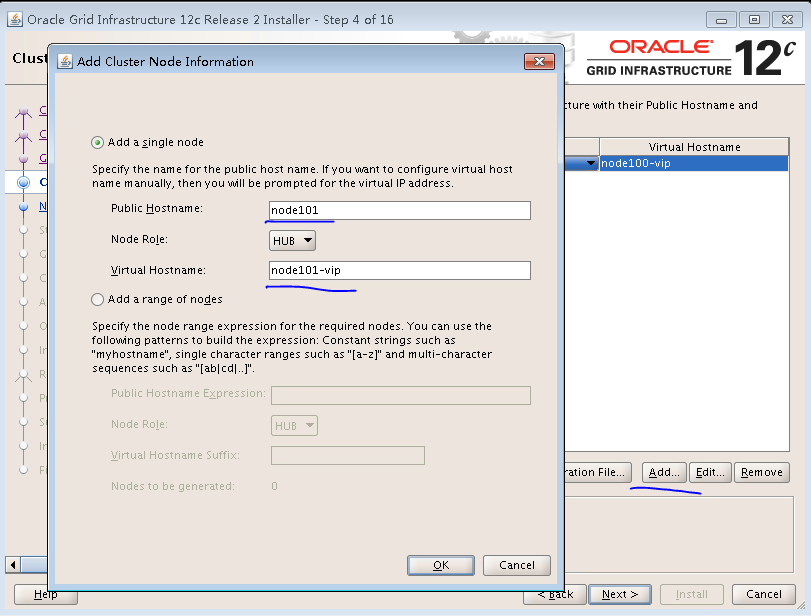
Click Add.
Add database nodes according to the /etc/hosts file, and then click OK.
Figure-4 Adding cluster node information
Click SSH connectivity, enter the Grid password, and then click Setup.
Figure-5 Cluster Node Information
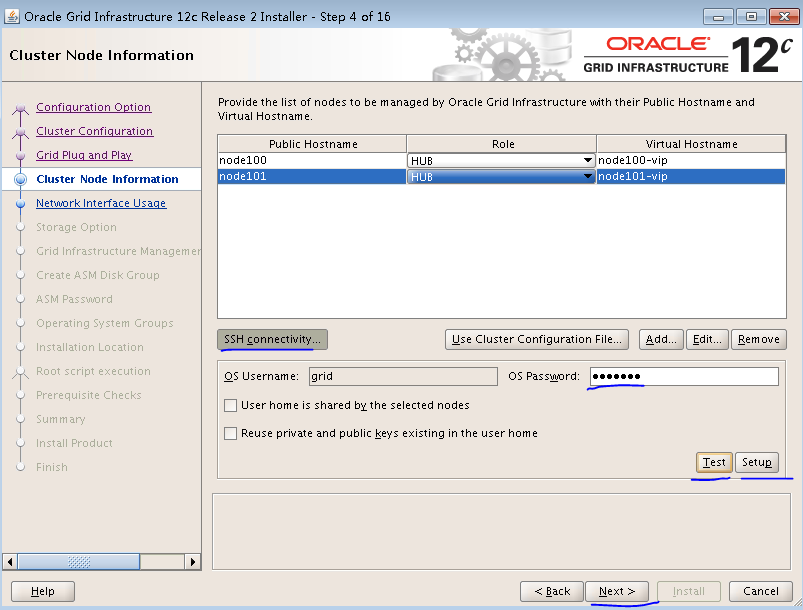
Click OK.
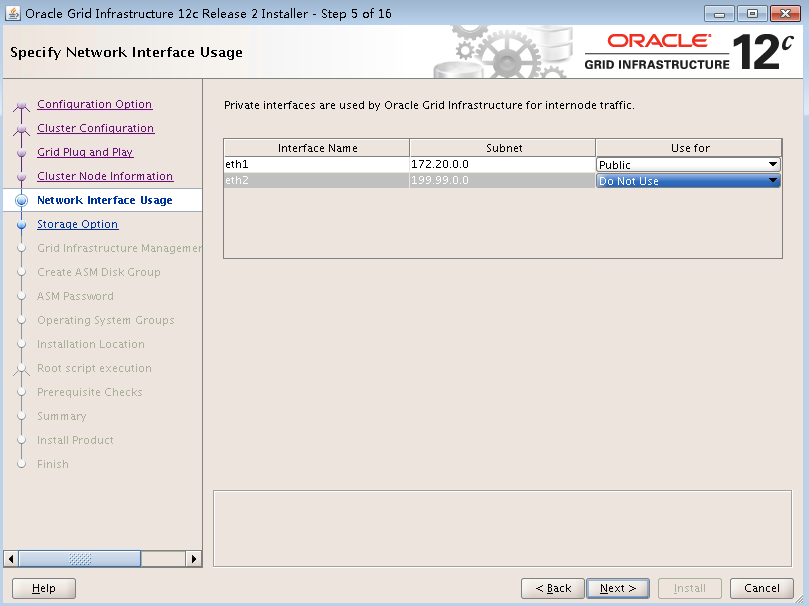
Verify interface settings, and then click Next.
Figure-6 Verifying interface settings
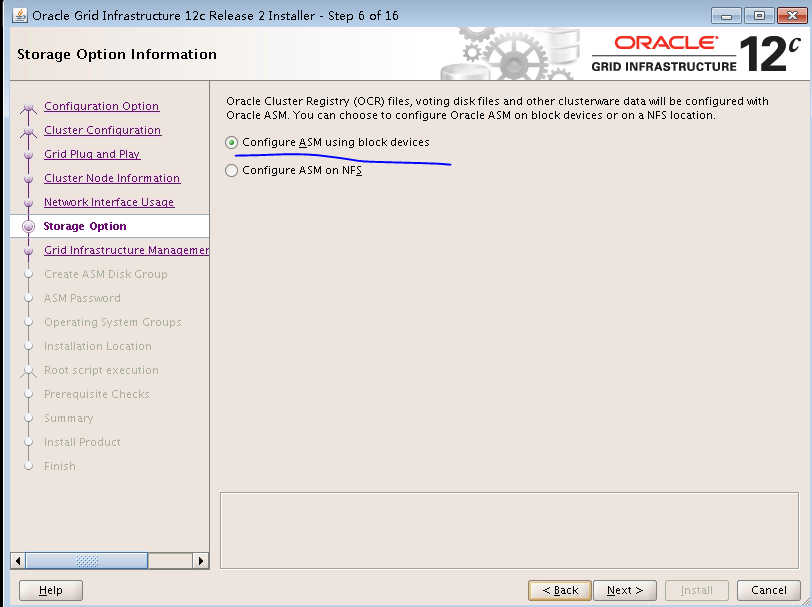
Select Configure ASM using block devices, and then click Next.
Figure-7 Storage option information
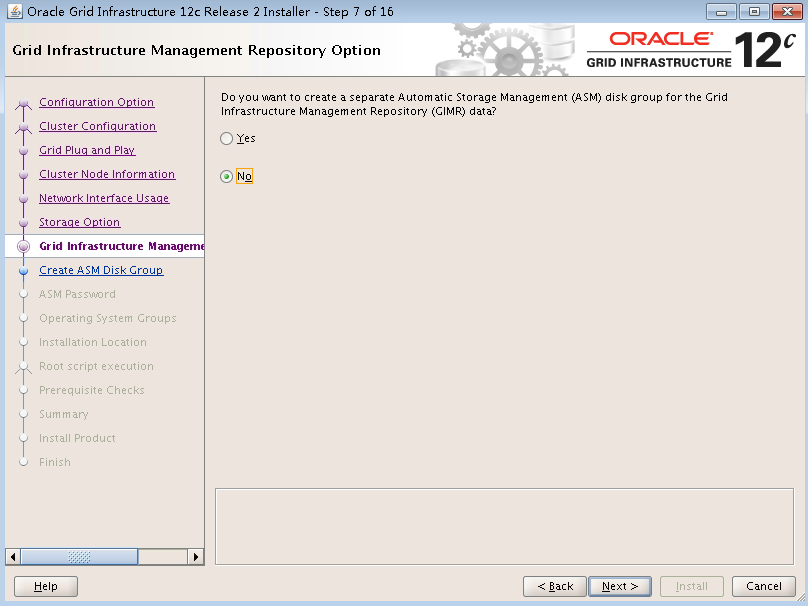
Select No, and then click Next.
Figure-8 Grid infrastructure management repository option
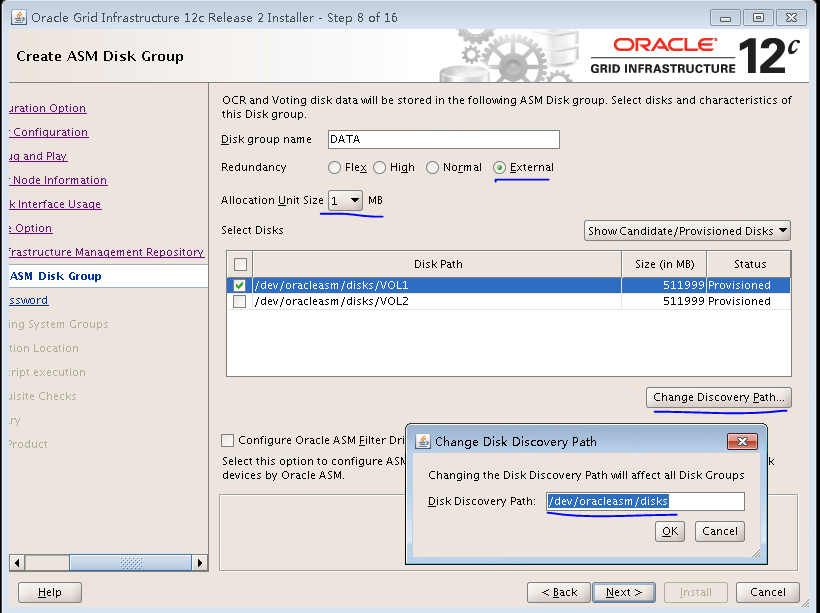
Configure an ASM disk group.
Select External for the Redundancy parameter.
Set the Allocation Unit Size to 1 MB.
Click Change Discovery Path, enter /dev/oracleasm/disks, and then click OK.
Select the Grid disk.
Uncheck Configure Oracle ASM Filter Driver, and then click Next.
Figure-9 Creating an ASM disk group
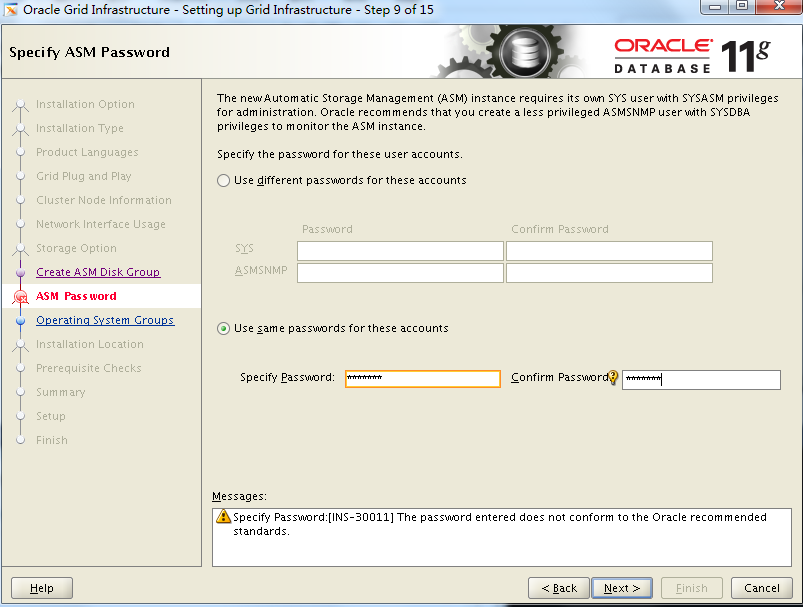
Set the same password for ASM SYS and ASMSNMP users, and then click Next.
Figure-10 Specifying ASM passwords
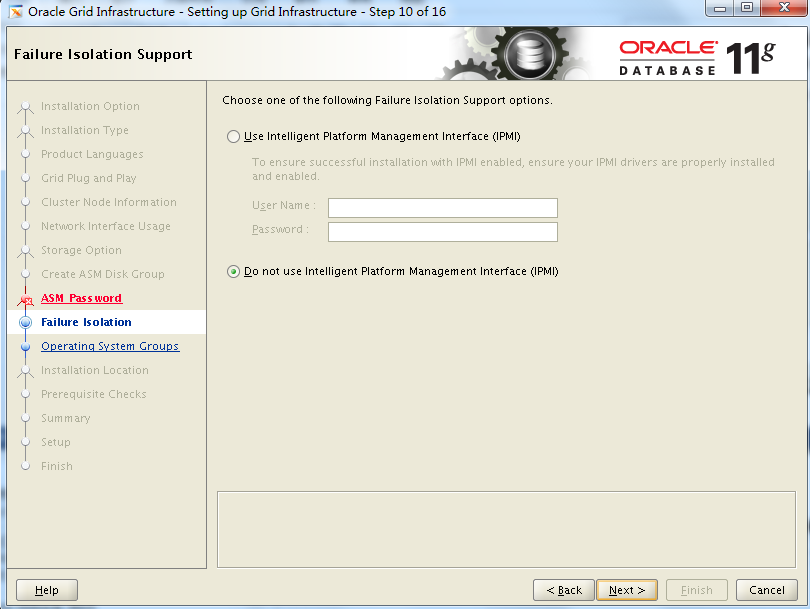
Select Do not use Intelligent Platform Management Interface(IPMI), and then click Next.
Figure-11 Failure Isolation Support
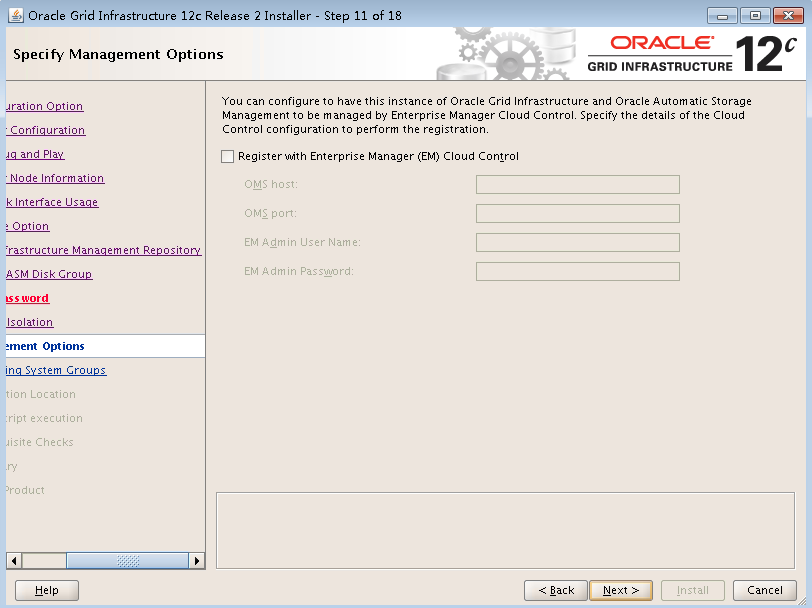
Do not select any options, and then click Next.
Figure-12 Specifying management options
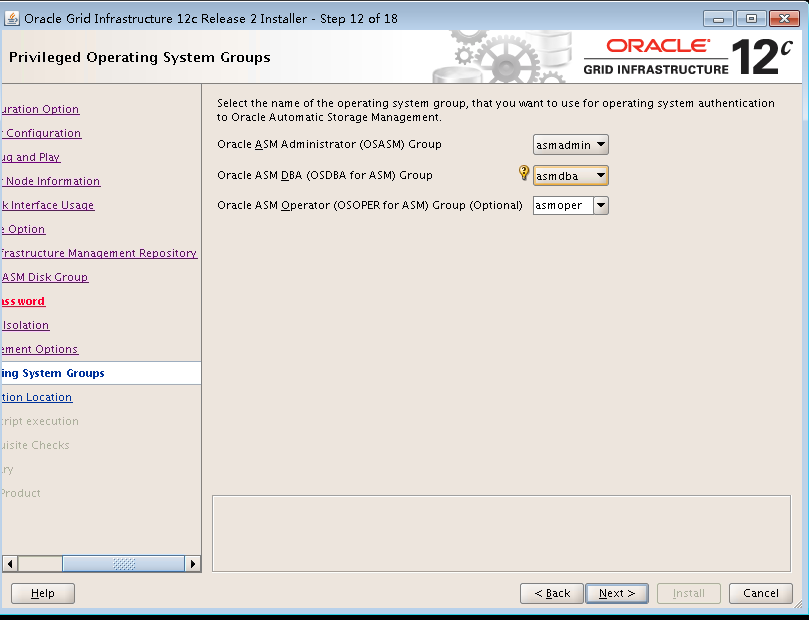
Use the default settings for privileged operating system groups, and then click Next.
Figure-13 Privileged operating system groups
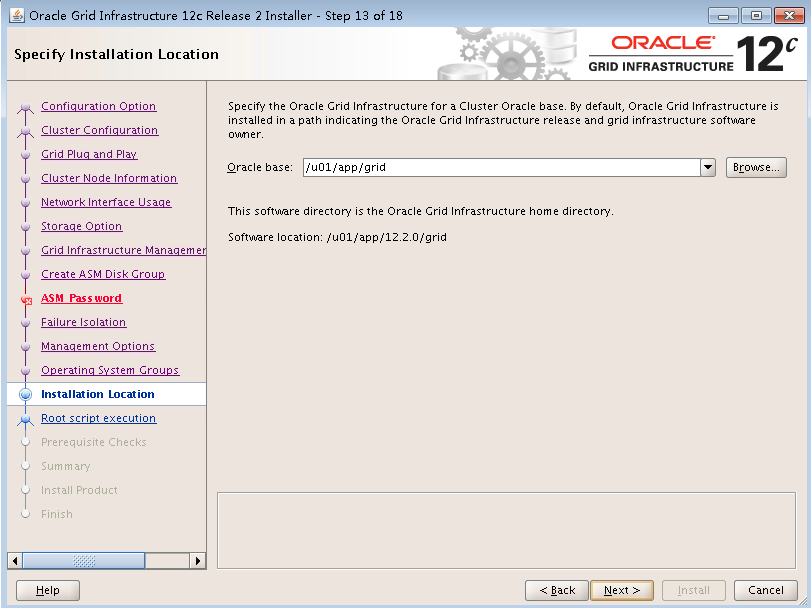
Enter the Grid installation path, and then click Next.
Figure-14 Specifying installation location
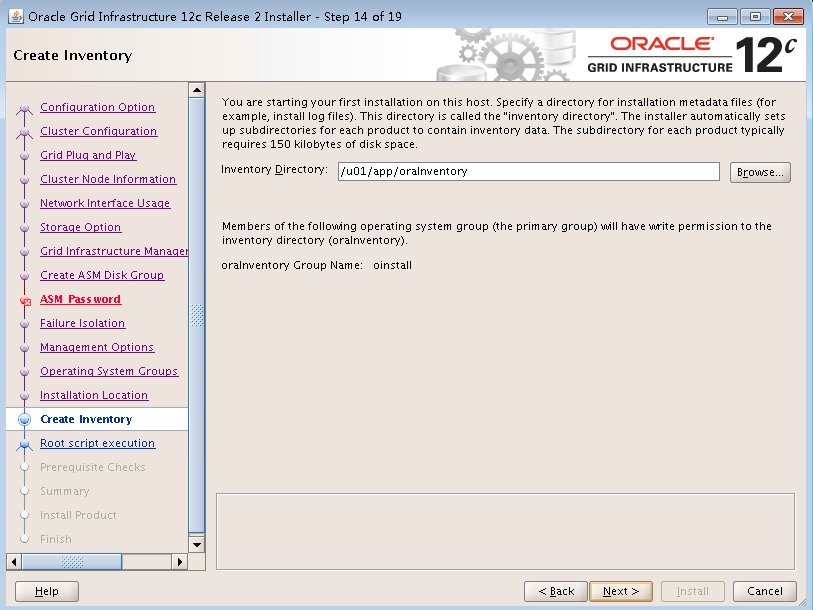
Use the default inventory settings, and then click Next.
Figure-15 Creating an inventory
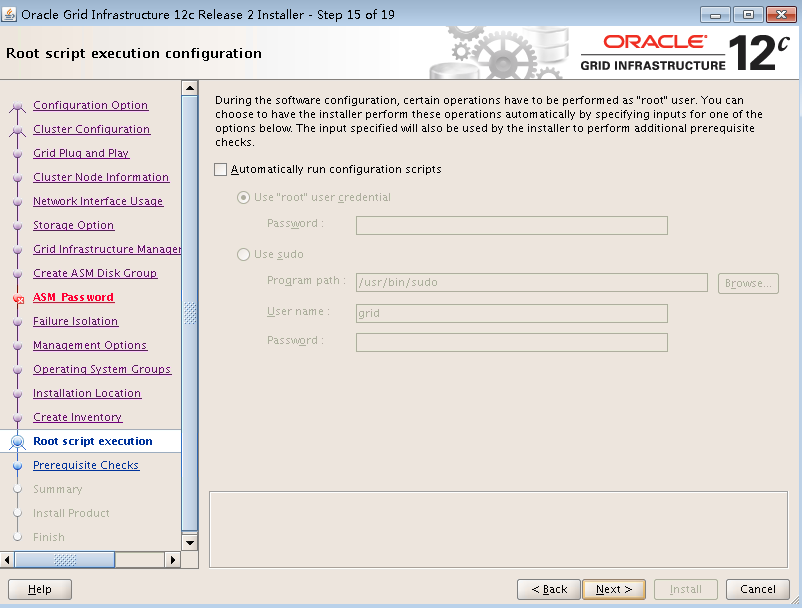
Do not select any scripts, and then click Next.
Figure-16 Root script execution configuration
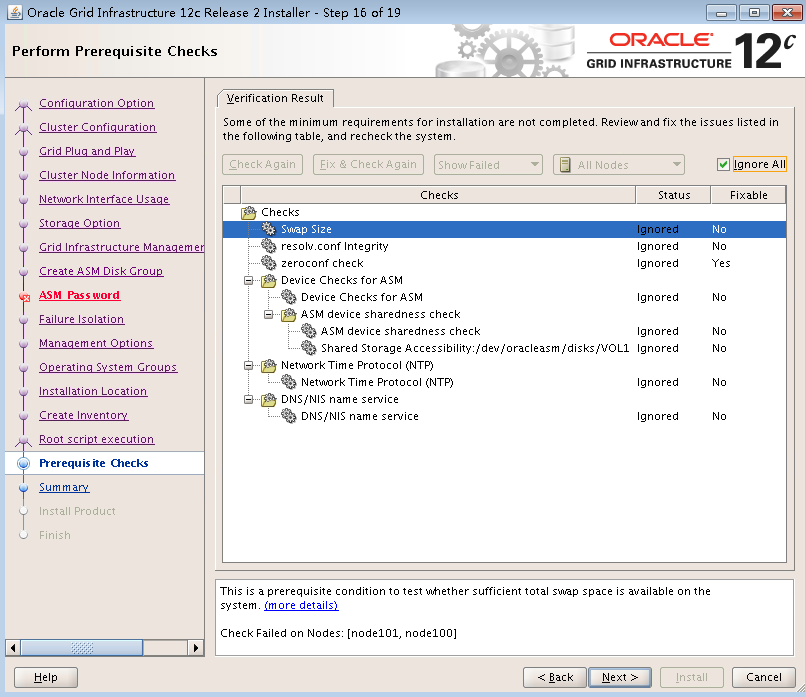
Process alarms as follows:
I/O scheduler—If you do not use Deadline I/O Scheduler, ignore the alarm.
resolv.conf Integrity—Ignore the alarm.
(Linux) resolv.conf Integrity—Ignore the alarm.
DNS/NIS name service—If you do not configure a scan IP for the DNS server, ignore the alarm.
For fixable alarms, click Fix & Check Again and follow the prompts to fix them.
To ignore all alarms, select Ignore All, click Next, and then click Yes.
Figure-17 Performing prerequisite checks
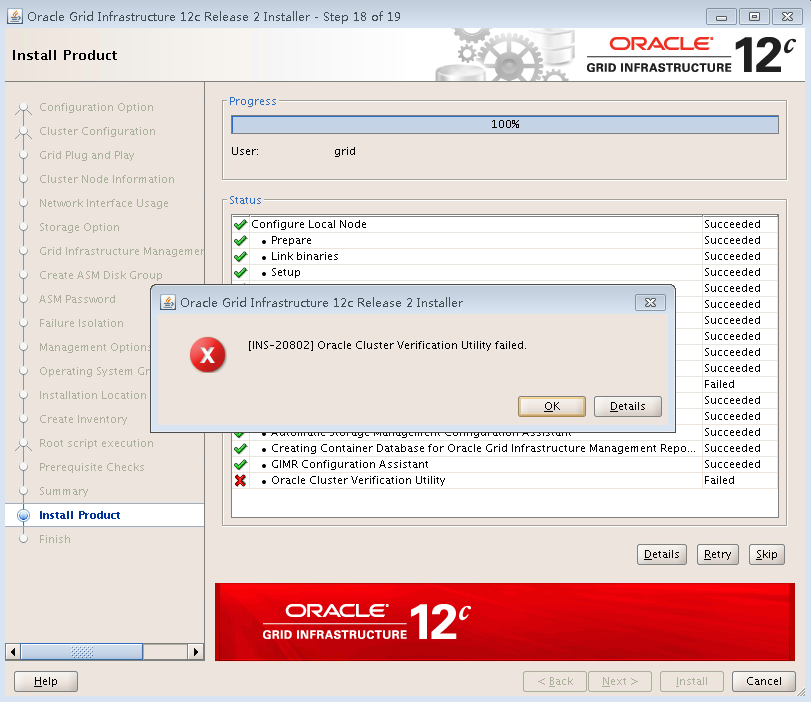
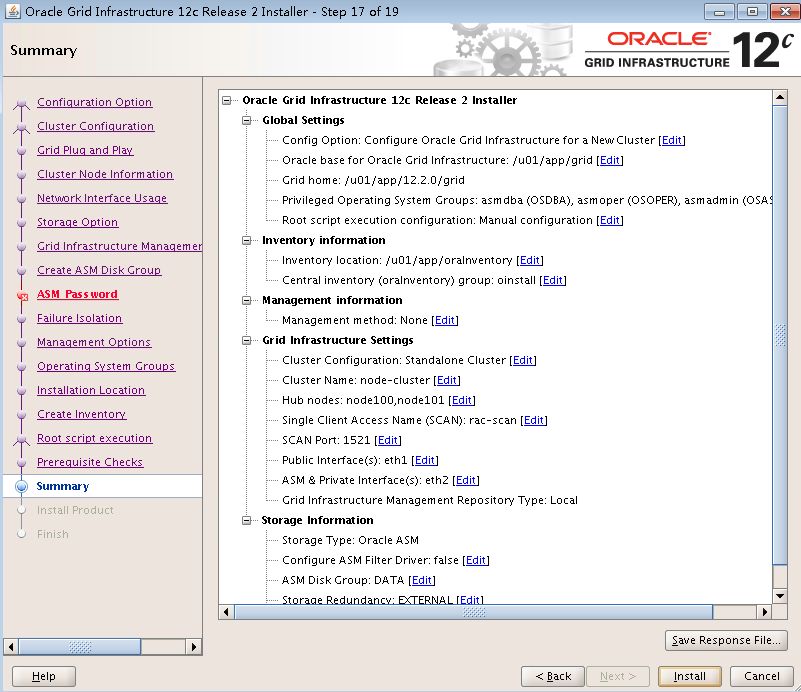
View the configuration summary, and then click Install.
Figure-18 Summary
Run configuration scrips as the root user on the database nodes one by one.
Figure-19 Executing configuration scripts
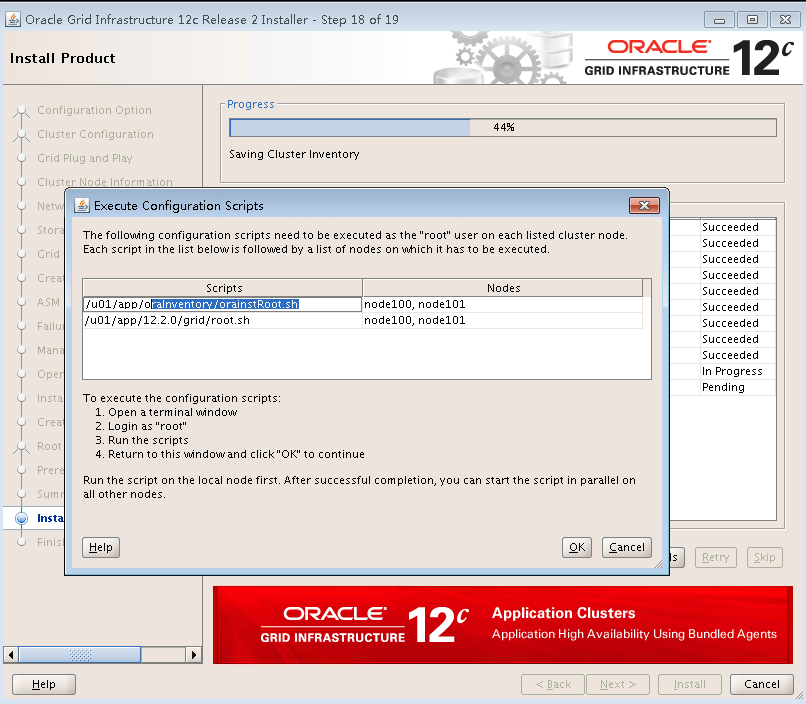
Click OK after script execution is finished.
Click OK after installation is finished.
Figure-20 Installation finished