- Released At: 24-06-2021
- Page Views:
- Downloads:
- Related Documents
-
H3C WBC580 G2 Multiservice Access Controller Installation Quick Start-AW100
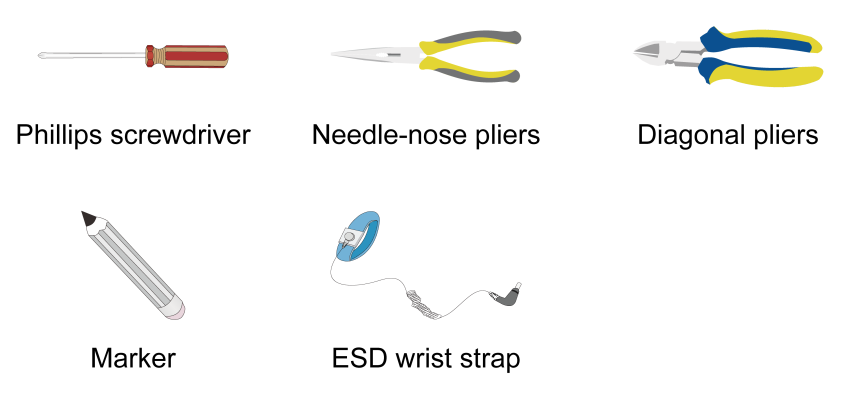
1 Installation tools
|
|
IMPORTANT: · No installation tools are provided with the device. Prepare tools yourself as required. · Before you install the device, wear an ESD wrist strap and make sure the strap makes good skin contact and is reliably grounded. |
Figure1-1 Installation tools
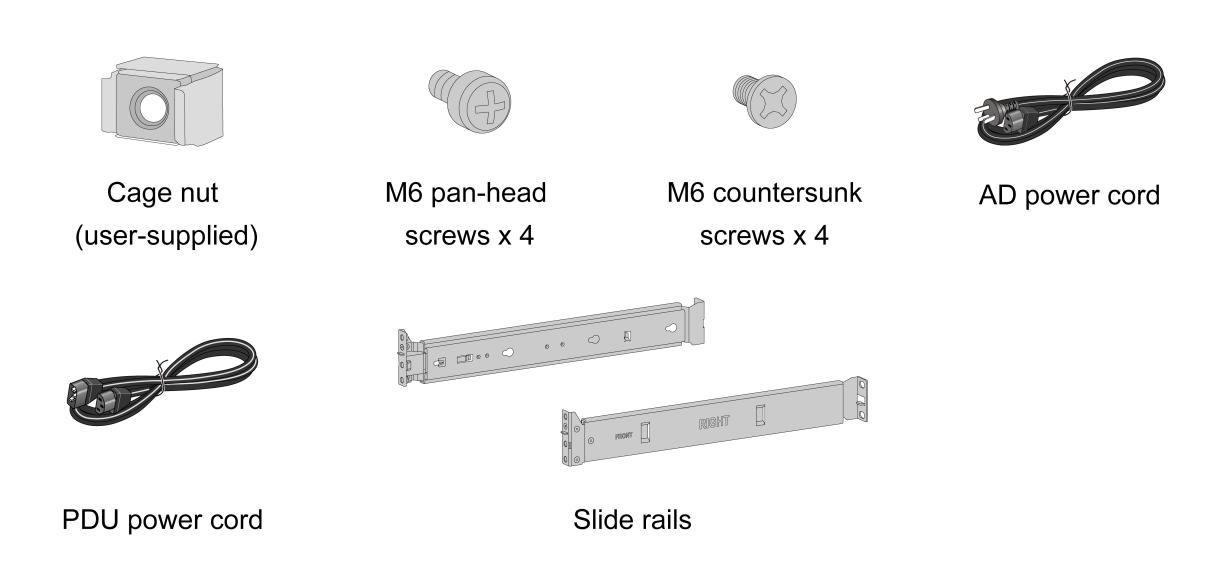
2 Installation accessories
Figure2-1 Installation accessories
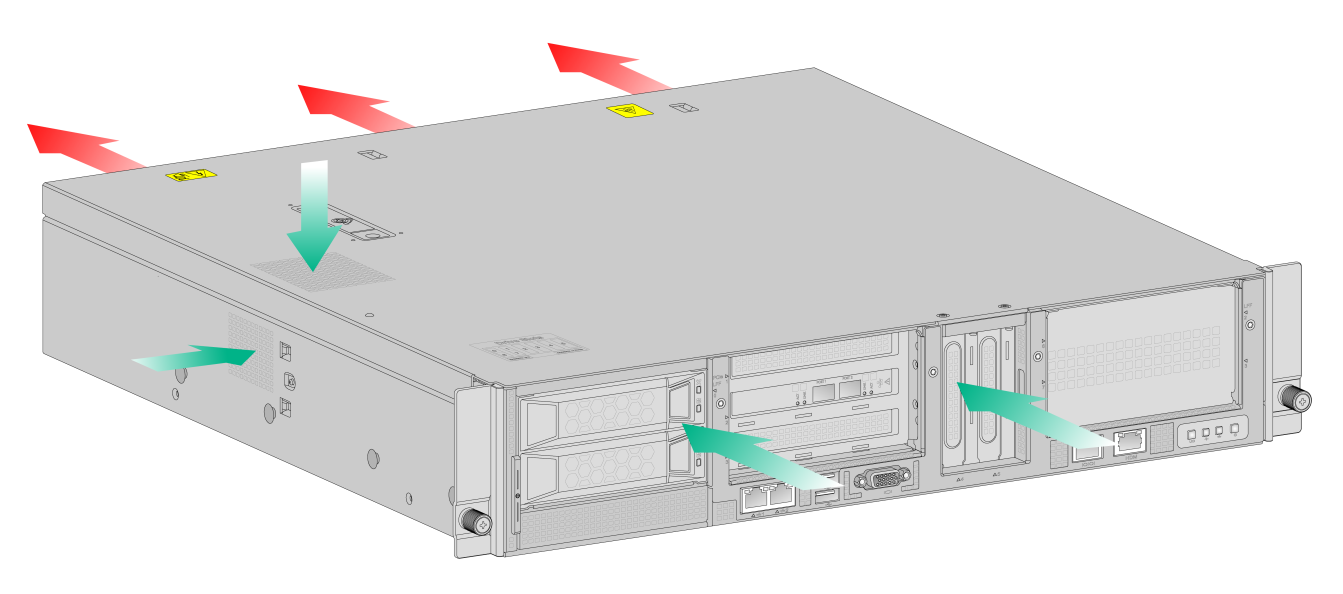
3 Airflow of the device
Make sure the air vents on the device are not blocked, and the installation site has a good ventilation system.
Figure3-1 Airflow through the device
4 Mounting the device in a rack
|
|
CAUTION: Keep the tamper-proof seal on a mounting screw on the chassis cover intact, and if you want to open the chassis, contact local sales agent for permission. Otherwise, H3C shall not be liable for any consequence. |
To mount the device in a rack:
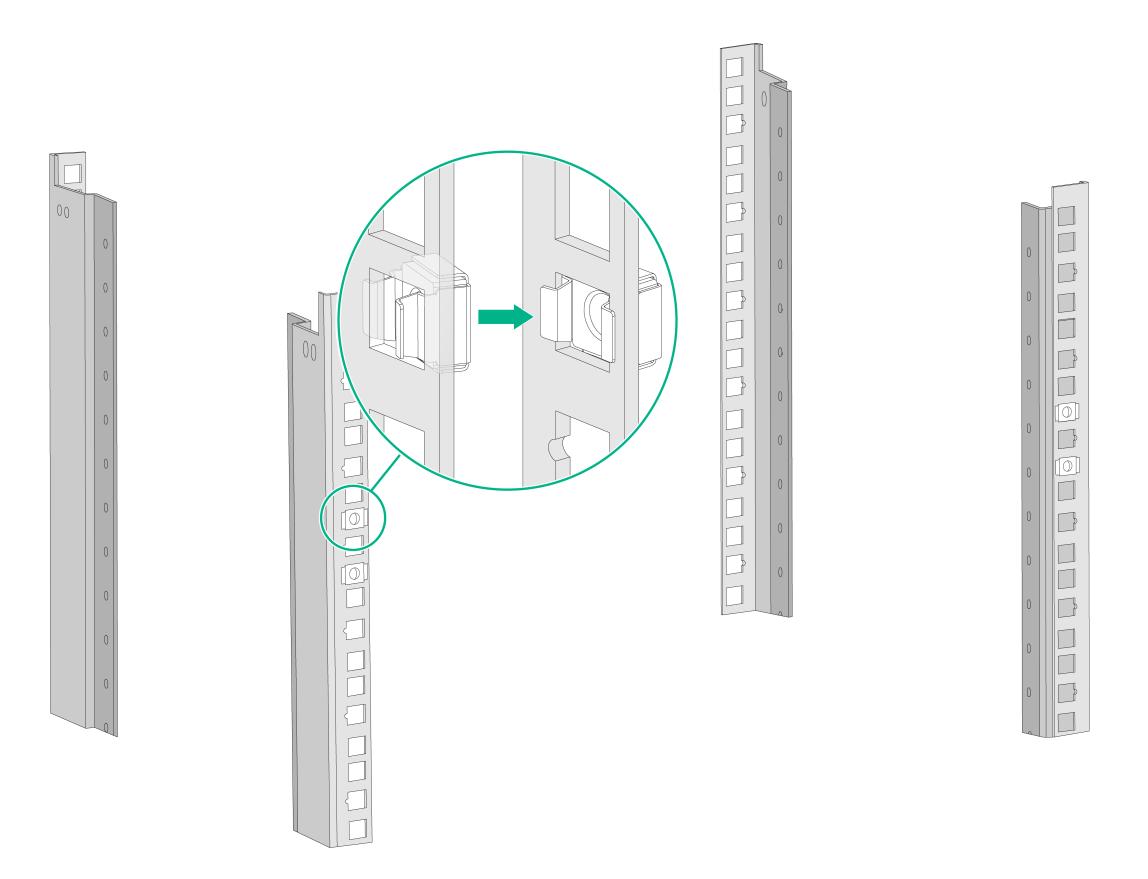
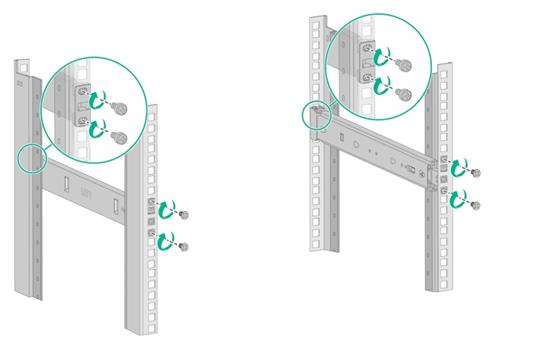
1. Install the cage nuts in the square holes in each rack post.
Figure4-1 Installing cage nuts
2. Use M6 countersunk screws and M6 pan-head screws to attach the slide rails to the front and rear sides of the rack posts, respectively.
Figure4-2 Installing slide rails
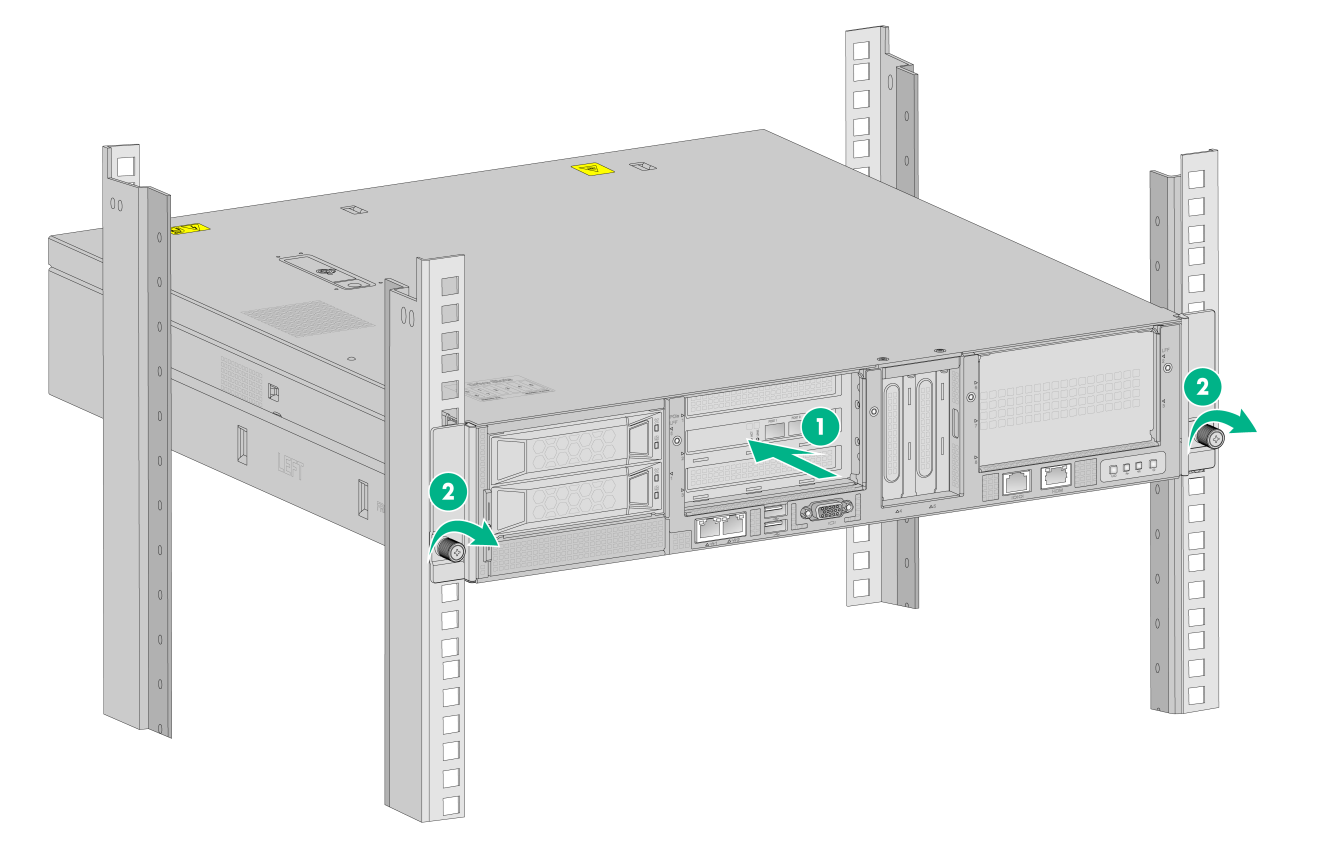
3. Use both hands to place the device on the slide rails and slide the device along the slide rails until the mounting brackets on the device touch the front rack posts. Use a Phillips screwdriver to fasten the captive screws in the mounting brackets to secure the device to the rack.
After you slide the device into the rack, make sure the bottom edge of the slide rails is in close contact with the device bottom.
Figure4-3 Securing the device to the rack
5 Installing a power supply
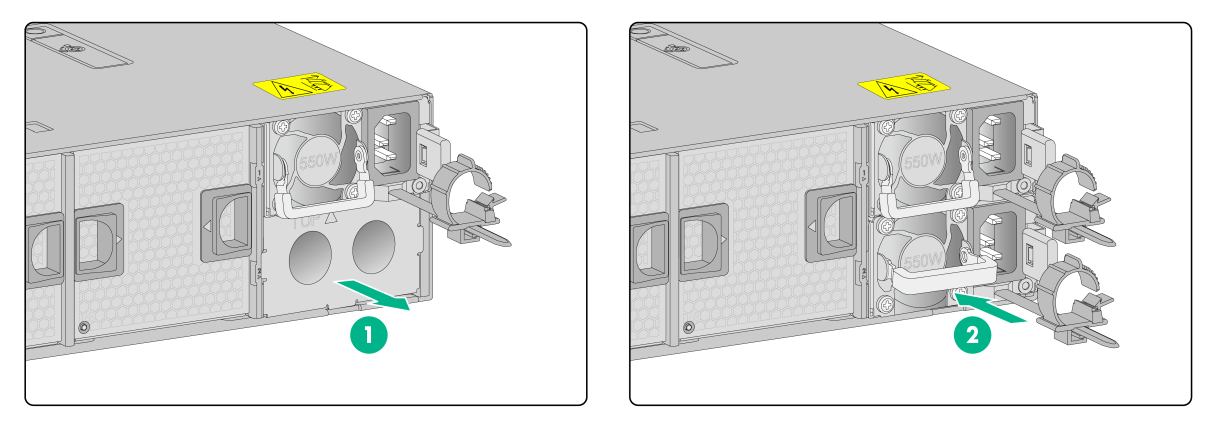
1. Remove the filler panel from the power supply slot.
2. Push the AC power supply into the slot until it snaps into place.
Figure5-1 Installing the power supply
6 Connecting the power cord
|
|
CAUTION: To avoid bodily injury, connect the power cord first to the device and then to the power supply system in the equipment room. |
To connect the power cord:
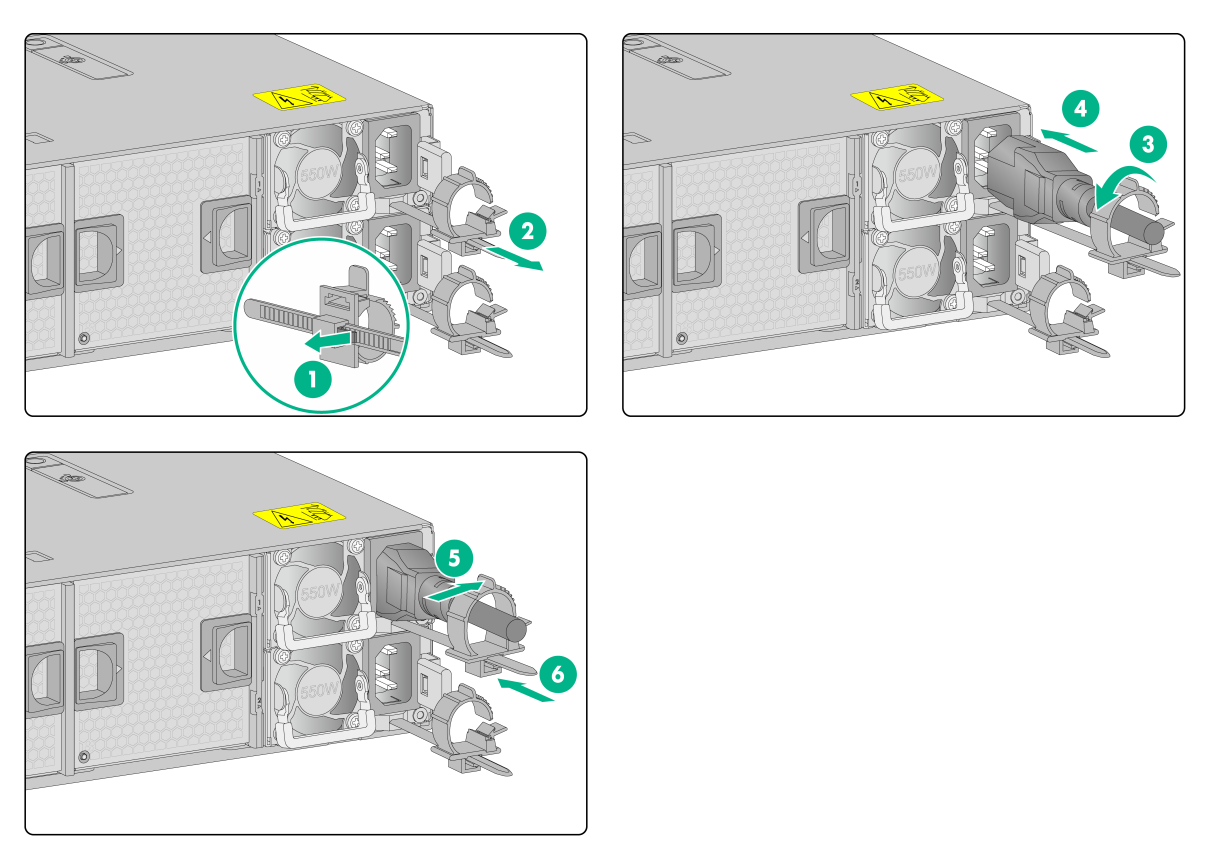
1. Release the jaw of the cable clamp.
2. Slide the cable clamp outward along the cable mount.
3. Open the cable clamp, thread the power cord through the cable clamp, and close the jaw.
4. Connect the female connector of the power cord to the power receptacle on the power supply.
5. Slide the cable clamp forward to secure the power cord in place.
6. Connect the other end of the power cord to the power supply system.
Figure6-1 Connecting the power cord
Copyright © 2021, New H3C Technologies Co., Ltd.
The information in this document is subject to change without notice.
