- Released At: 26-10-2023
- Page Views:
- Downloads:
- Table of Contents
- Related Documents
-
Unified Platform
Automated Device Deployment
Configuration Examples
Document version: 5W105-20230608
Product Version: PLAT 2.0 (E0711)
Copyright © 2023 New H3C Technologies Co., Ltd. All rights reserved.
No part of this manual may be reproduced or transmitted in any form or by any means without prior written consent of New H3C Technologies Co., Ltd.
Except for the trademarks of New H3C Technologies Co., Ltd., any trademarks that may be mentioned in this document are the property of their respective owners.
The information in this document is subject to change without notice.
Example: Performing automated device deployment
Backing up device configuration
Viewing backup history records
Deploying device configuration
Restoring device configuration
Introduction
Automated device deployment enables Unified Platform (PLAT 2.0) to automatically back up and deploy incorporated devices in the system. The device configuration can be deployed immediately or as scheduled. The following tasks are supported:
· Back up device configuration—An operator can create backup plans as needed to back up the current running files and startup files of the device. Both manual and auto backup are supported.
· Deploy device configuration—An operator can use a configuration template as the startup or running configuration to deploy one or multiple devices in bulk. The operator can also restore the current device configuration to a specific historical configuration on the device configuration page.
Usage guidelines
Application scenarios
Back up and deploy device configuration on Unified Platform (PLAT 2.0).
Prerequisites
· An operator with automated management privileges can log in to the all-domain interface of Unified Platform (PLAT 2.0).
· The system can use correct SNMP read and write parameters to incorporate devices.
Example: Performing automated device deployment
The system administrator of a company wants to deploy settings to a device incorporated in the system, but is concerned that it might affect other operations after the settings are applied. Therefore, the administrator plans to back up the original device settings before deploying the new settings. The following are deployment requirements:
1. Back up the configuration file of the device.
2. Issue the deployment task for the device. (Take configuration segment deployment as an example.)
3. Compare device configurations before and after deployment.
4. Restore the current configuration of the device to a specific historical configuration.
|
|
NOTE: This example uses Unified Platform of PLAT 2.0 E0711 as an example. |
Backing up device configuration
Manual backup
Two methods are available for manual backup.
· Method 1
a. On the top navigation bar, click the Automation tab. From the left navigation pane, select Configuration Deployment > Configuration Center.
Figure 1 Configuration Center page
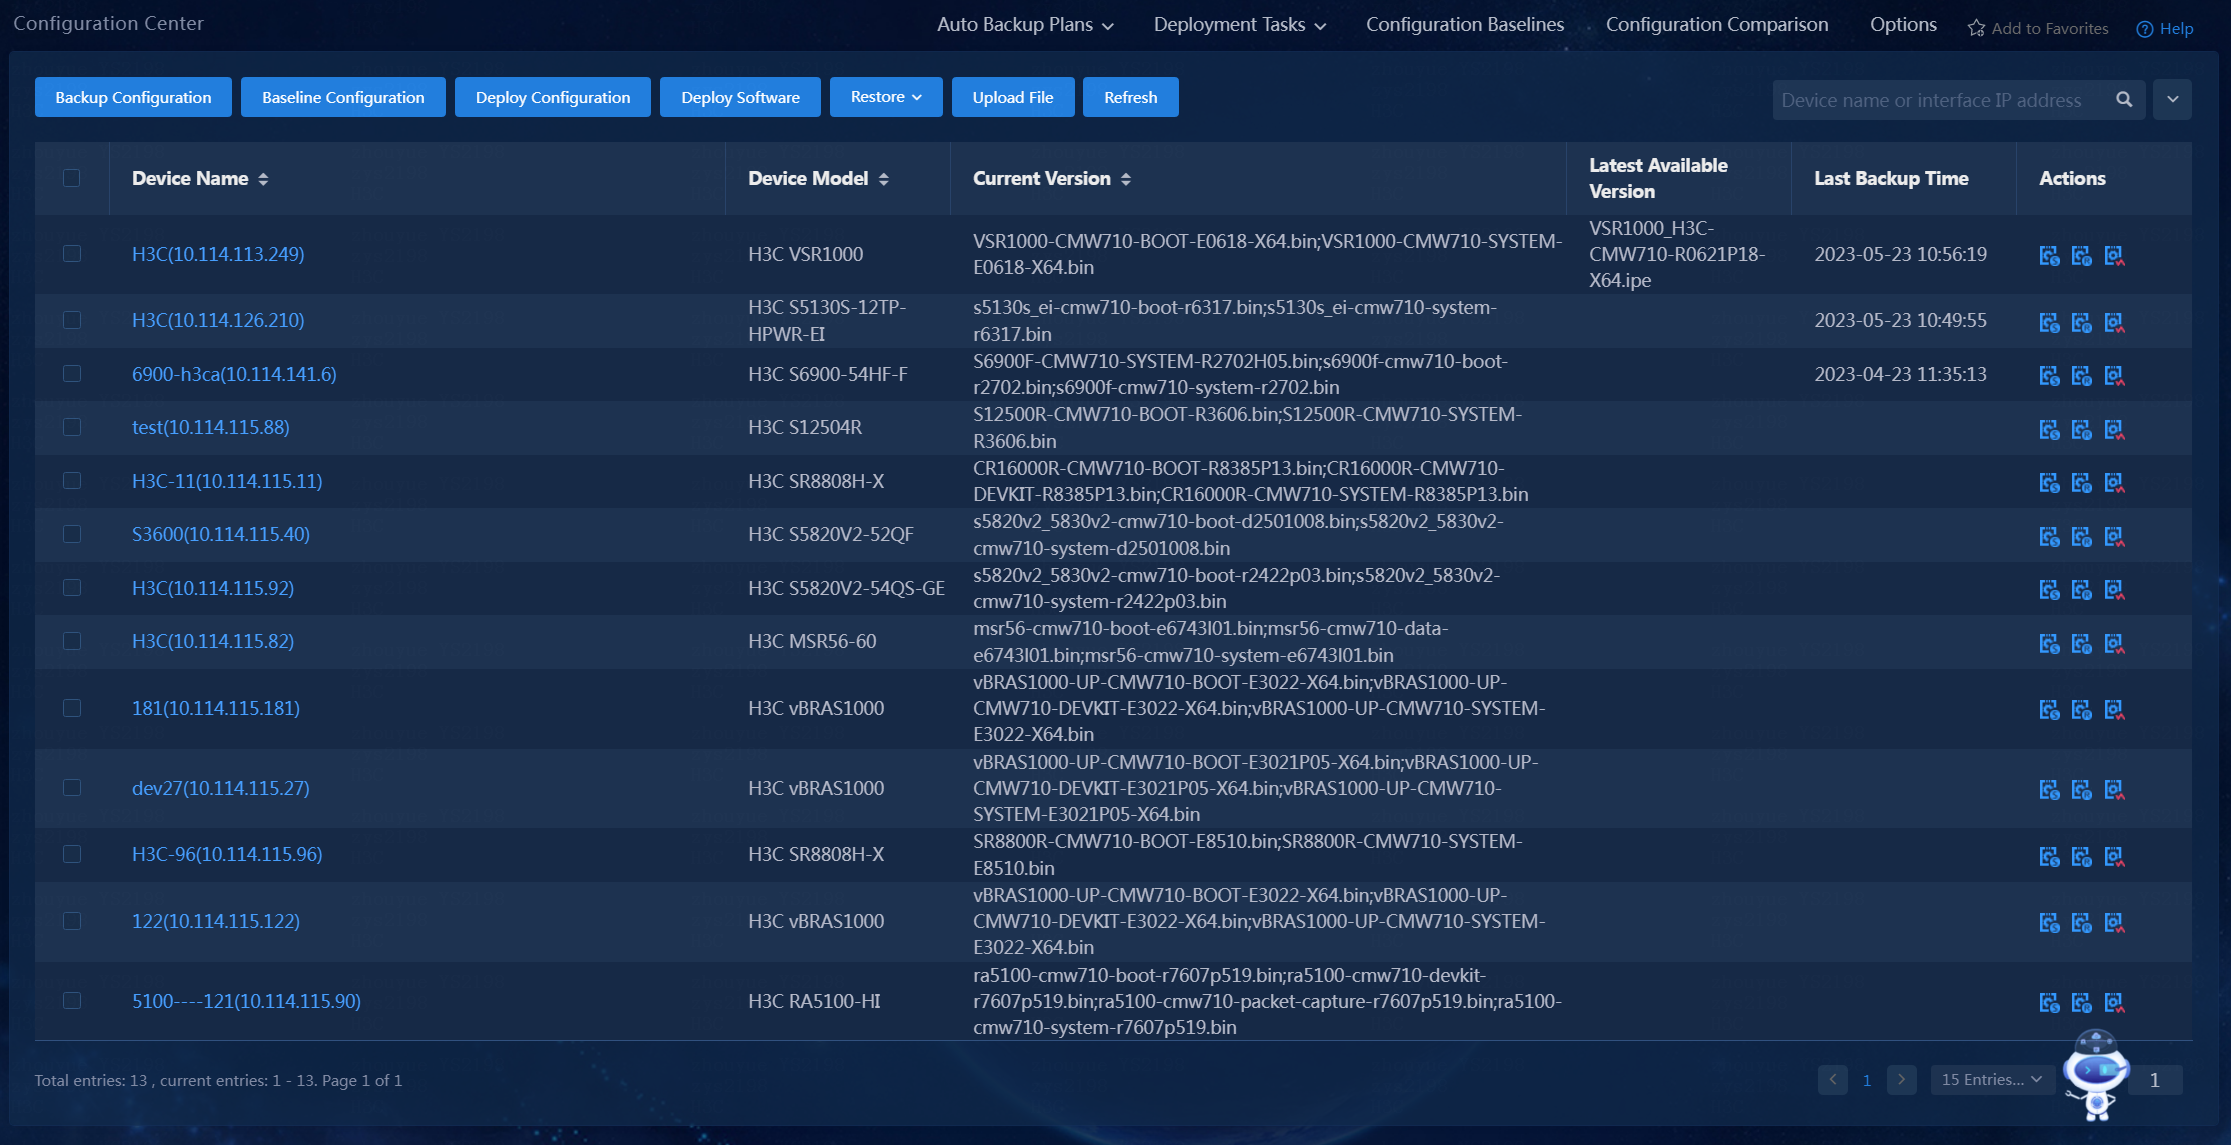
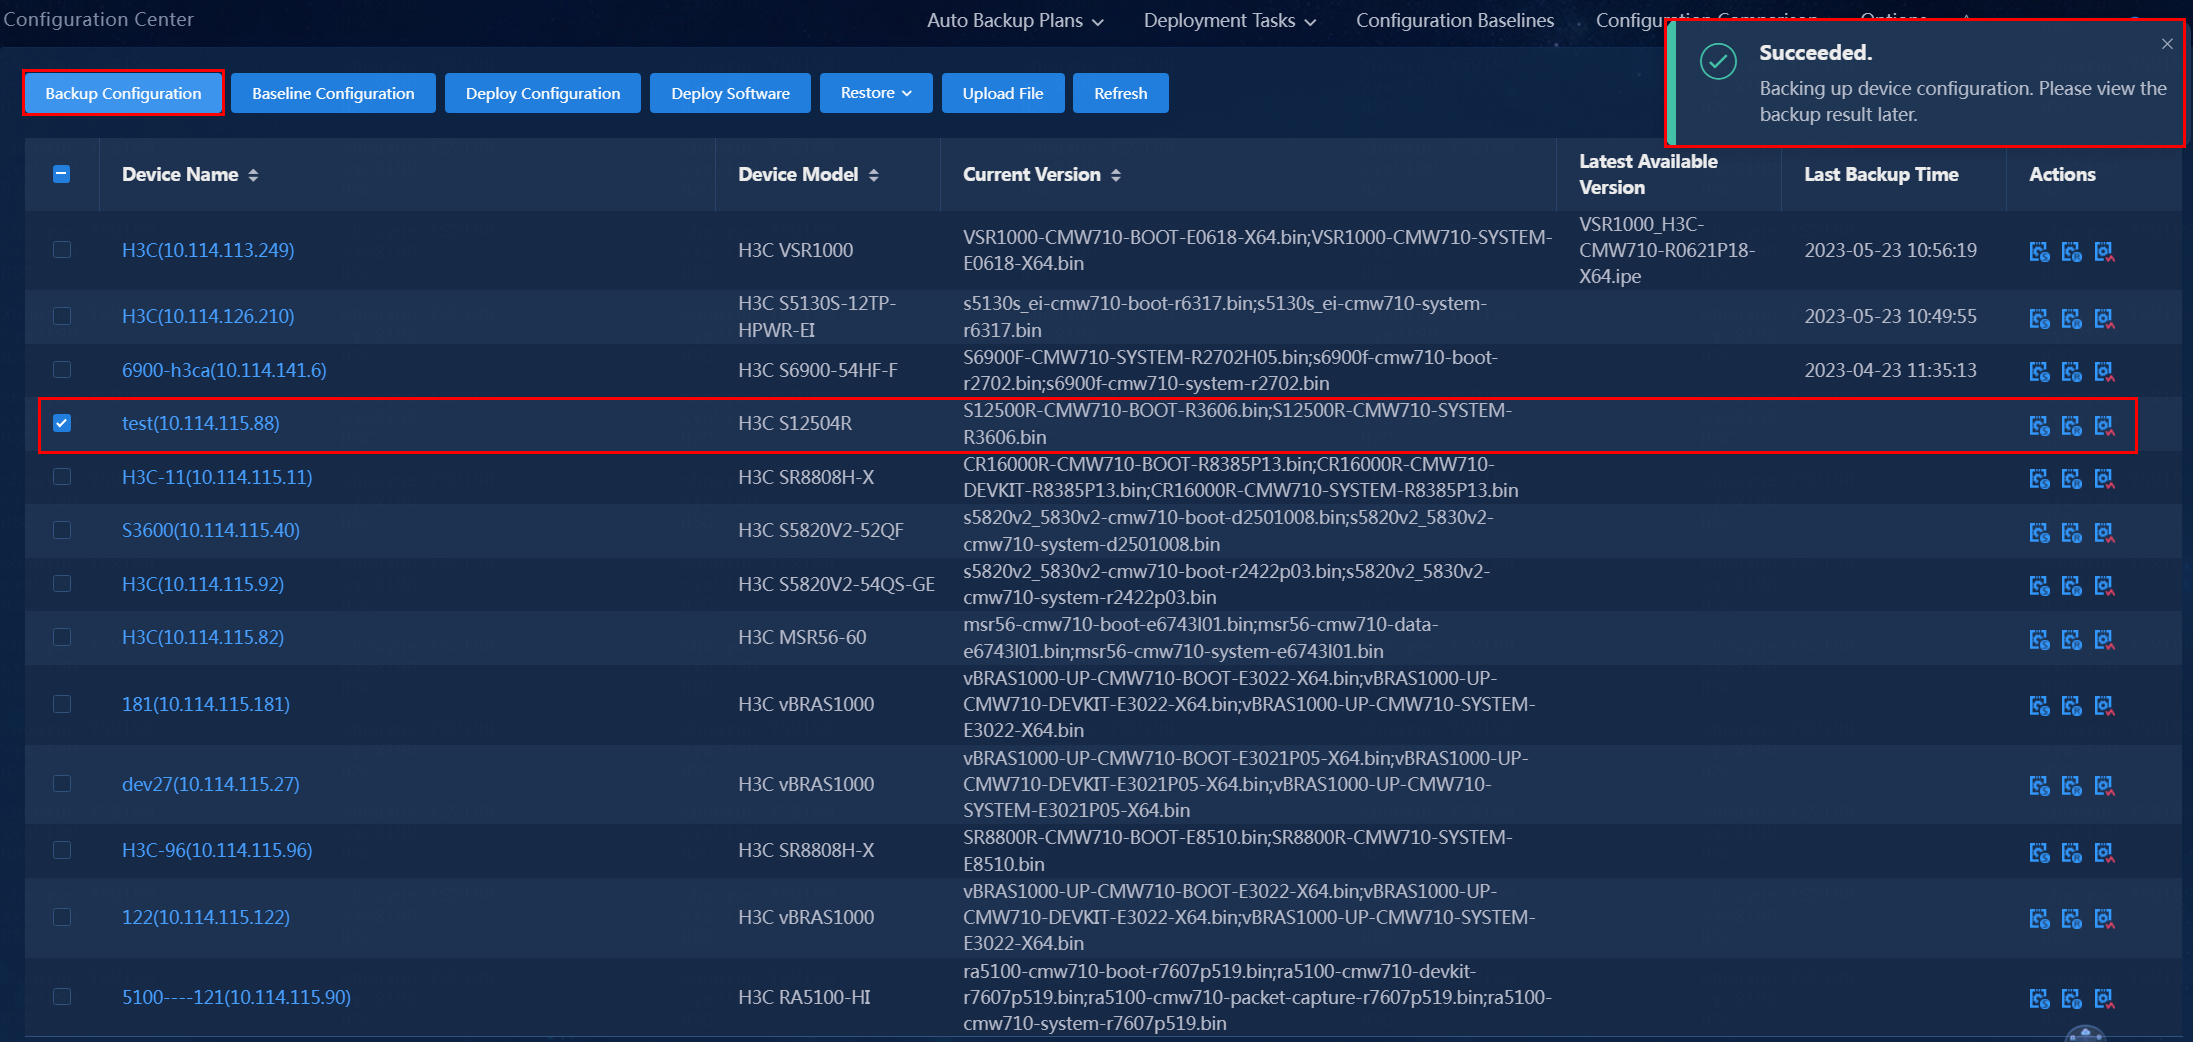
b. Select one or multiple devices.
c. Click Backup Configuration.
Figure 2 Backing up device configuration
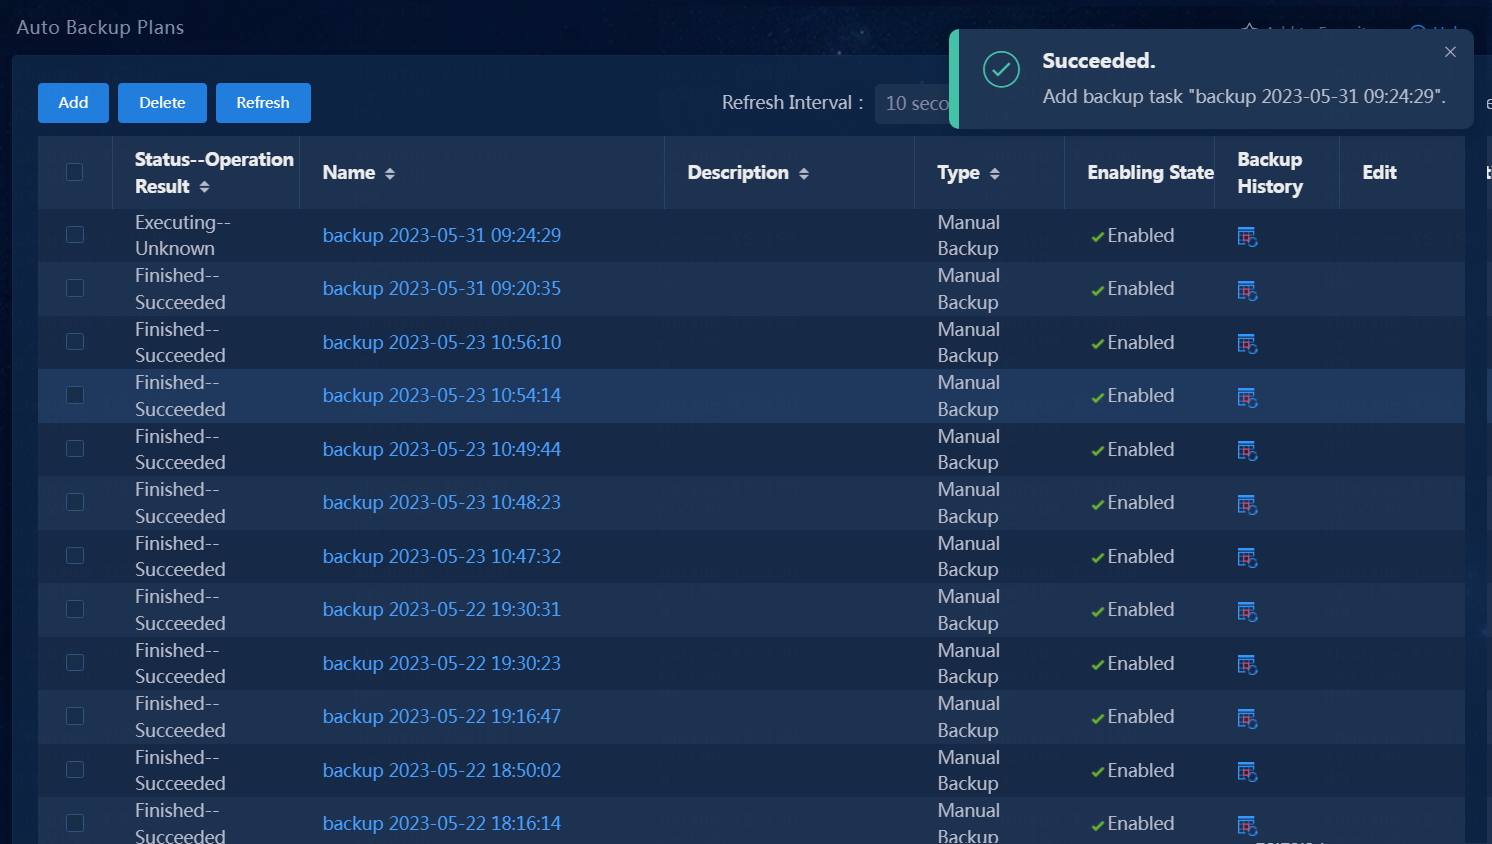
d. On the top navigation bar, click the Automation tab. From the left navigation pane, select Configuration Options > Auto Backup Plans. You can view the backup result in the list.
Figure 3 Auto backup plan list

· Method 2
a. On the top navigation bar, click the Automation tab. From the left navigation pane, select Configuration Options > Auto Backup Plans.
b. Click Add. By default, the backup type is Manual Backup.
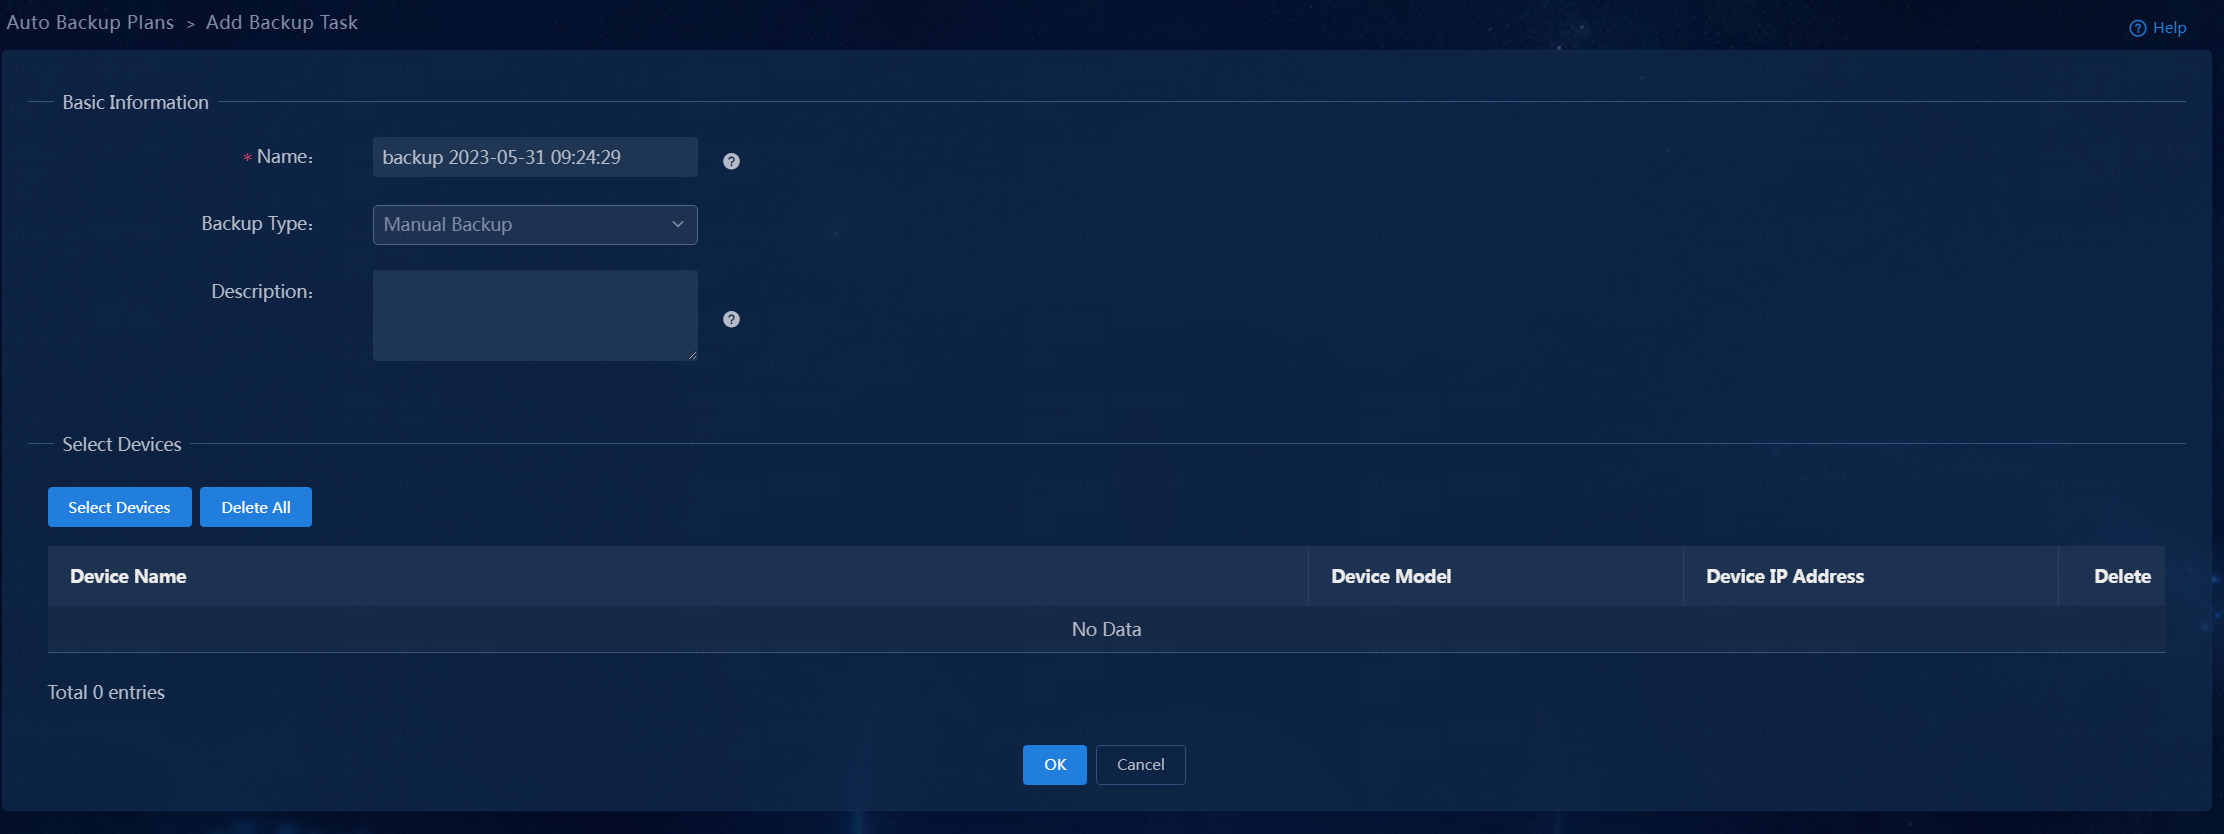
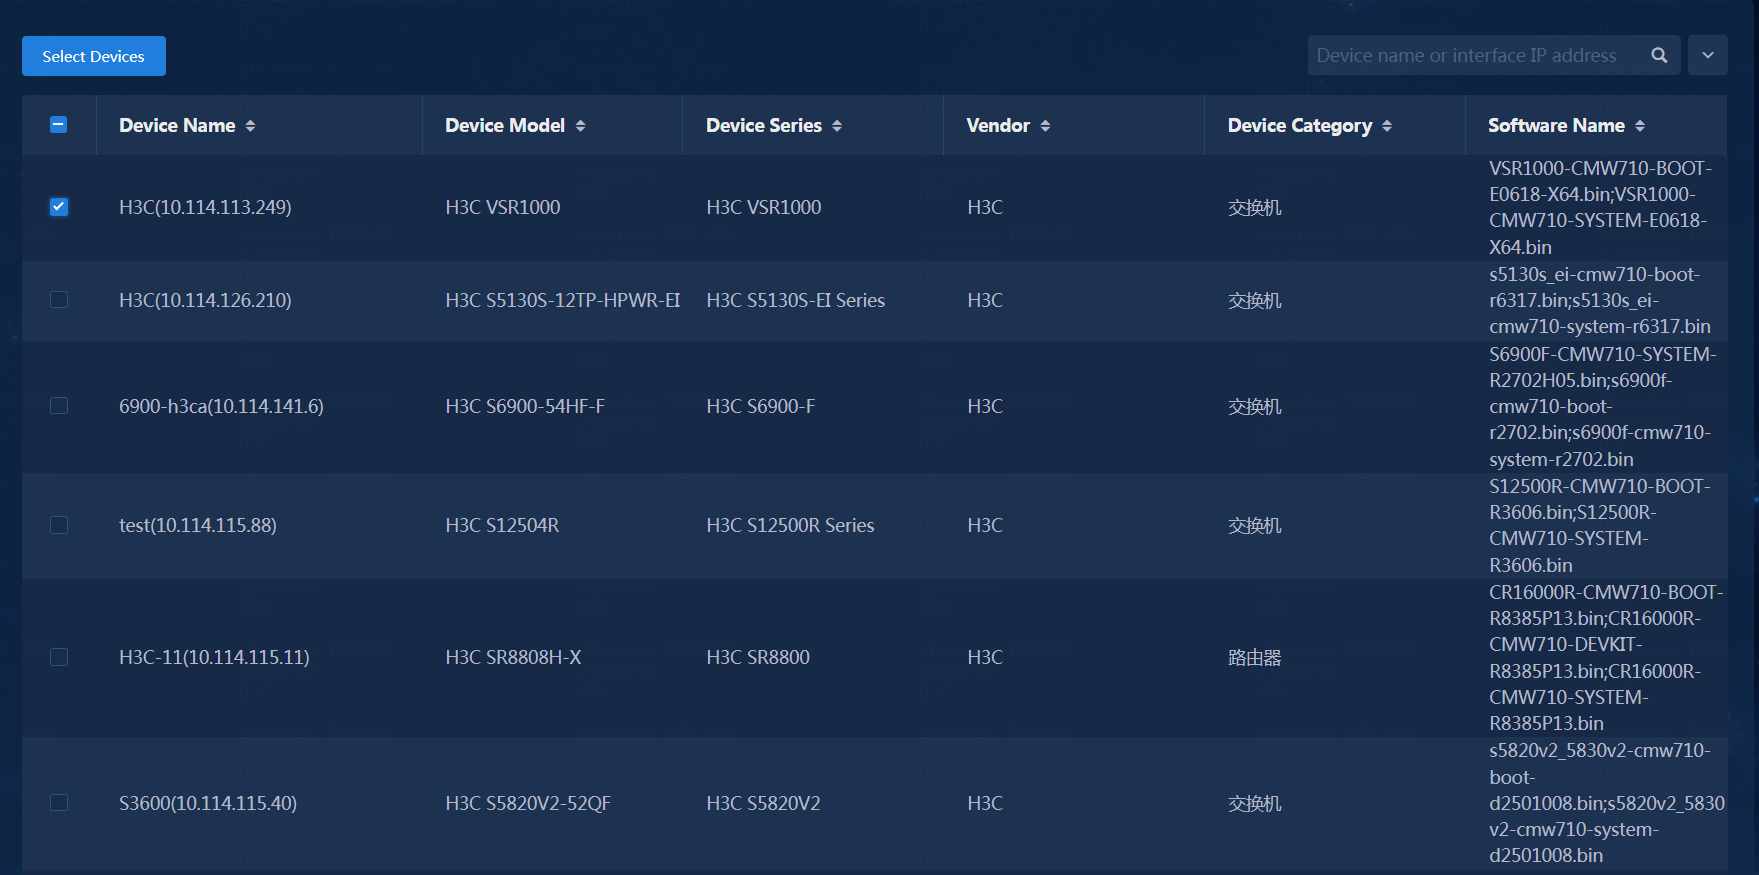
c. Click Select Devices. On the window that opens, select the devices as needed, and click Select Devices.
Figure 5 Selecting devices
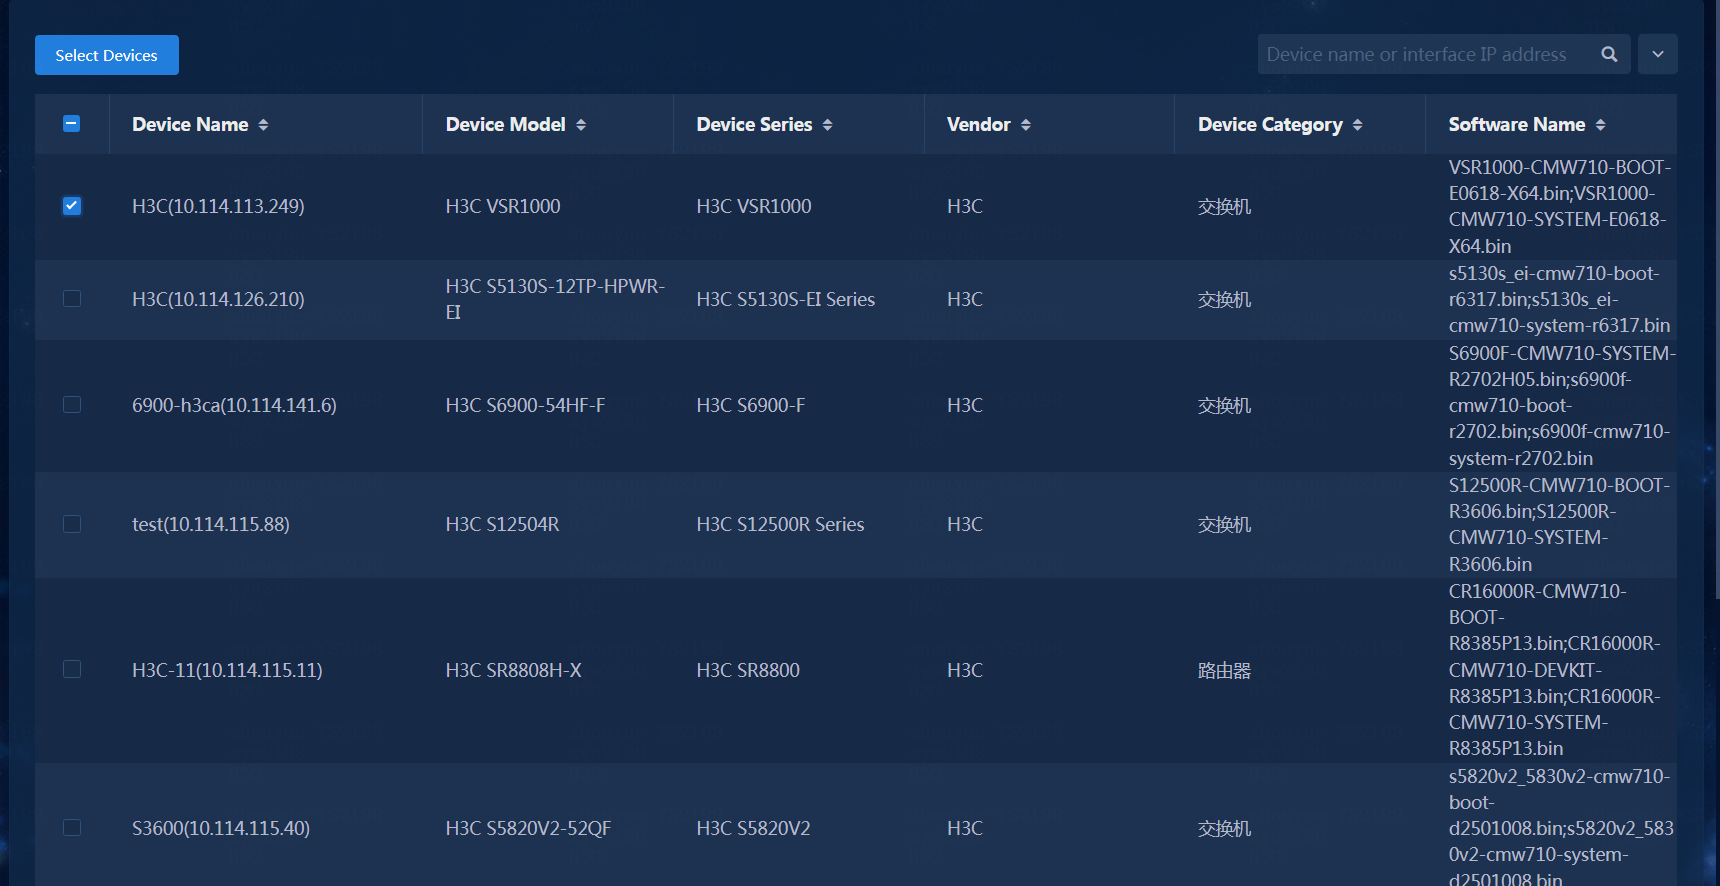
The selected devices are displayed on the Add Backup Task page.
Figure 6 Displaying selected devices
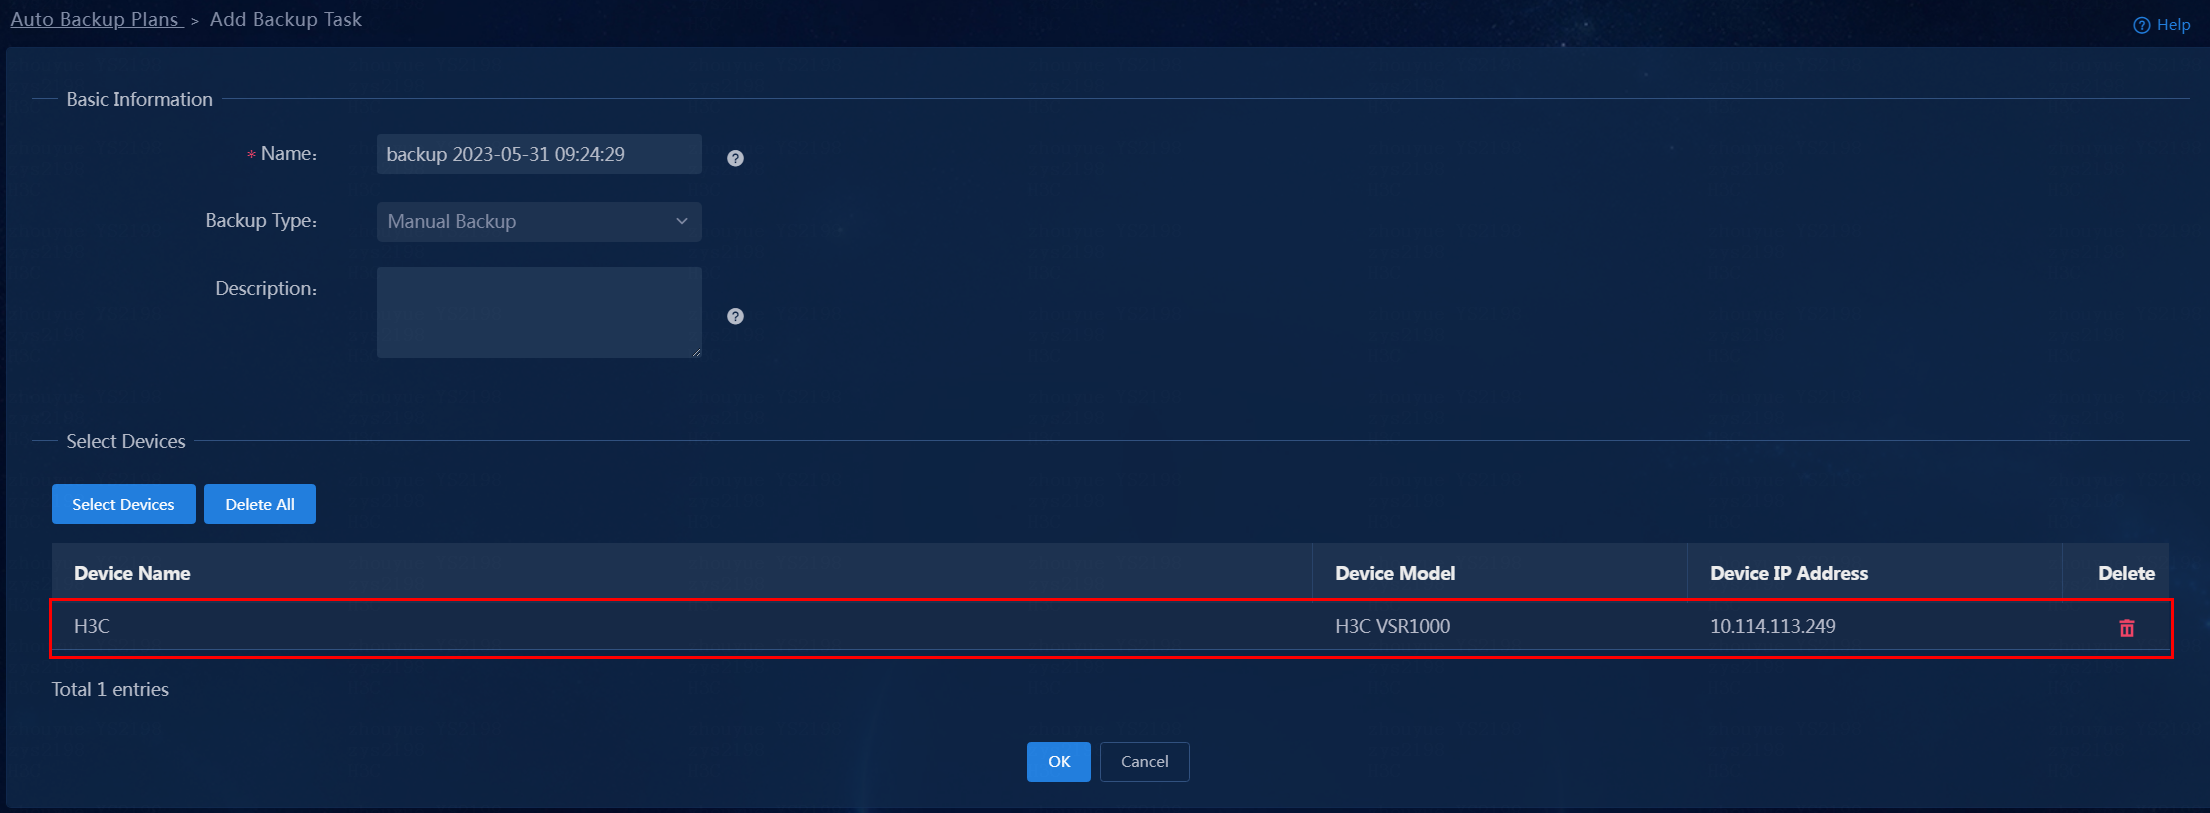
d. Click OK.
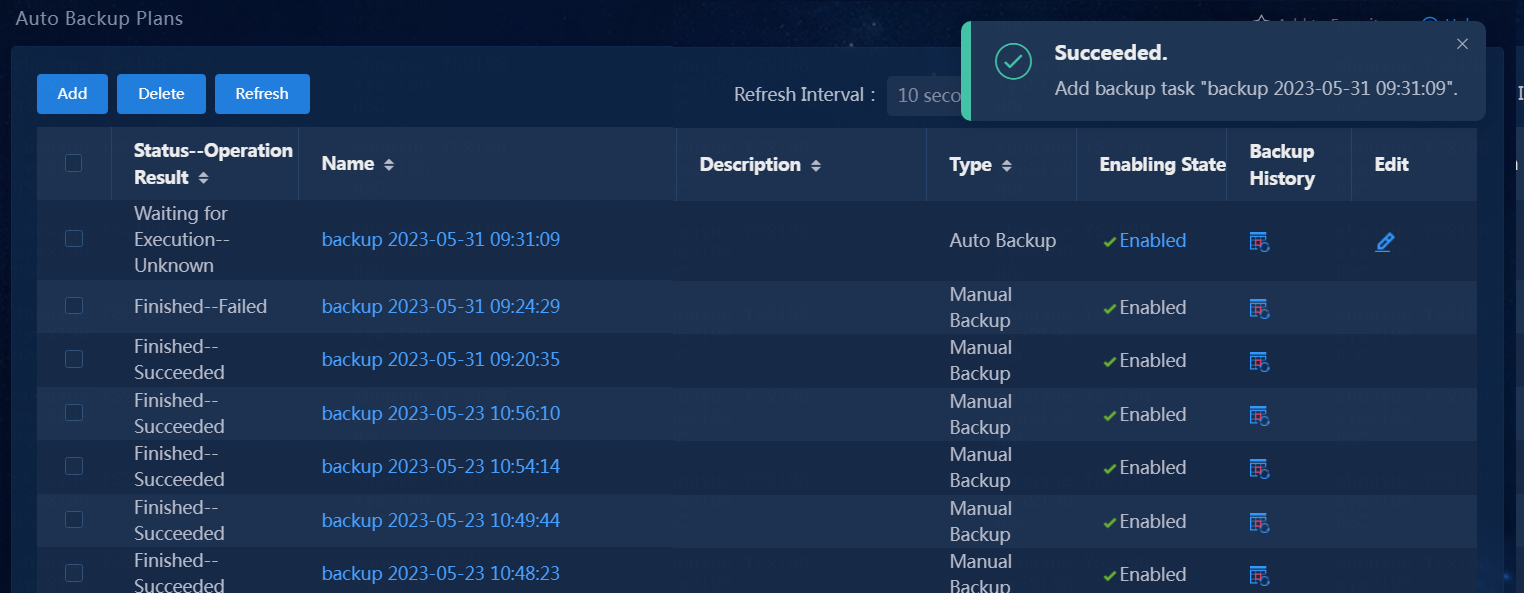
If the request to add the backup task is successfully issued, the page will display a corresponding message and the backup task will be displayed in the auto backup plan list.
Auto backup
An operator can add scheduled backup plans as needed.
1. On the top navigation bar, click the Automation tab. From the left navigation pane, select Configuration Options > Auto Backup Plans.
2. Click Add. Select Auto Backup as the backup type.
Figure 8 Adding an auto backup task
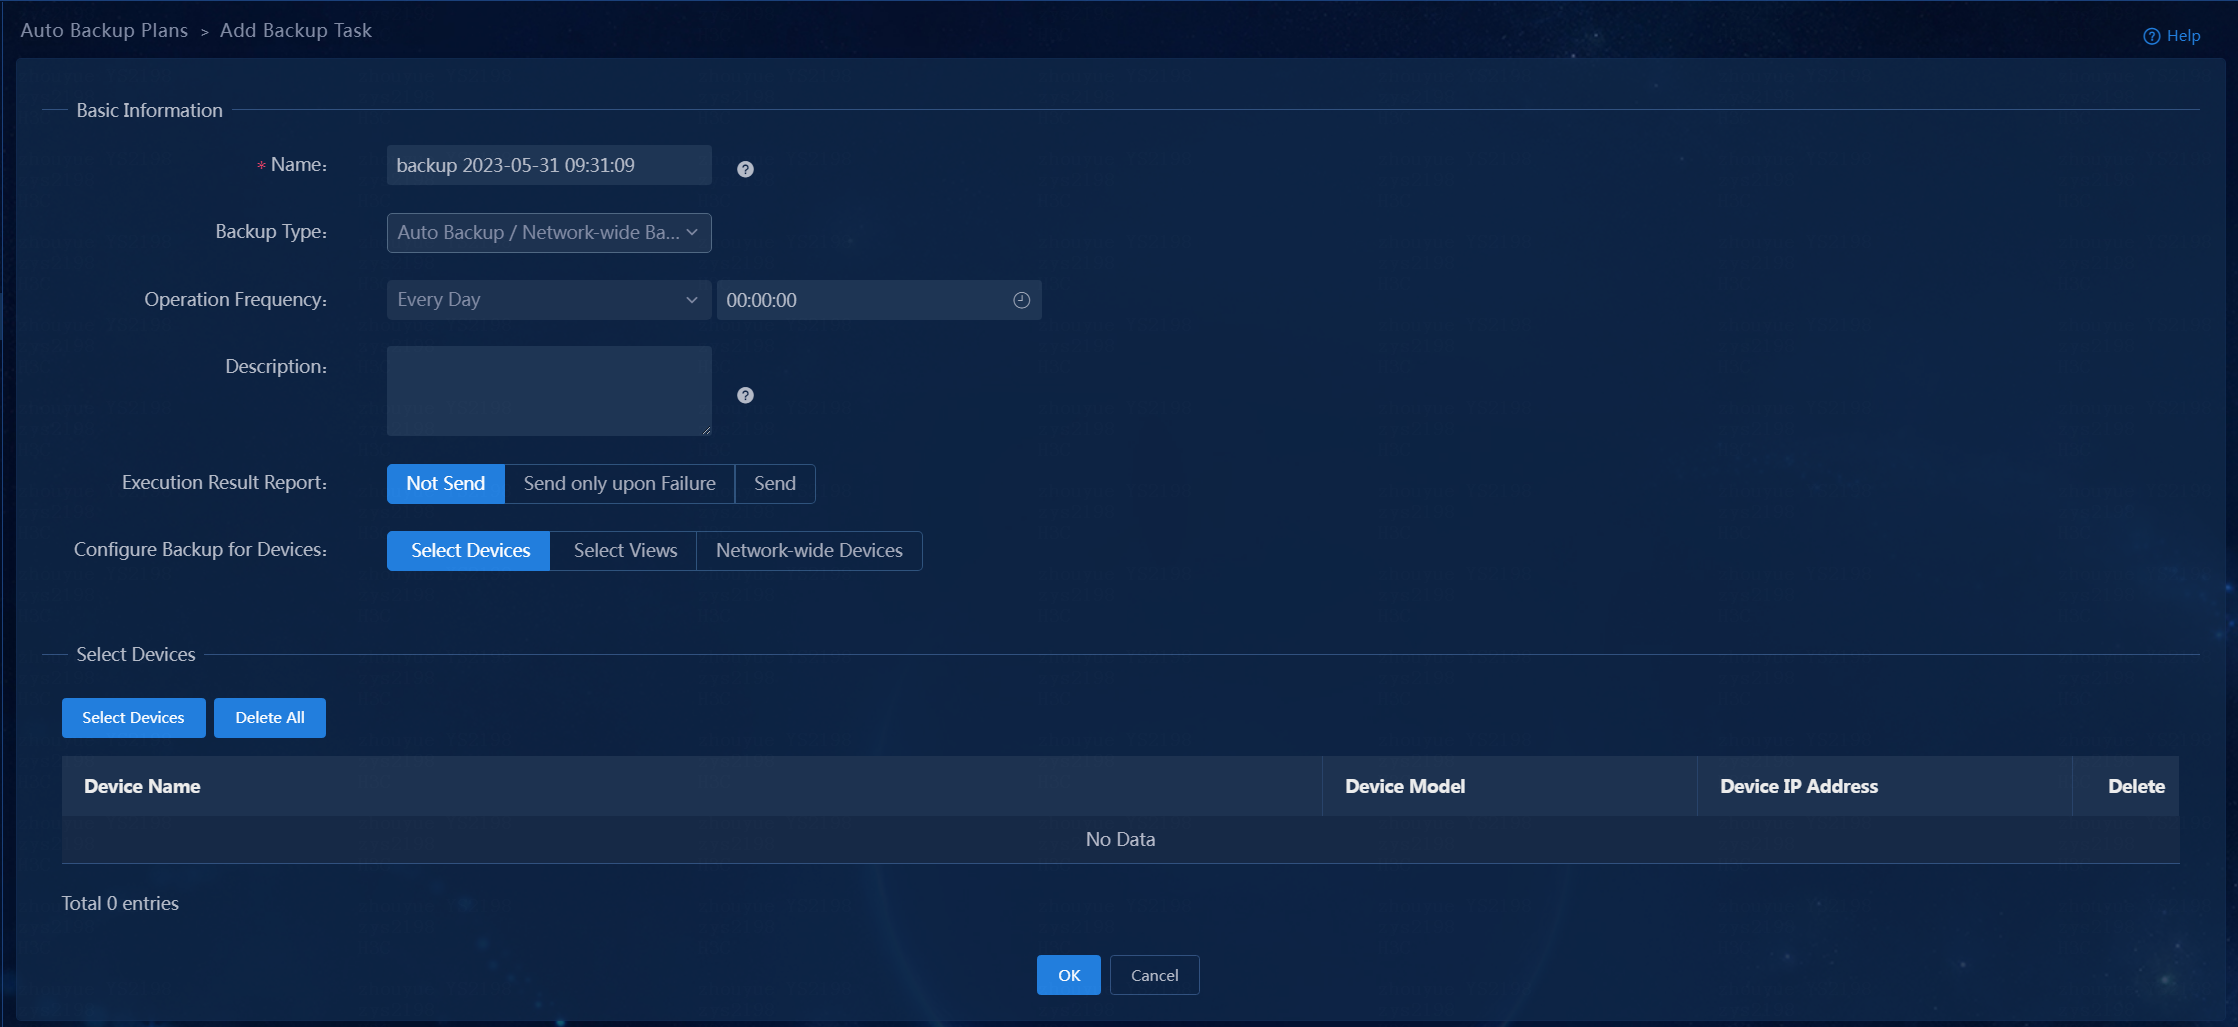
3. Set the operation frequency for backup execution:
Select the frequency from the first drop-down list, including Every Day, Every Week, and Every Month.
Select the time from the second drop-down list.
4. Click Select Devices. On the window that opens, select the devices as needed, and click Select Devices.
The selected devices will be displayed on the page.
Figure 9 Selecting devices
5. Click OK. If the request to add the auto backup task is successfully issued, the page will display a corresponding message and the auto backup task will be displayed in the auto backup plan list. You can edit an auto backup task, as shown in Figure 10.
Viewing backup history records
1. On the top navigation bar, click the Automation tab. From the left navigation pane, select Configuration Options > Backup History Records.
Figure 11 Displaying backup history records
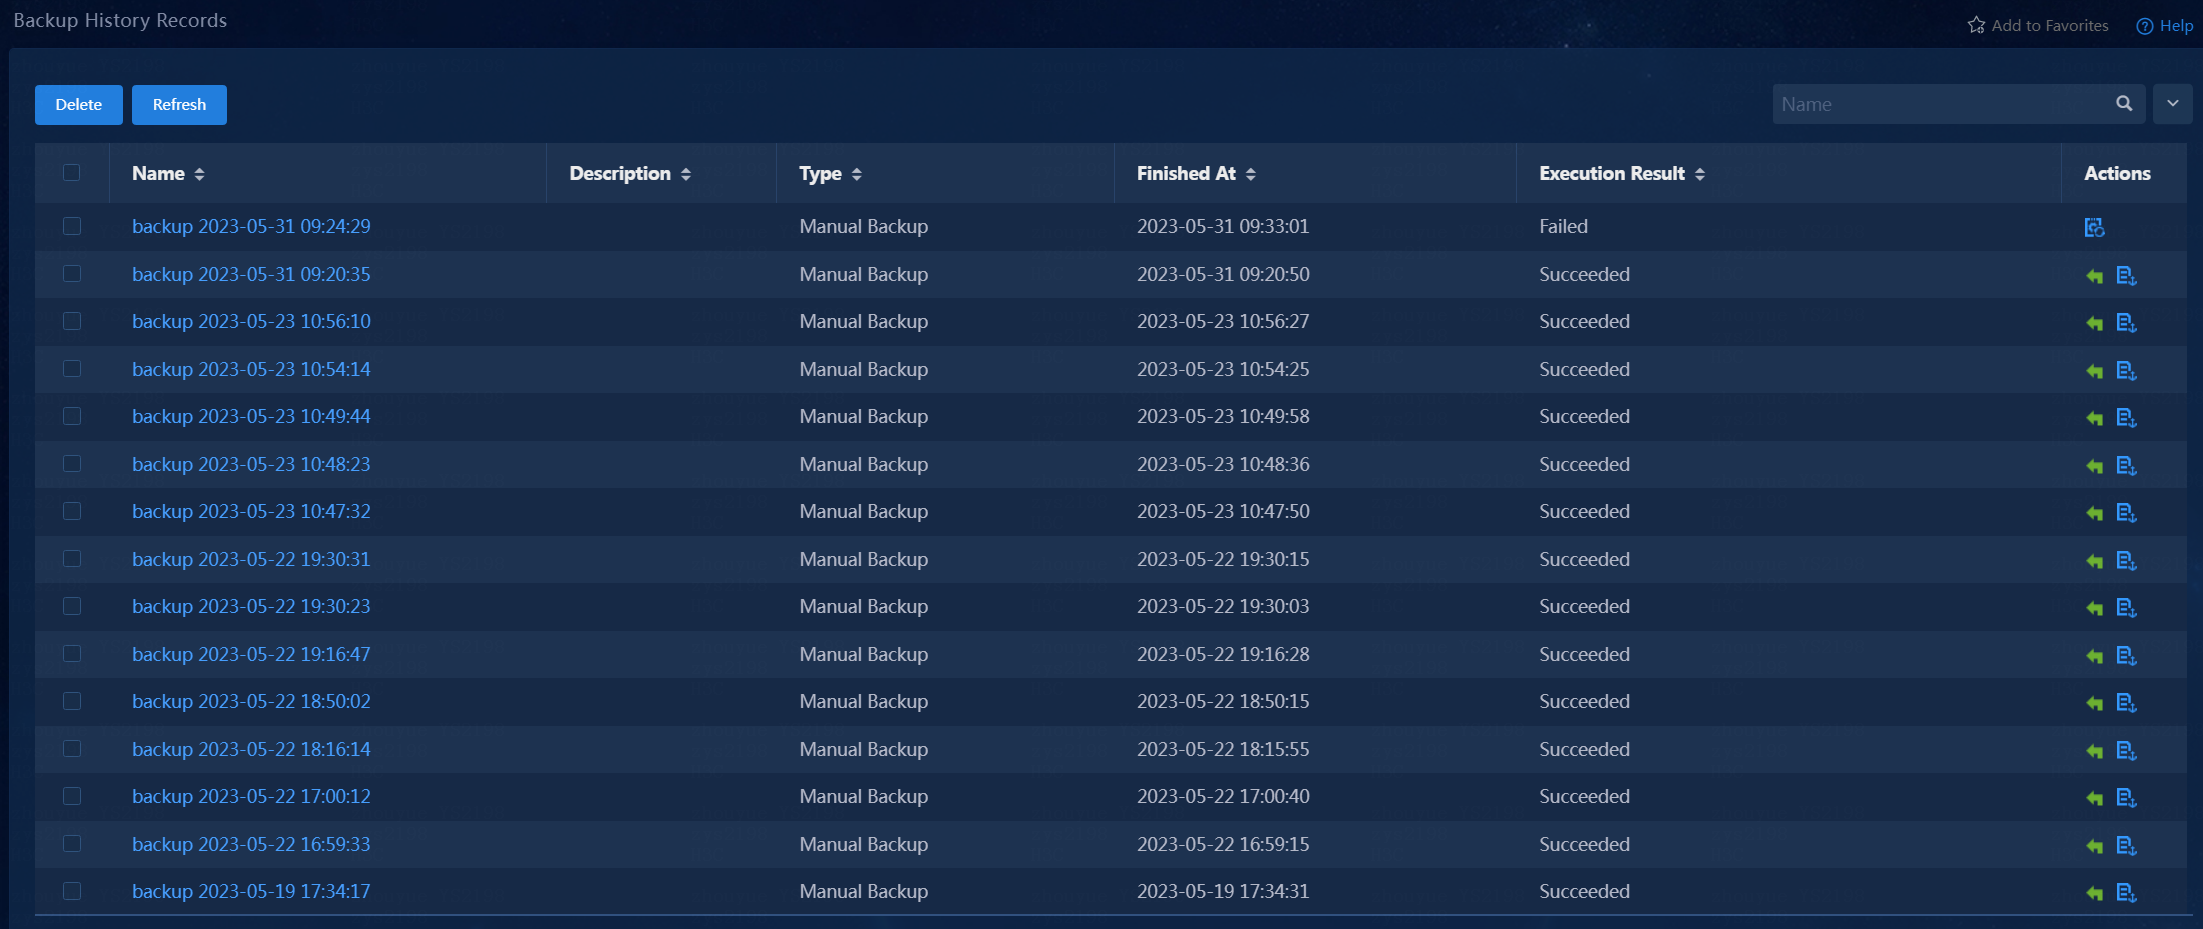
2. To view the details of a history backup task, click the corresponding name link in the Name column.
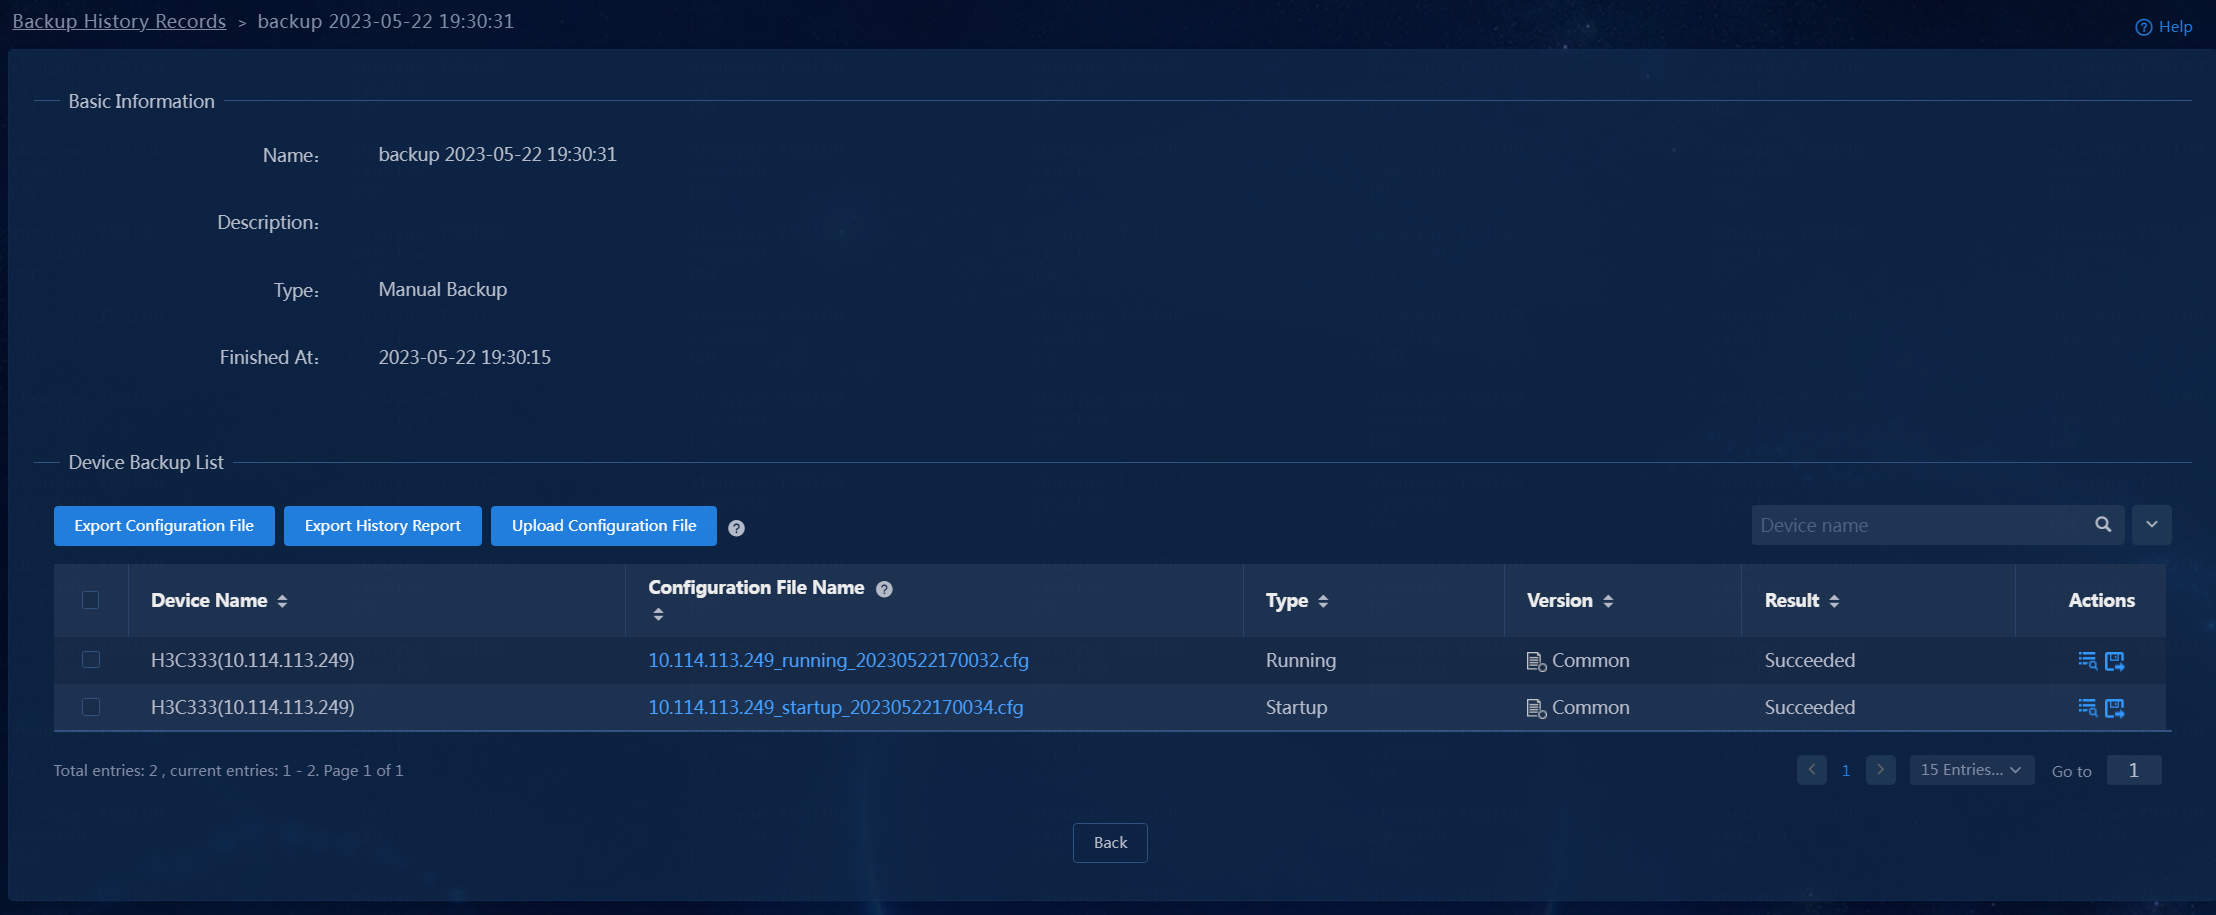
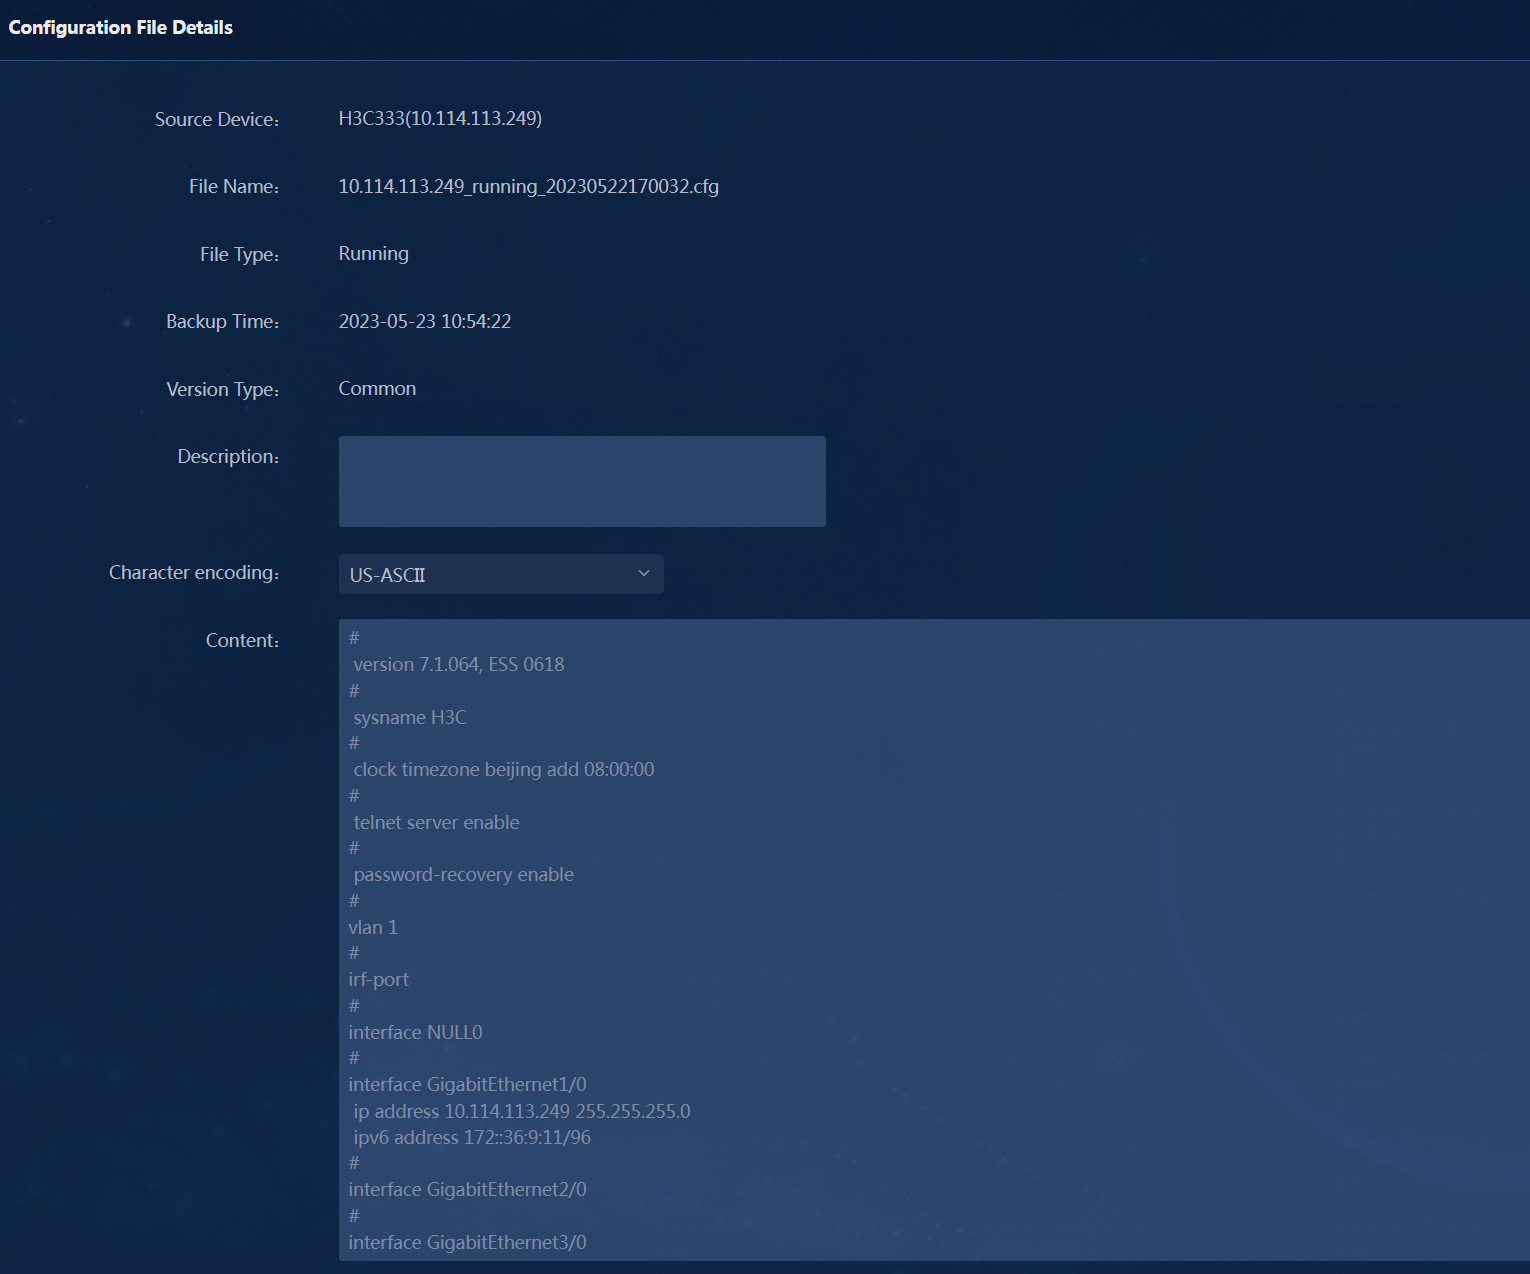
3. To view the details of a configuration file, click the name link in the Configuration File Name column.
Figure 13 Configuration file details
4. To view the detailed steps for backing up a
device, click ![]() in the Actions column for a device on the backup task
details page.
in the Actions column for a device on the backup task
details page.
Figure 14 Detailed backup steps

5. On the backup task details page, click ![]() in the
Actions column for a device to enter the Add Configuration Template
page. You can edit the configuration template on this page.
in the
Actions column for a device to enter the Add Configuration Template
page. You can edit the configuration template on this page.
Figure 15 Add Configuration Template page
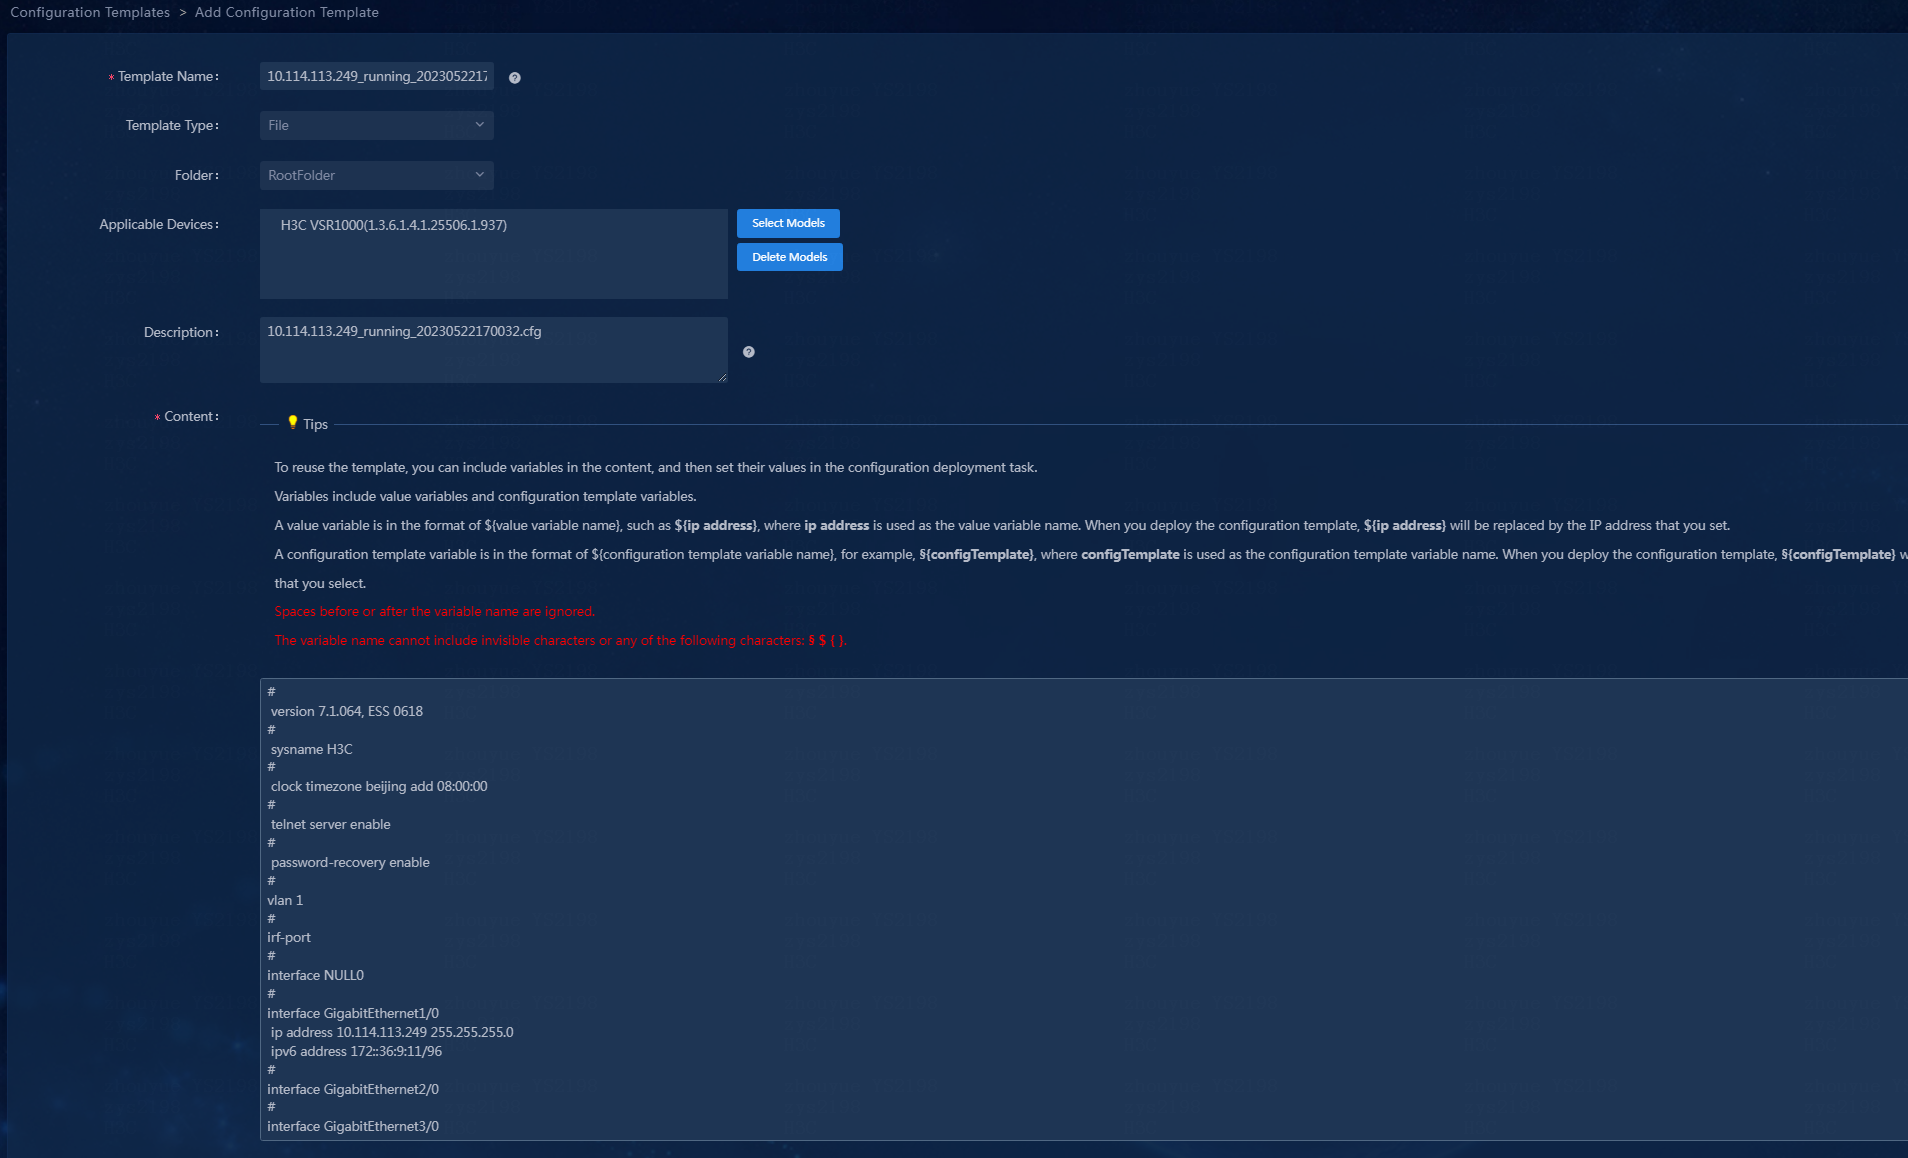
6. Click OK. The Configuration Templates page will display a message and the newly added template.
Deploying device configuration
The system deploys device configuration using various configuration templates. The system supports configuration templates for configuration segments, configuration files, and CLI scripts. An operator can add a new configuration template or select an existing configuration template to deploy device configuration.
The following uses a new configuration template of the segment type to deploy device configuration as an example.
Creating a configuration template
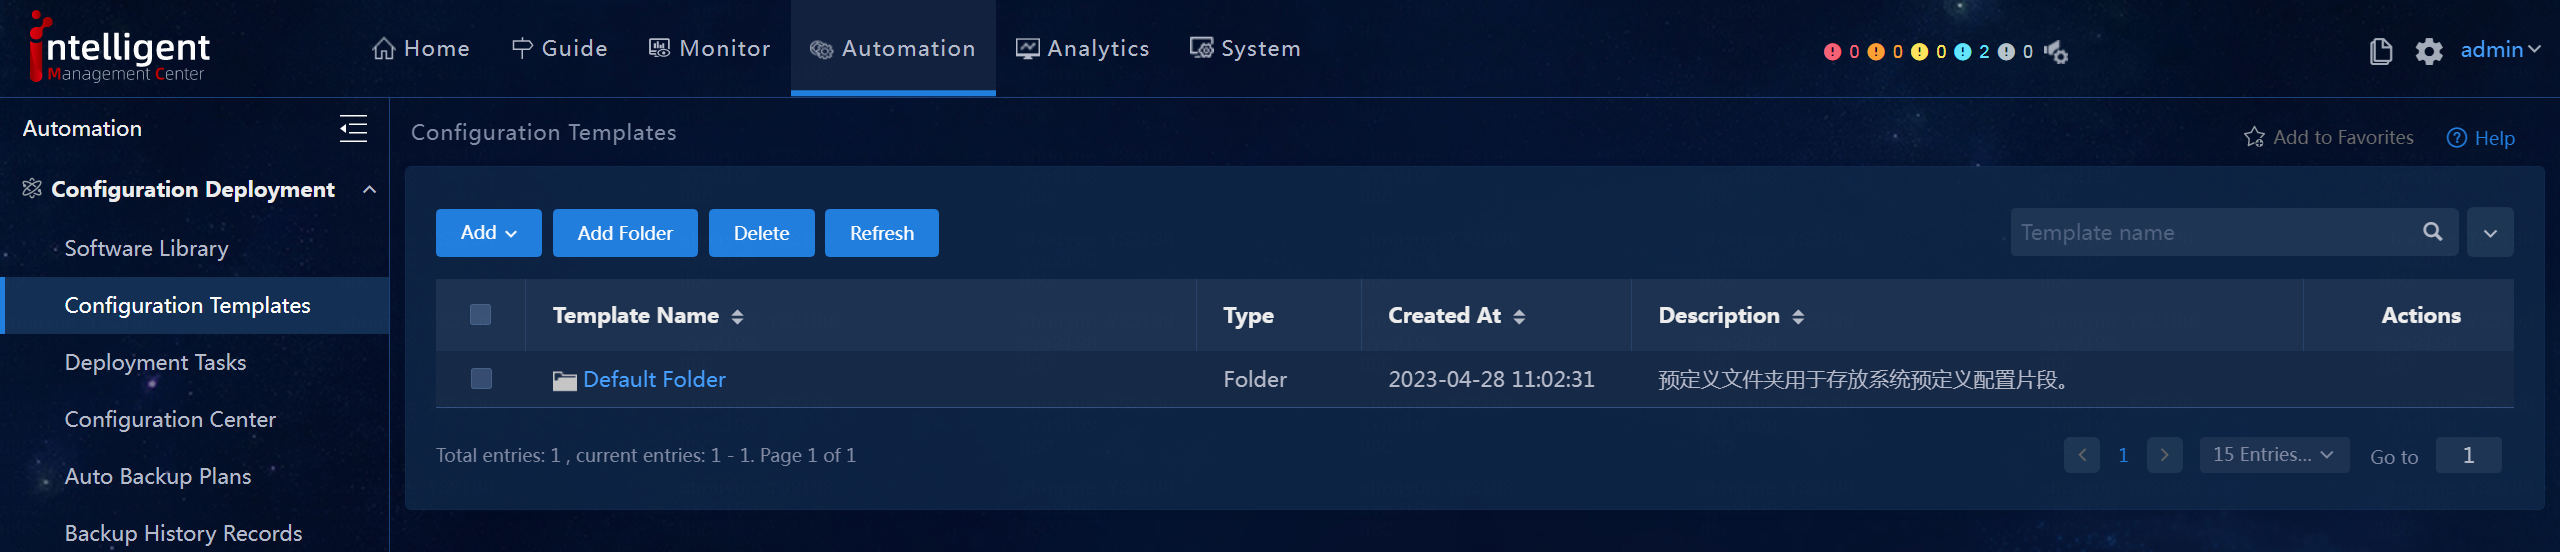
1. On the top navigation bar, click the Automation tab. From the left navigation pane, select Configuration Deployment > Configuration Templates.
2. Click Add, and then select Manually Add from the drop-down list.
Figure 16 Configuration templates

3. On the Add Configuration Template page, select Segment for the Template Type field.
4. Enter the configuration segments to be deployed in the Content field.
5. Click OK. The newly added configuration segments are displayed in the corresponding folder.
Figure 17 Configuration templates
Configuring device deployment tasks
Three methods are available for entering the Deploy Device Configuration page and deploy device configuration tasks.
· Method 1
a. On the top navigation bar, click the Automation
tab. From the left navigation pane, select Configuration Deployment >
Configuration Templates. Then, click ![]() in the Actions
column for a configuration template.
in the Actions
column for a configuration template.
b. Click Select Devices.
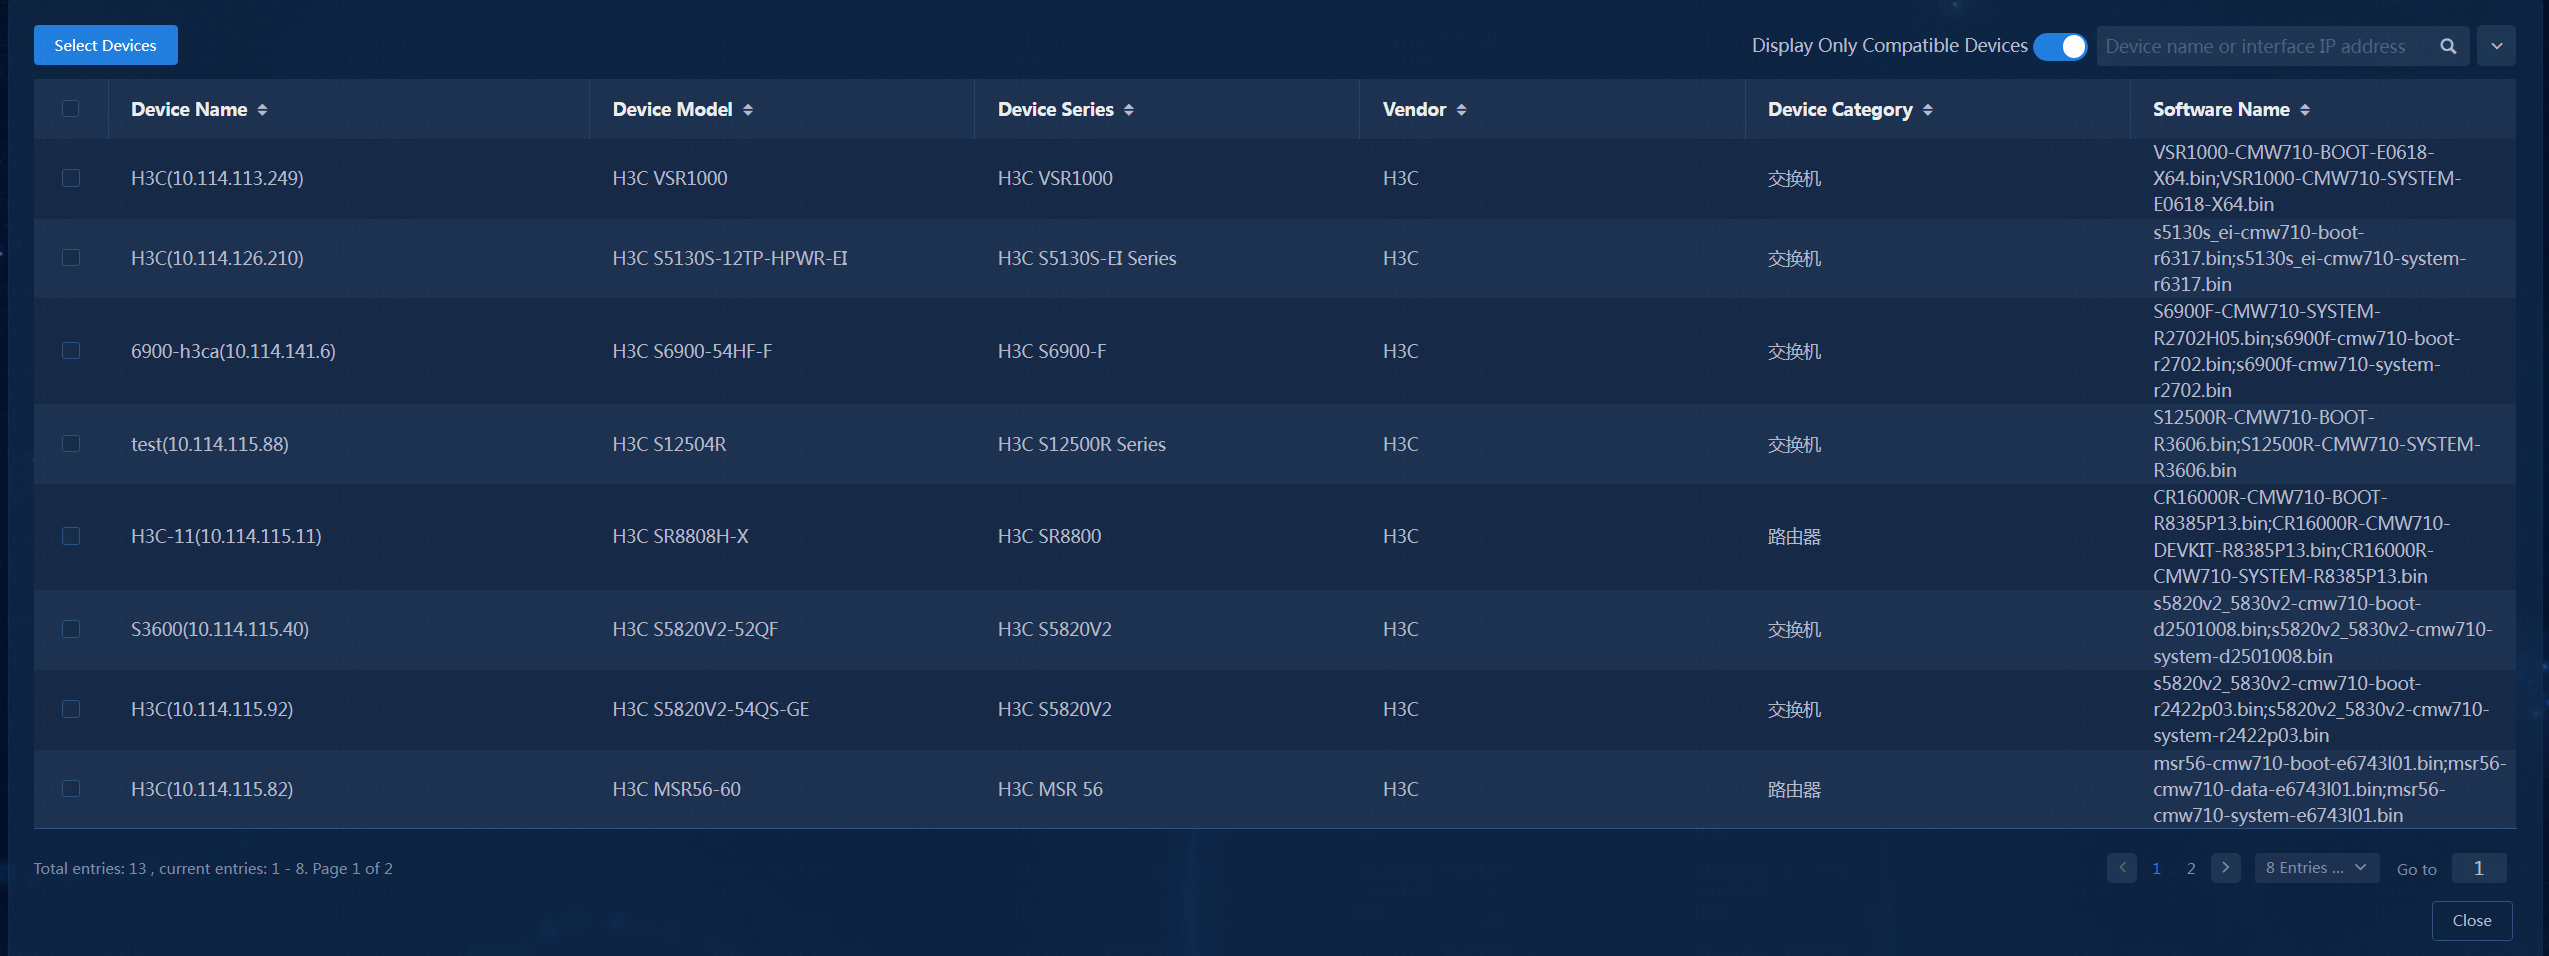
c. On the window that opens, select the devices as needed, and click Select Devices.
Figure 18 Selecting devices for deployment
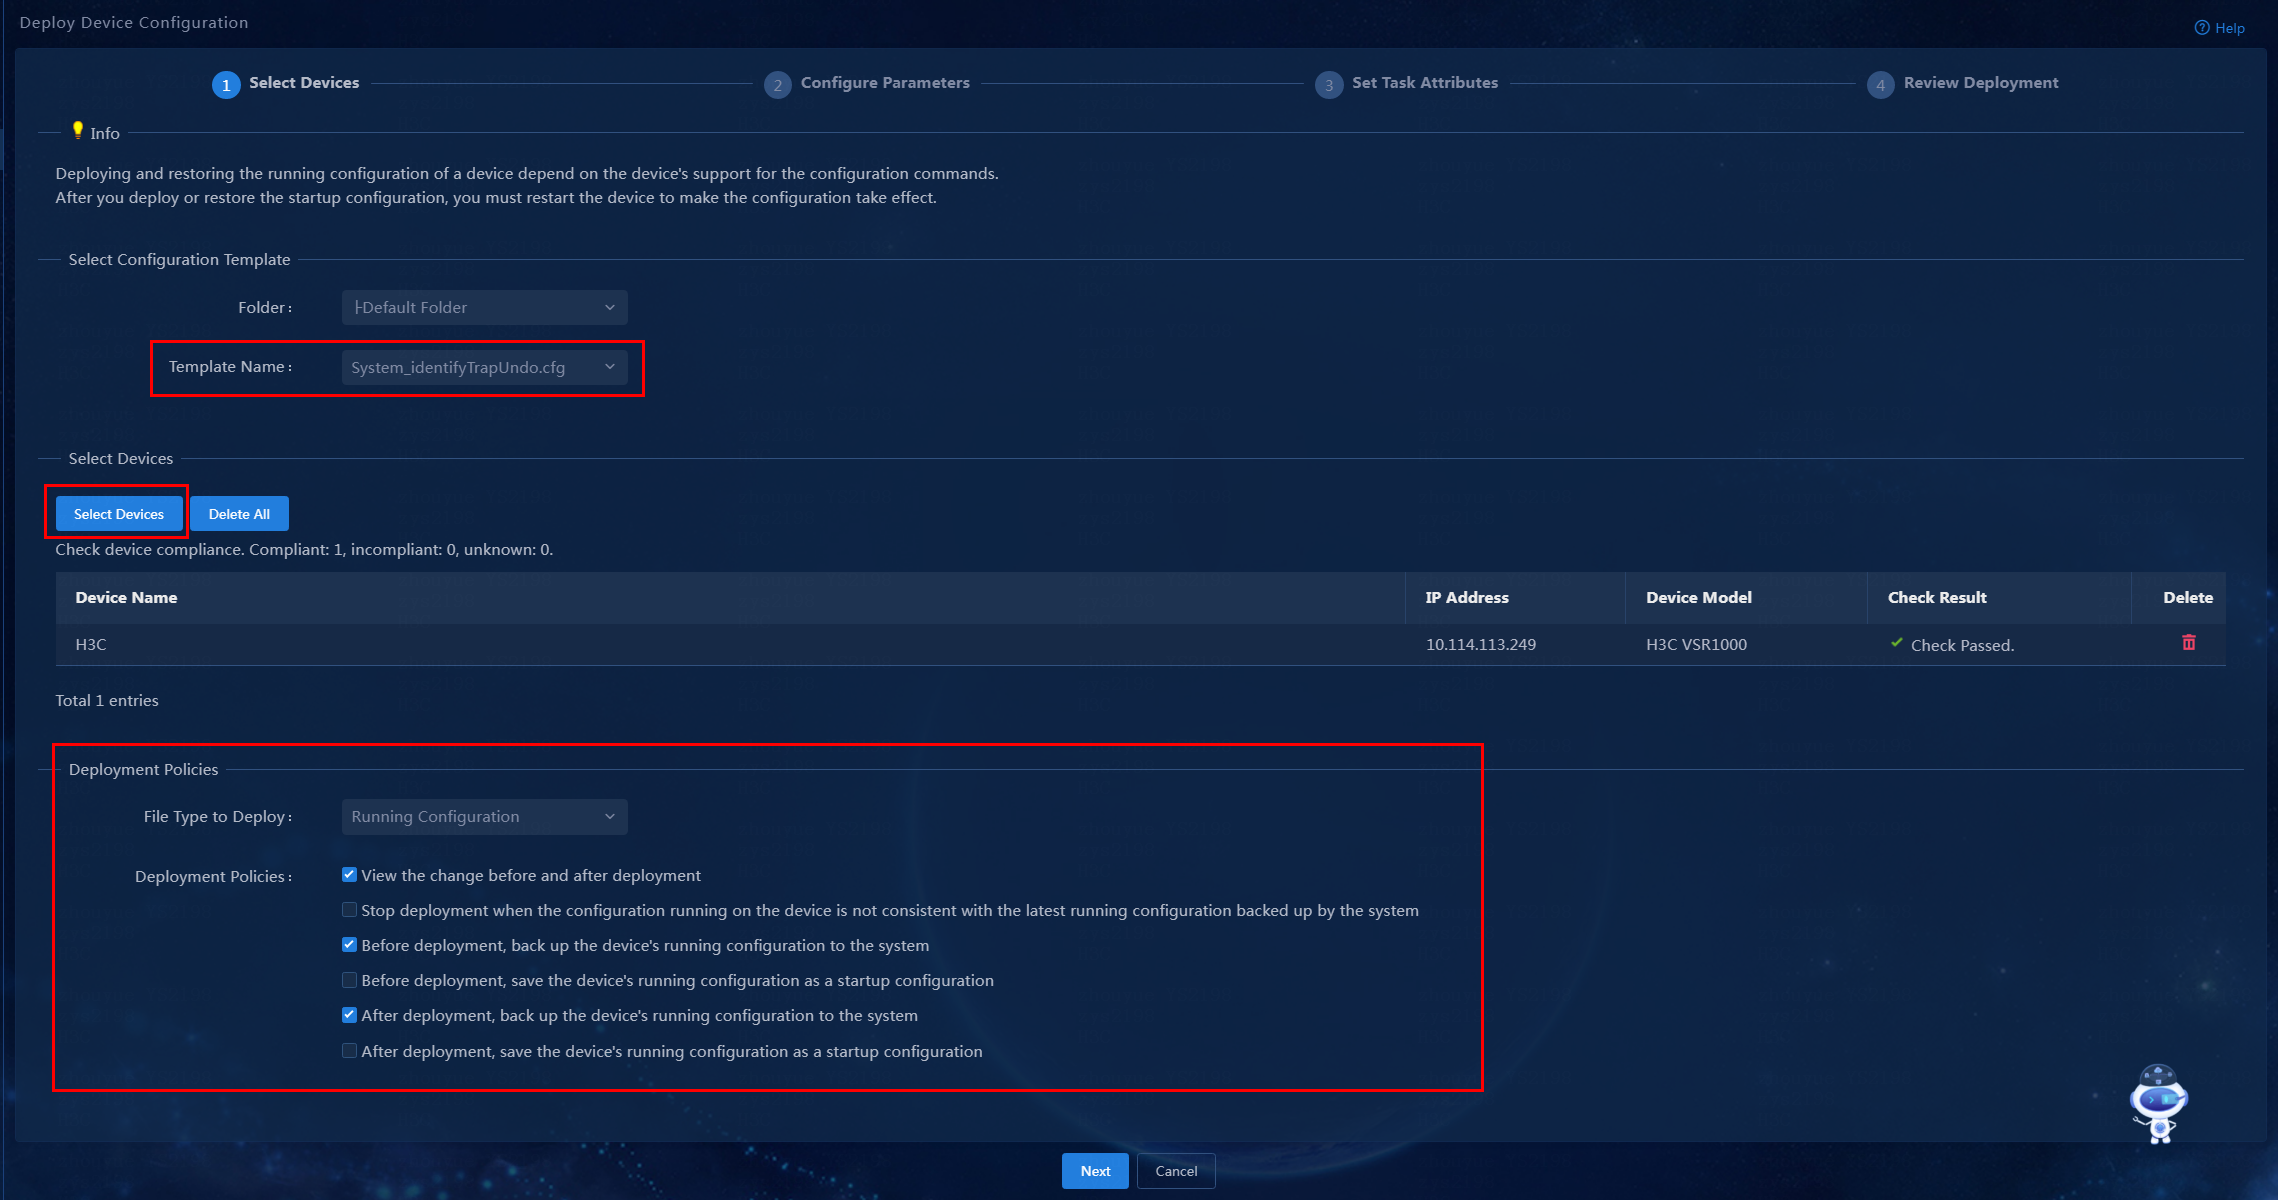
d. On the Deploy Device Configuration page, select deployment policies. Click Next.
Figure 19 Deploying device configuration
e. On the Configure Parameters page, configure parameters if the selected template has variables. If the selected template does not have variables, directly enter the Set Task Attributes page. Click Next.
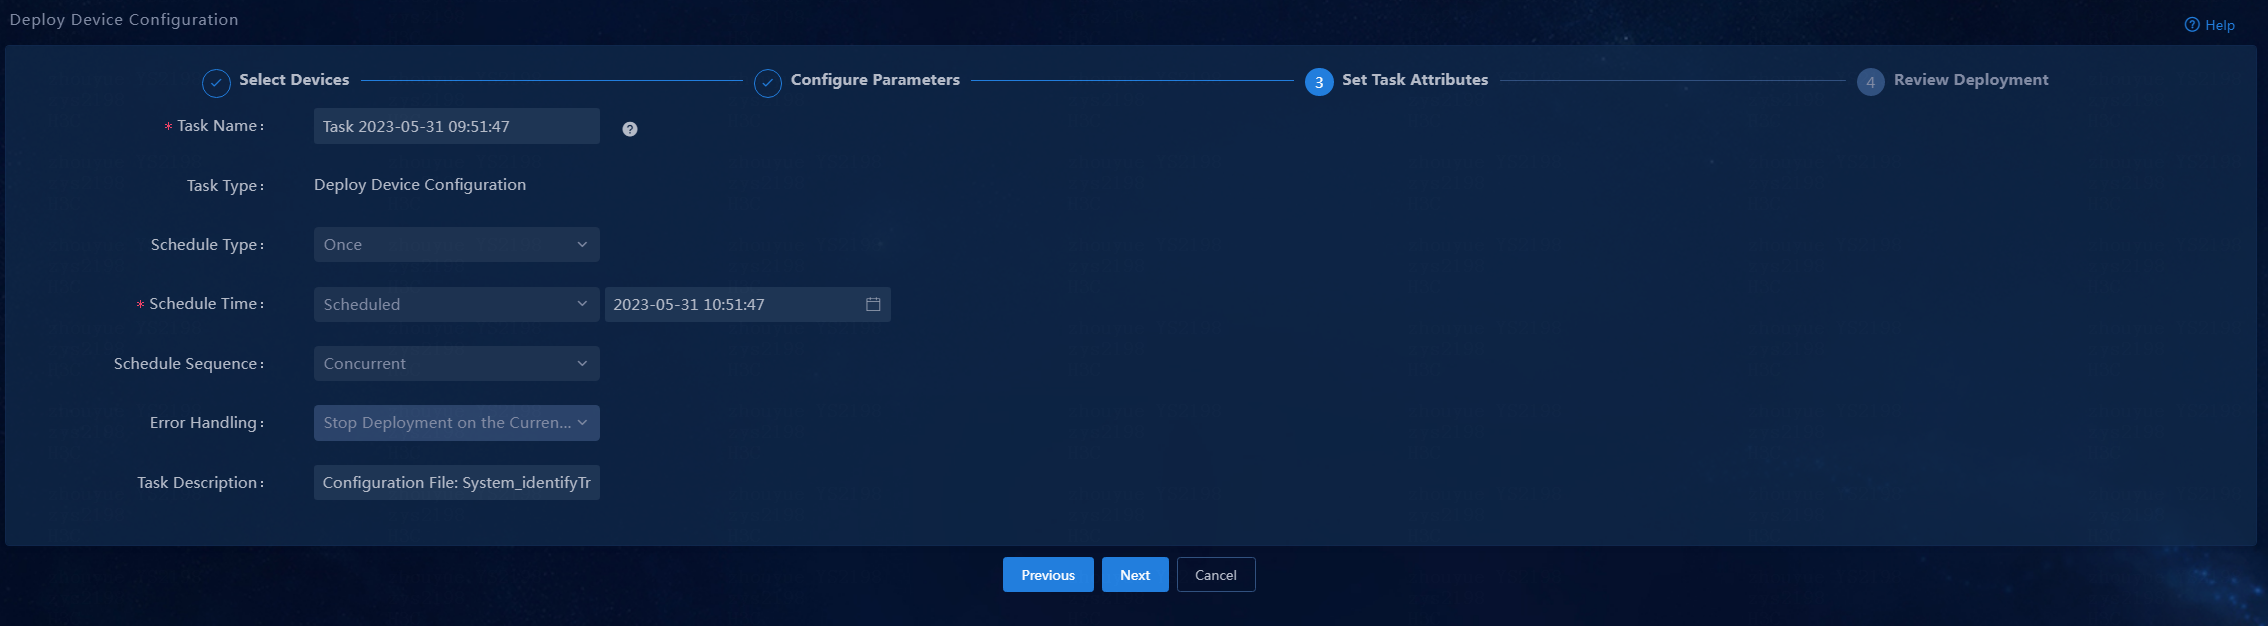
f. On the Set Task Attributes page, configure the task attributes, including task name, schedule type, schedule time, and schedule sequence. Click Next.
Figure 20 Setting the deployment task attributes
g. On the Review Deployment page, verify the settings are correct, and then click Finish to issue the request to create the device configuration deployment task.
If the request to add a new task is successfully issued, the system will automatically navigate to the deployment task page, add the new task to the deployment task list, and display a message.
· Method 2
a. On the top navigation bar, click the Automation tab. From the left navigation pane, select Configuration Deployment > Configuration Center.
Figure 21 Configuration Center page
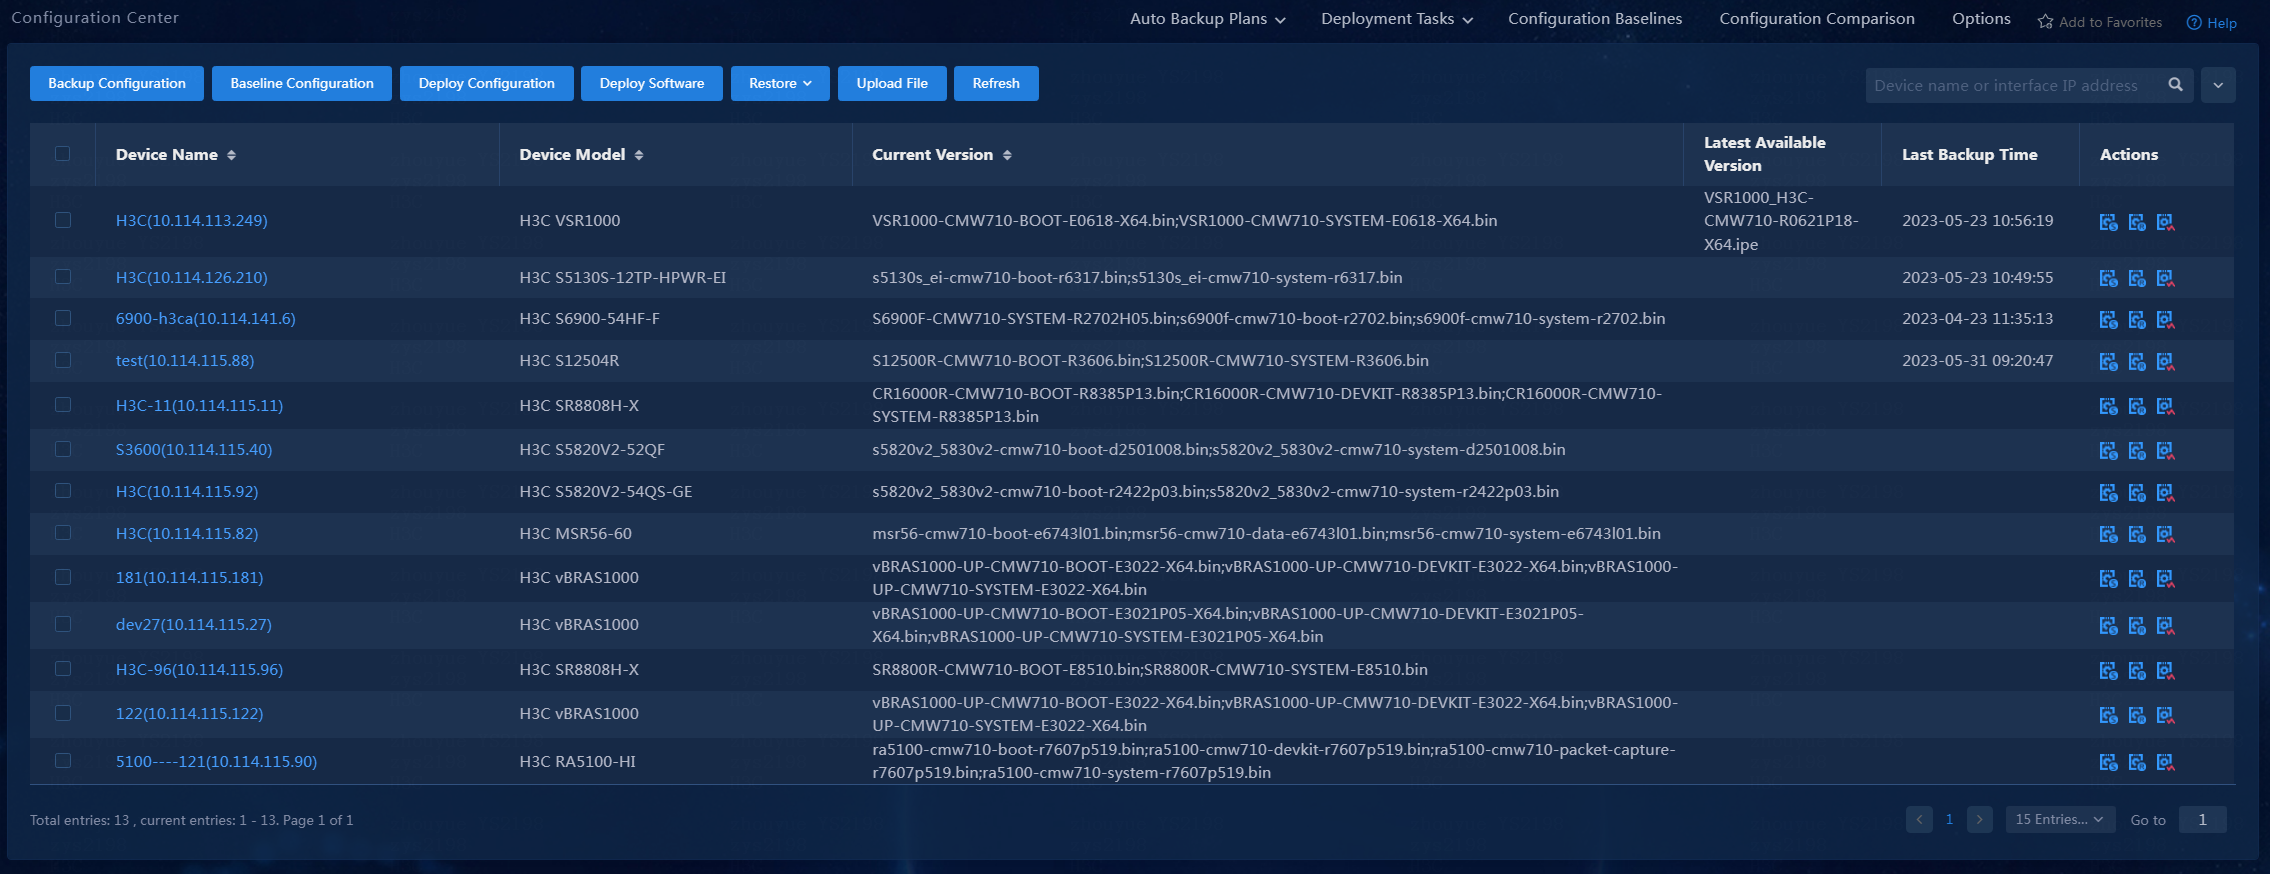
b. Select devices for deployment.
c. Click Deploy Configuration.
d. Perform operations on the Deploy Device Configuration page. For more information, see method 1 in "Deploying device configuration."
· Method 3
a. Click the Automation tab. From the left navigation pane, select Configuration Deployment > Deployment Guides.
b. Click Deploy Configuration.
c. Perform operations on the Deploy Device Configuration page. For more information, see method 1 in "Deploying device configuration."
Comparing configuration files
Perform this task to compare two configuration files in the following modes:
· Simple mode—Configures two copies of device configurations on the corresponding page.
· Advanced mode—Configures multiple copies of device configurations on the corresponding page.
Simple mode
1. On the top navigation bar, click the Automation tab, and then select Configuration Options > Configuration Comparison from the left navigation pane.
2. Click the Simple Mode tab.
Figure 22 Comparing configuration files in simple mode
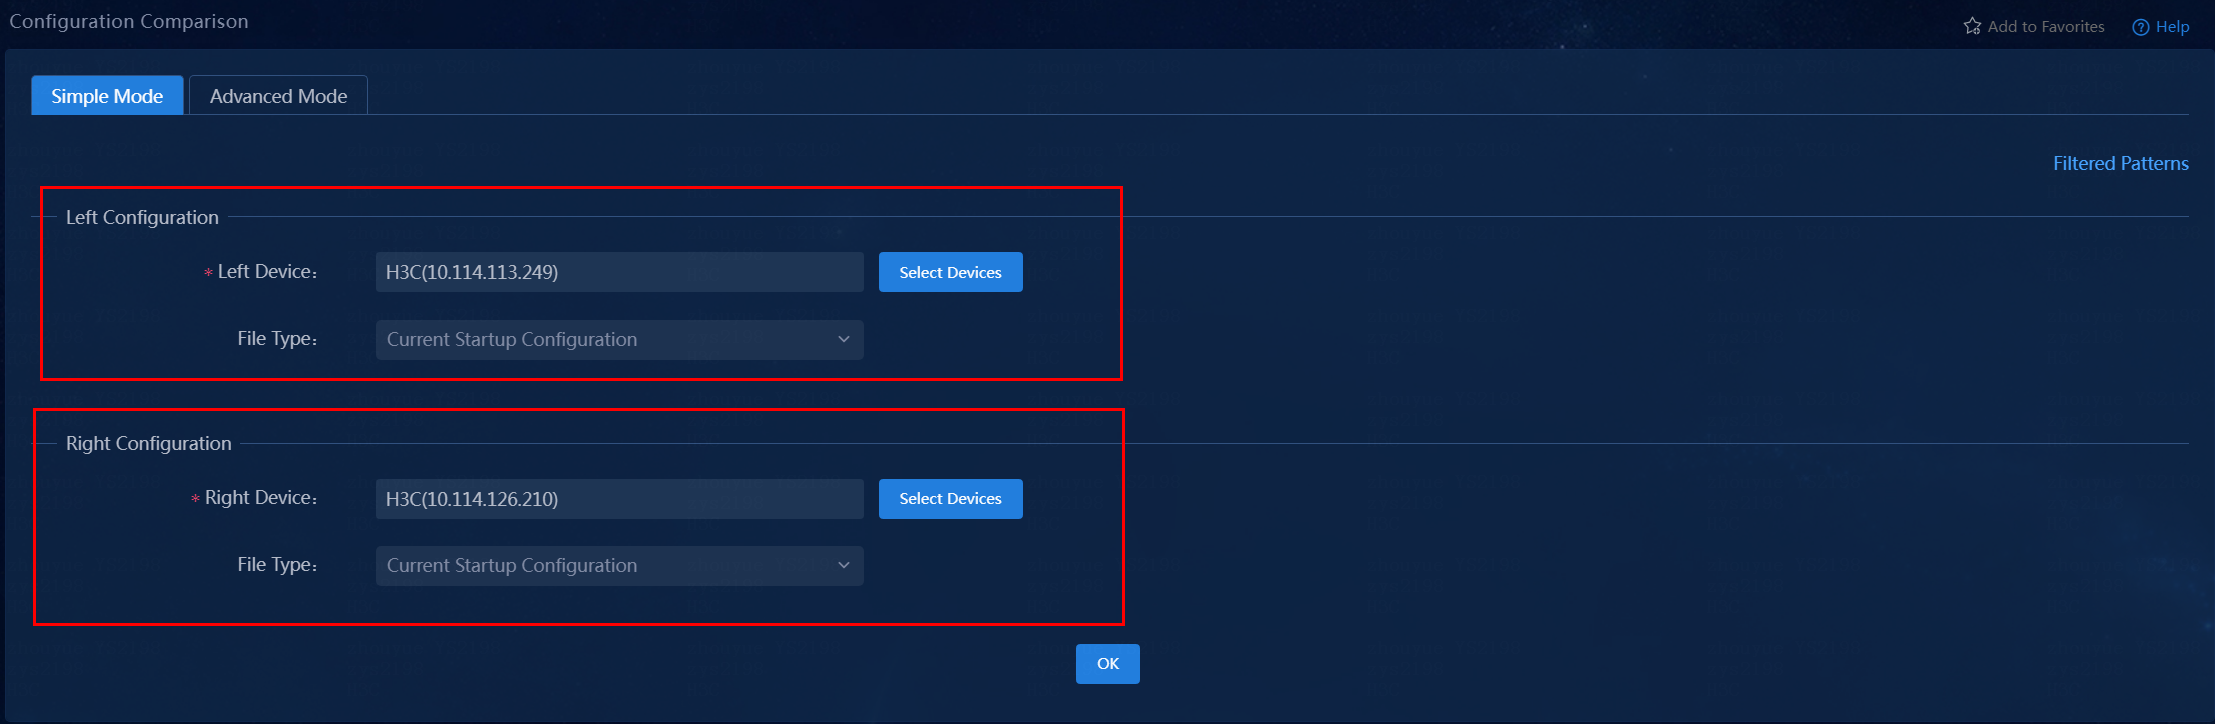
3. Configure the parameters in the Left Configuration and Right Configuration areas. The configuration procedure is the same for these two areas as follows:
¡ Click Select Devices. On the window that opens, select a device whose configuration is to be compared.
¡ Select a file type to be compared. Options include Current Startup Configuration, Current Running Configuration, and Backup History.
¡ Select a configuration file to be compared.
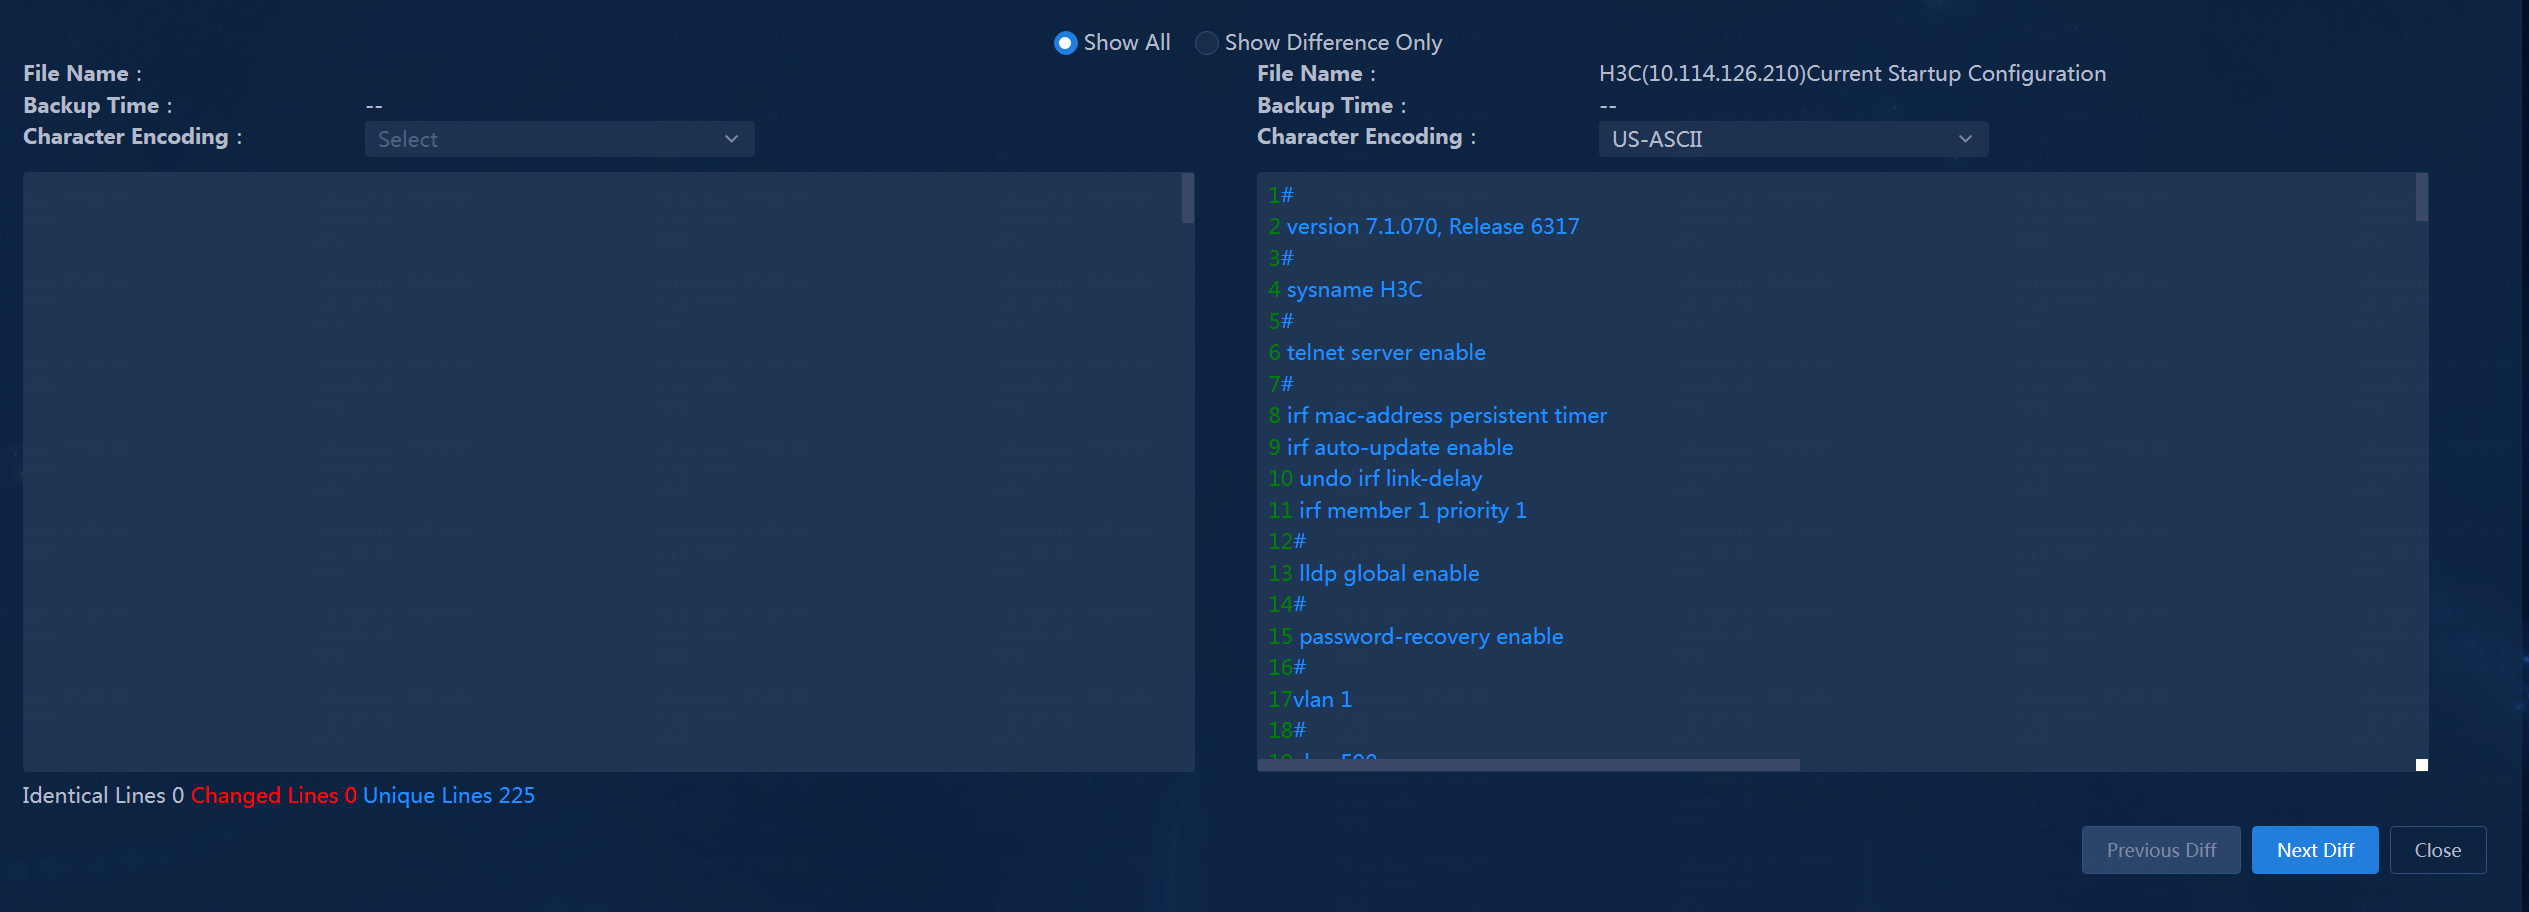
4. Click OK. The configuration comparison window opens to display the comparison result.
Figure 23 Configuration comparison result
5. To filter out some unnecessary information in the comparison result, you can add the filtering criteria. Then, the filtered configuration will not be displayed in the search result. To filter the comparison result:
a. Click Filtered Patterns on the right of the page.
b. In the dialog box that opens, select a filtered pattern or add a filtered pattern. Click Add. This example adds a filtered pattern.
c. Enter the filtered pattern, and click OK.
Figure 24 Adding a filtered pattern

Advanced mode
Compare to the simple mode, the advanced mode supports comparing multiple copies of device configurations.
To compare device configurations in advanced mode:
1. On the top navigation bar, click the Automation tab. From the left navigation pane select Configuration Options > Configuration Comparison.
2. Click the Advanced Mode tab.
3. Select devices.
Click Add.
On the window that opens, click Select Devices. On the window that opens, select devices and click OK.
4. Select a file type to be compared.
5. Click OK.
The selected devices will be displayed in the device list on the Configuration Comparison page. Repeat these steps to add multiple configuration files for comparison.
Figure 25 Comparing configuration files in advanced mode
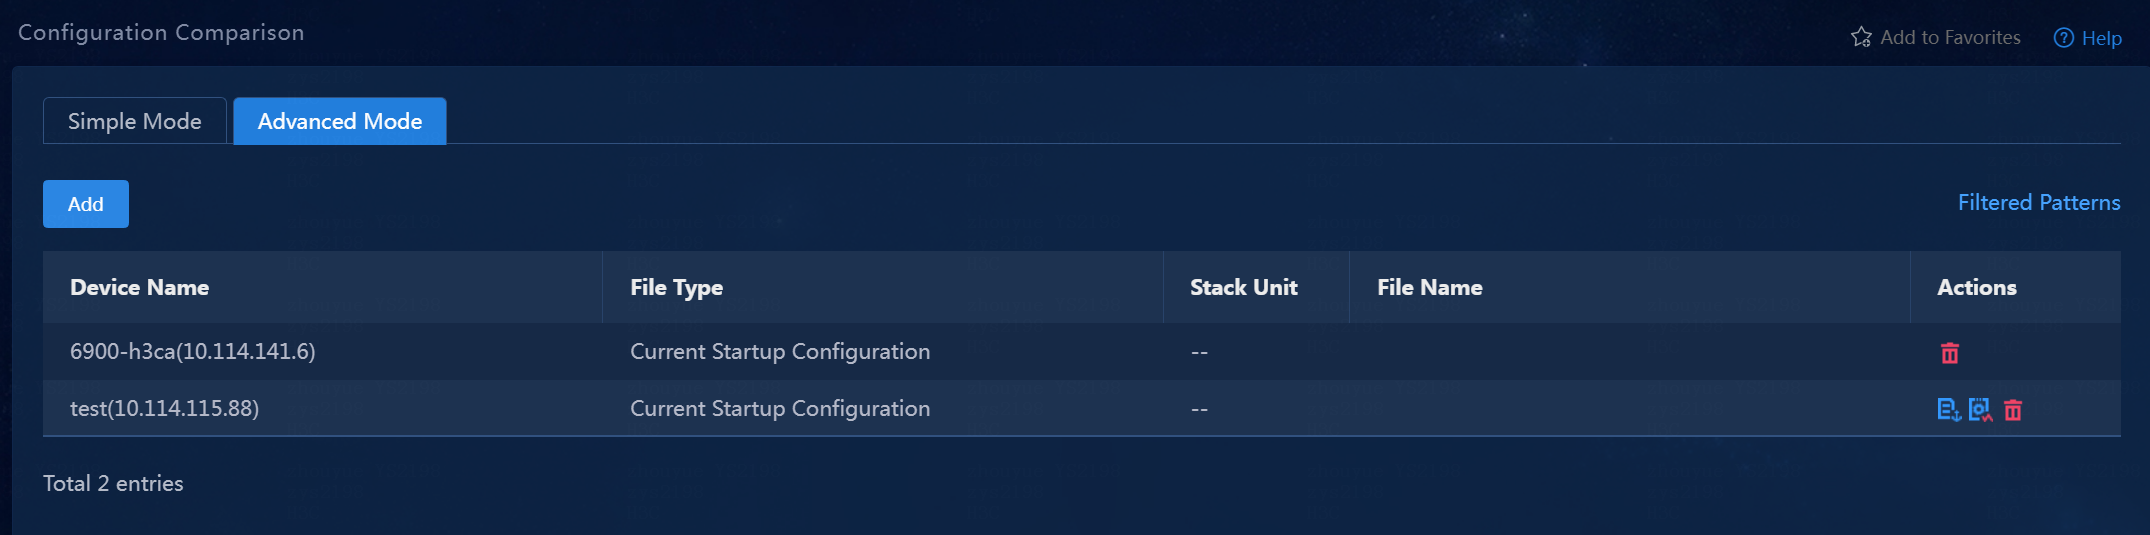
6. Click ![]() in the Actions
column for a device in the device list on the Configuration Comparison
page to specify the device as the base for comparison.
in the Actions
column for a device in the device list on the Configuration Comparison
page to specify the device as the base for comparison.
7. Click ![]() in the Actions
column for another device in the device list to display the comparison result
between the current configuration file and the base configuration file.
in the Actions
column for another device in the device list to display the comparison result
between the current configuration file and the base configuration file.
8. To remove a device, click ![]() in the
Actions column for that device.
in the
Actions column for that device.
9. To filter out unnecessary information in the comparison results, perform the same steps as the simple mode. For more information, see "Simple mode."
Restoring device configuration
Two methods are available for entering the Restore Device Configuration page.
· Method 1
a. On the top navigation bar, click Automation. From the left navigation pane, select Configuration Deployment > Configuration Center.
b. Select the devices to be restored.
c. Click ![]() , and then select
a restore method from the drop-down list:
, and then select
a restore method from the drop-down list:
- Restore Device Configuration: You can select a configuration file to be restored to.
- Restore Device Configuration to Baseline: The system already specifies the baseline configuration to be restored to.
d. Select a configuration file from the drop-down list in the Restore Configuration From column.
Figure 26 Selecting a file to be restored to
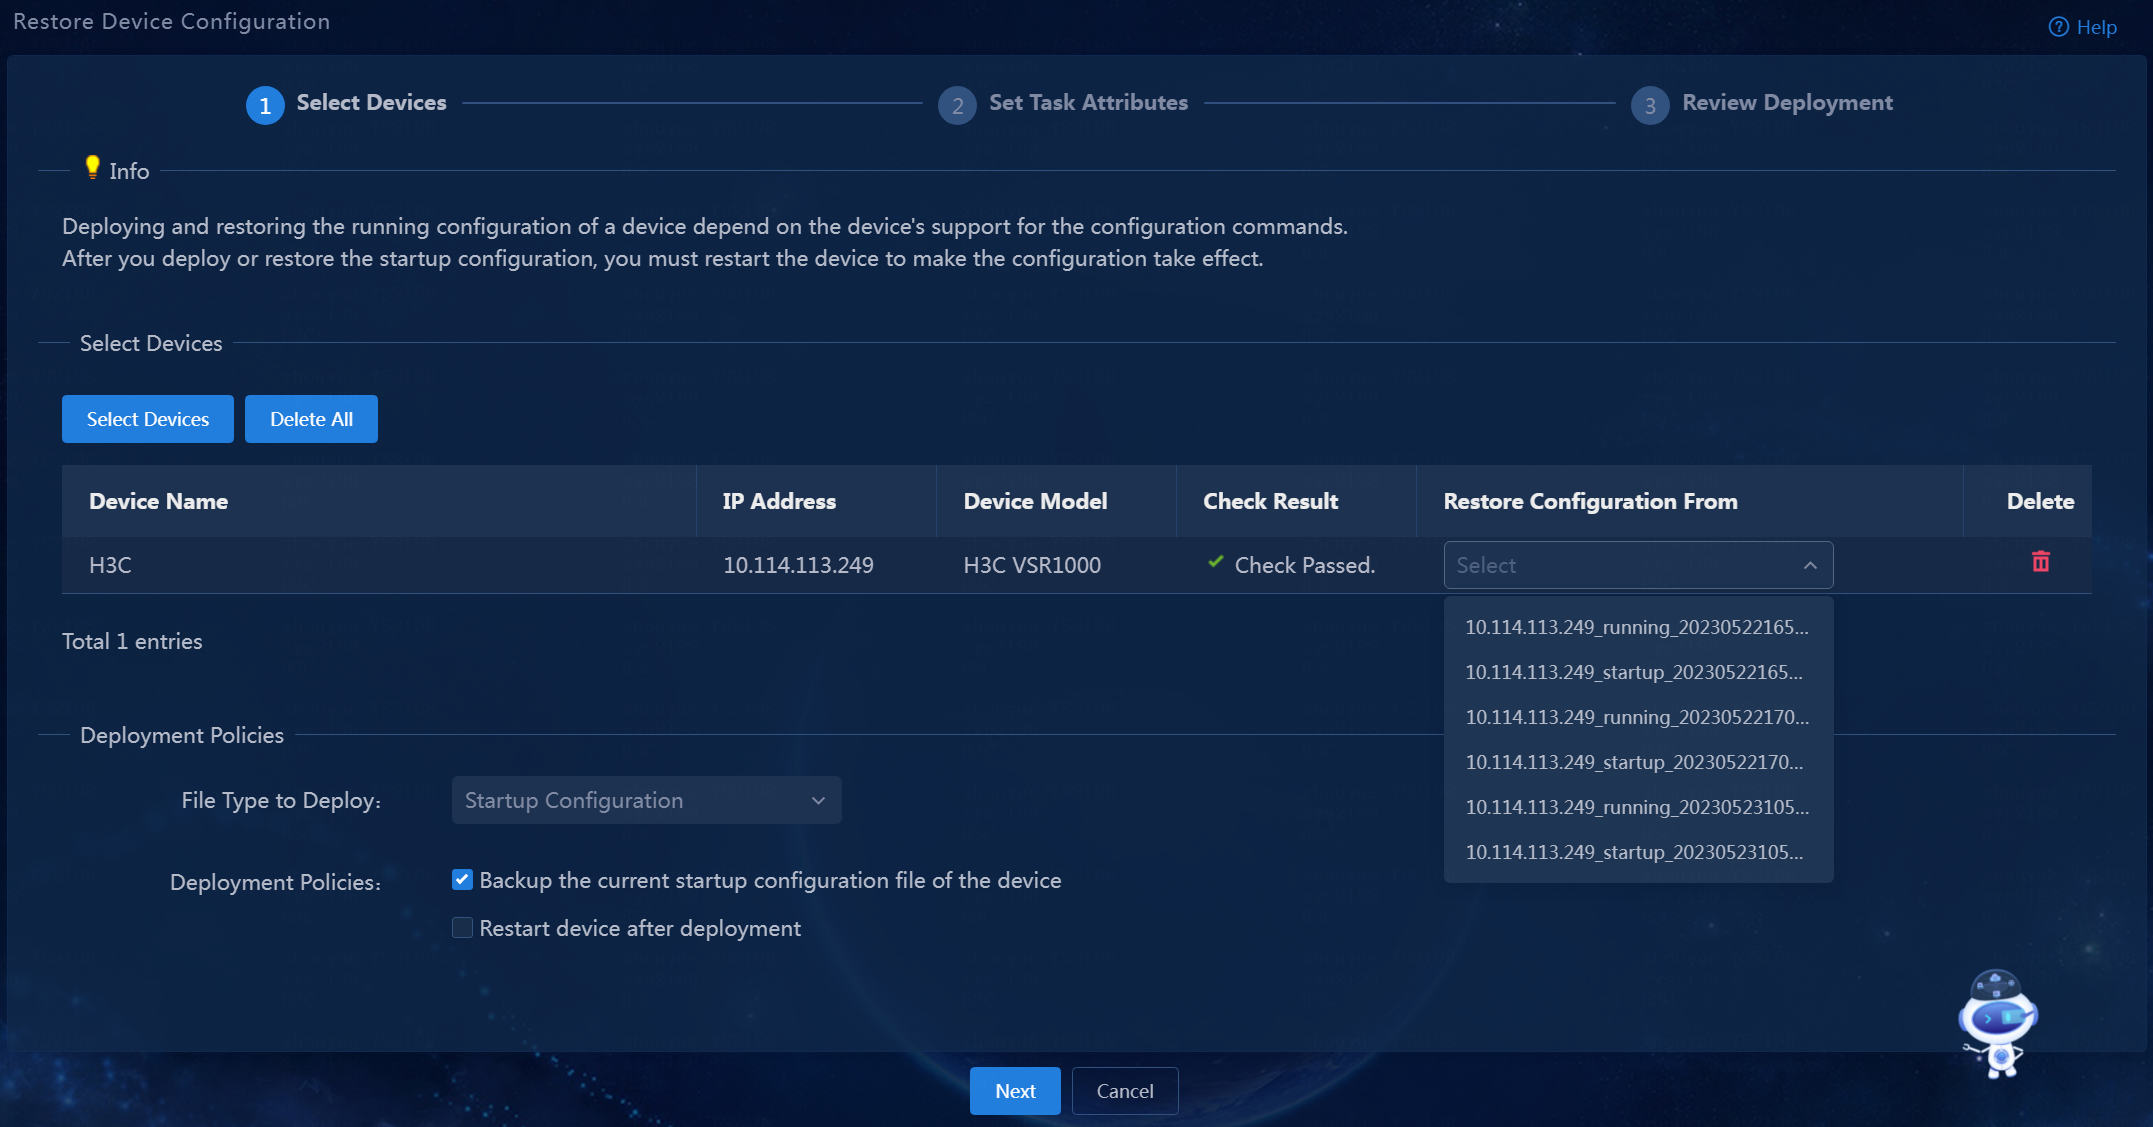
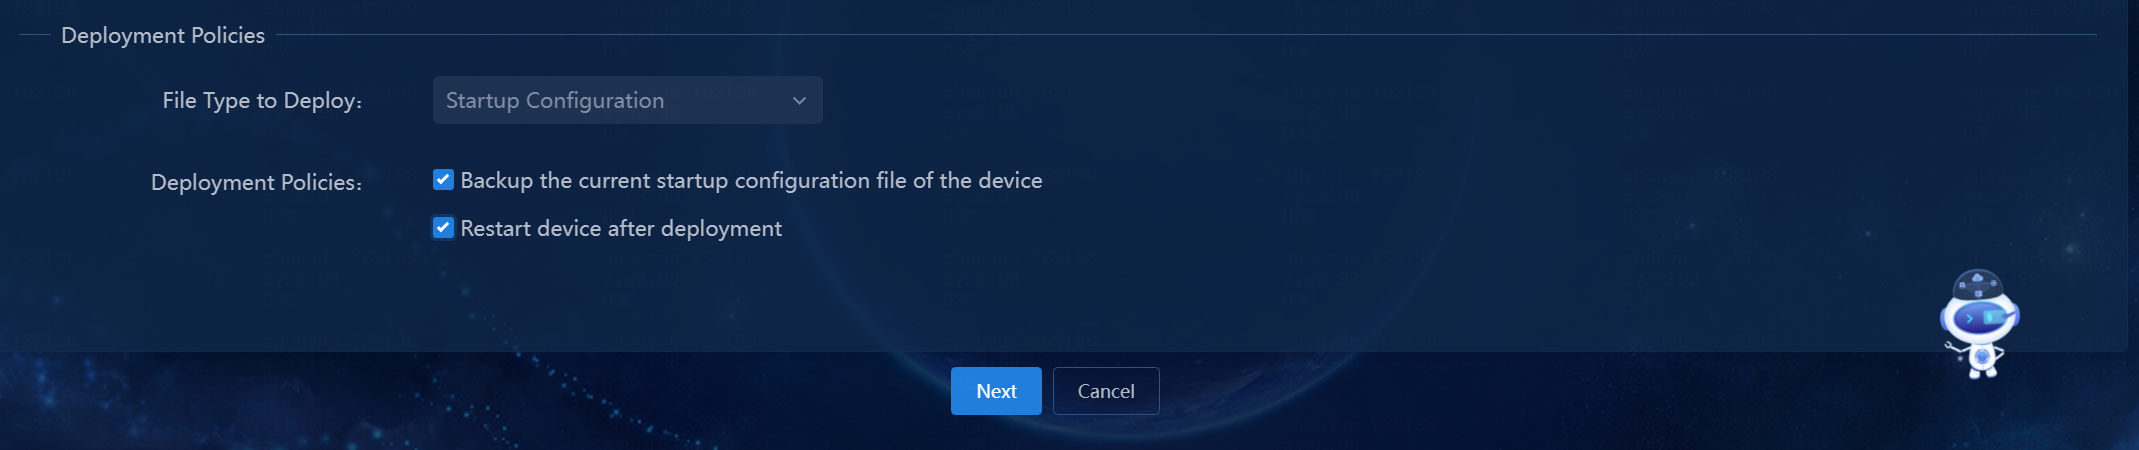
e. Select deployment policies.
Figure 27 Selecting deployment polices
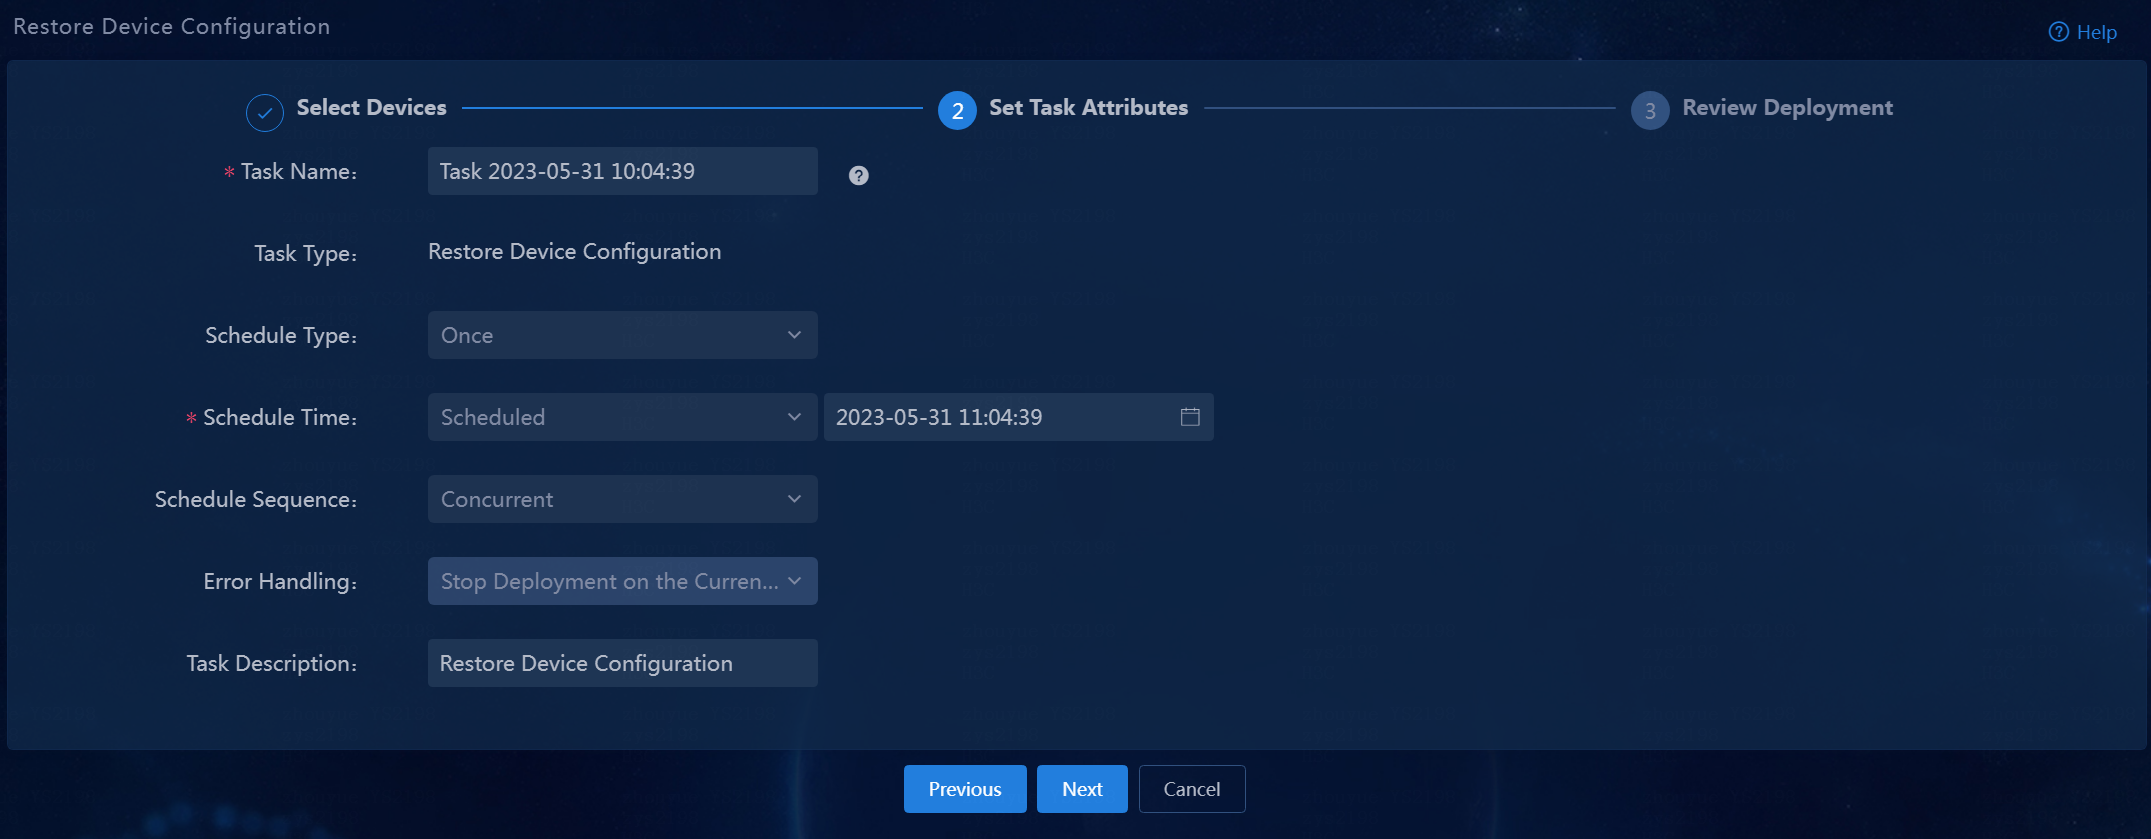
f. Click Next to enter the Set Task Attributes page.
g. Click Next. On the Review Deployment page, verify the settings are correct, and then click Finish to issue the request to create the device configuration restoration task. If the request to add a new task is successfully issued, the system will automatically navigate to the deployment task page, add the new task to the deployment task list, and display a message.
Figure 28 Setting task attributes
· Method 2
a. On the top navigation bar, click Automation. From the left navigation pane, select Configuration Options > Deployment Guide.
b. Click Restore Device Configuration. The page for restoring device configuration opens.
c. For the operations on this page, see method 1 in "Restoring device configuration."
