Create a database instance
Switch to the Oracle account.
Execute the dbca command.
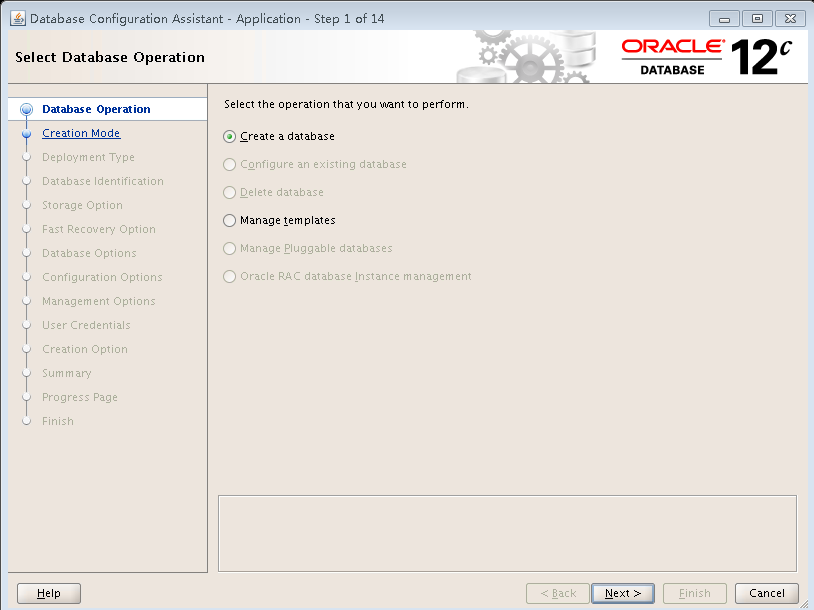
Select Create a database, and then click Next.
Figure-1 Selecting a database operation
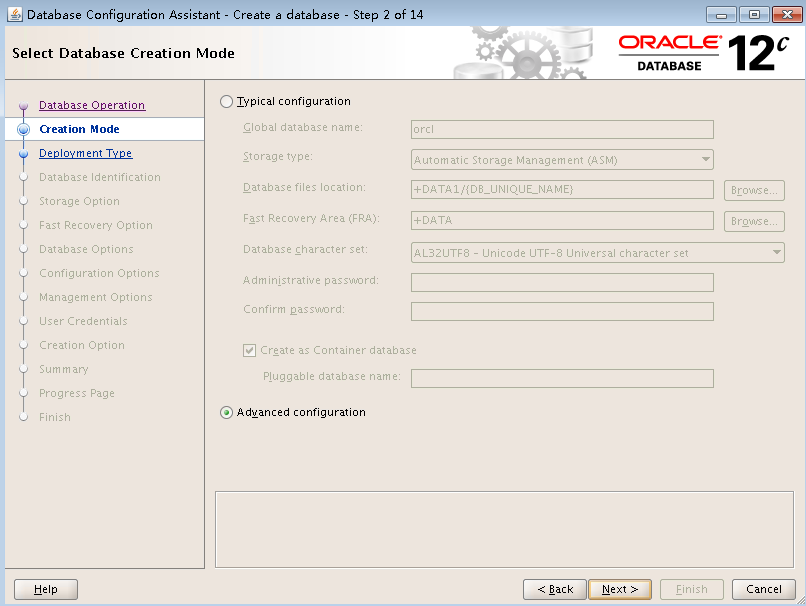
Select Advanced configuration, and then click Next.
Figure-2 Selecting a database creation mode
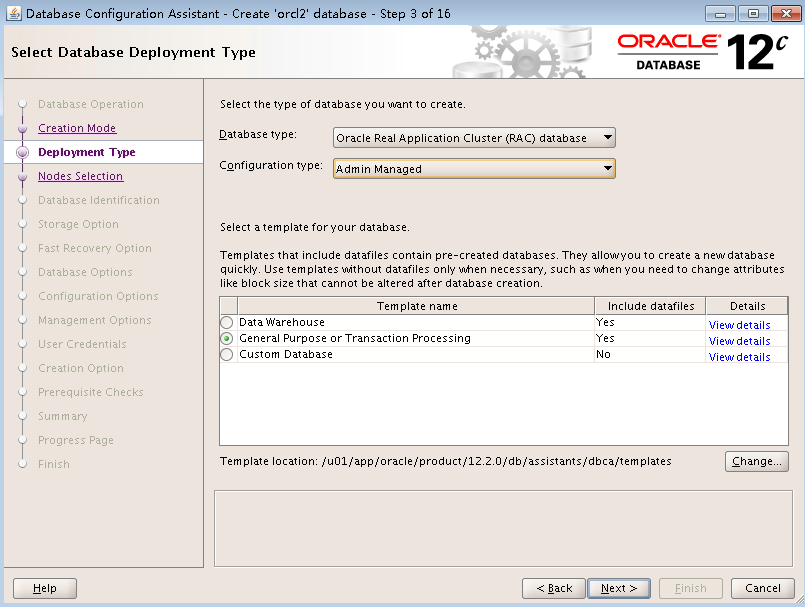
Select the RAC database type, select the Admin-Managed configuration type, select the General purpose or Transaction Processing template, and then click Next.
Figure-3 Selecting a database deployment type
Check all nodes, and then click Next.
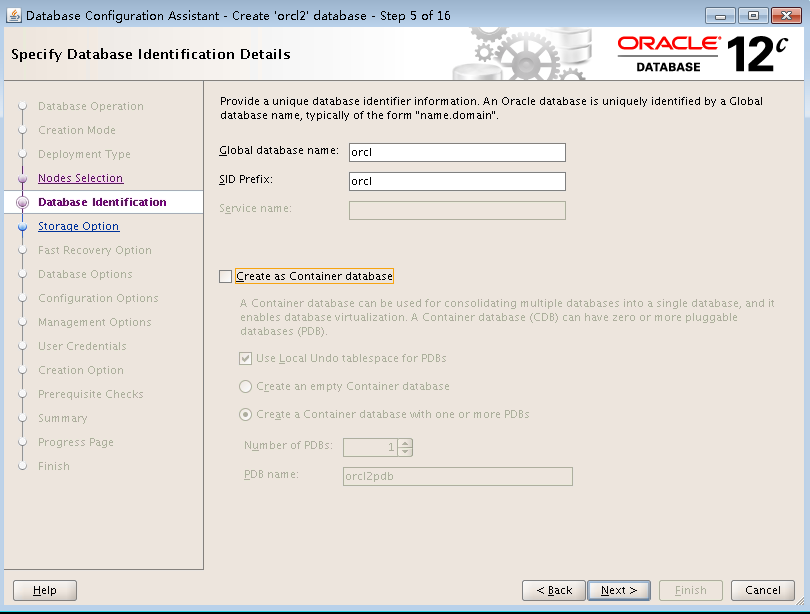
Enter orcl in the Global database name field, enter the SID prefix. For example, if you set the SIDs to orcl1 and orcl2 when configuring environment variables, enter orcl as the SID prefix. Do not install the database as a container database.
Figure-4 Specifying database identification details
Click Next.
Select the data disk group to store database files, and select Use Oracle-Managed Files. Click Multiplex redo logs and control files, enter the string +LOG, and then click OK.
Figure-5 Selecting a database storage option

Click Next.
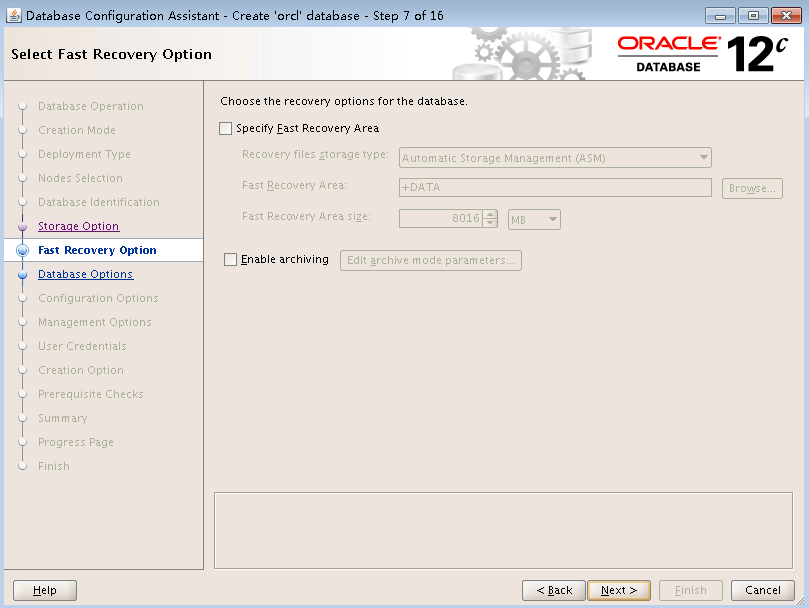
Do not select any options. This configuration is used for performance testing. Do not use it in a production environment.
Figure-6 Fast recovery option
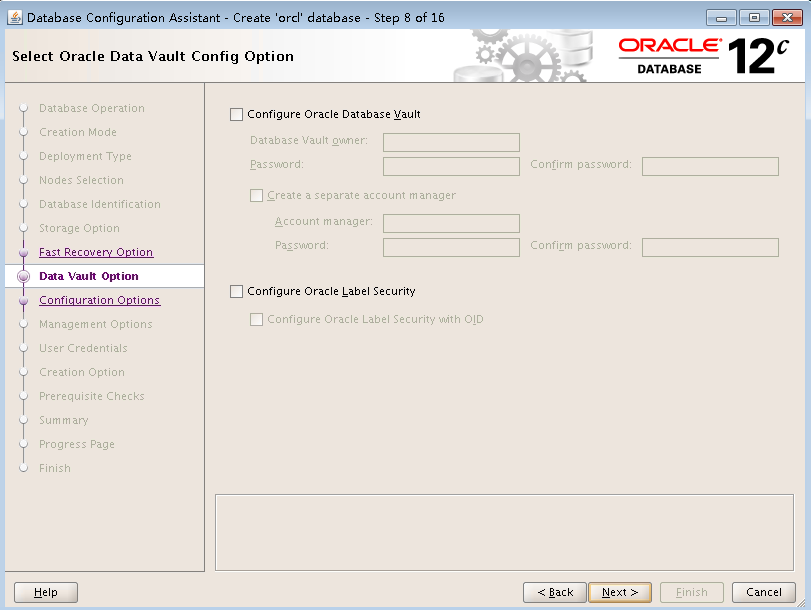
Use the default settings for data vault options, and then click Next.
Figure-7 Oracle data vault configuration
Select Use Automatic Shared Memory Management, set the SGA size and PGA size, and then click Next.
Figure-8 Specifying configuration options

Select Run Cluster Verification Utility check periodically, configure EM settings, use the default port 5500, and then click Next.
Figure-9 Specifying management options

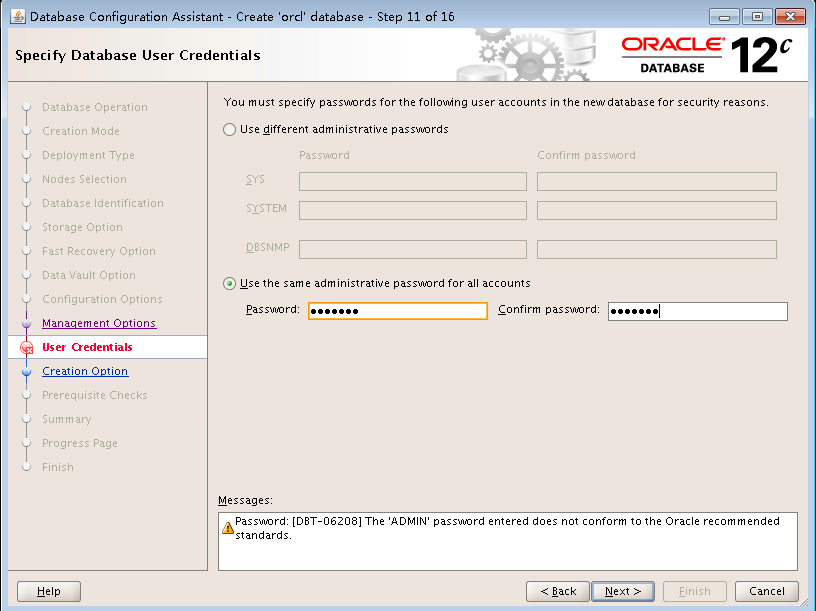
Set the same password for all users, and then click Next.
Figure-10 Specifying database user credentials
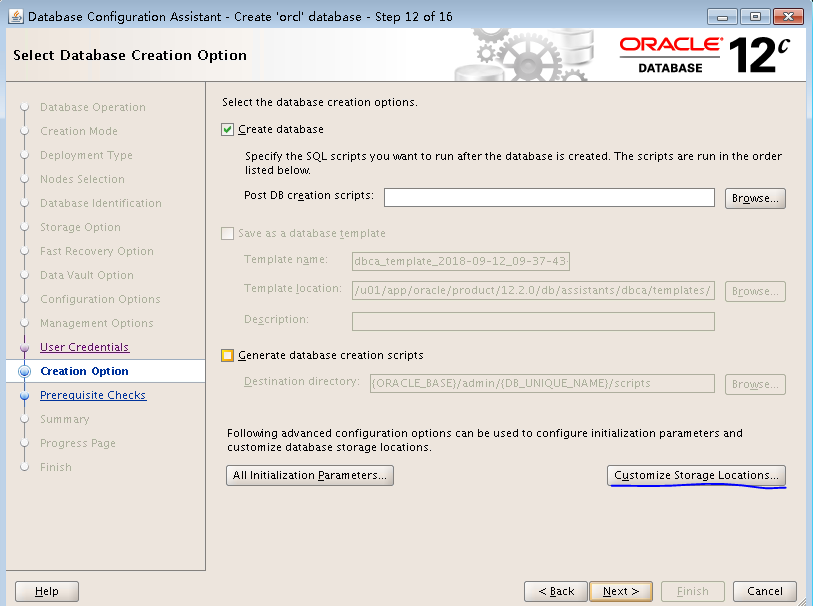
Select Create database, and then click Next.
Figure-11 Selecting a database creation option
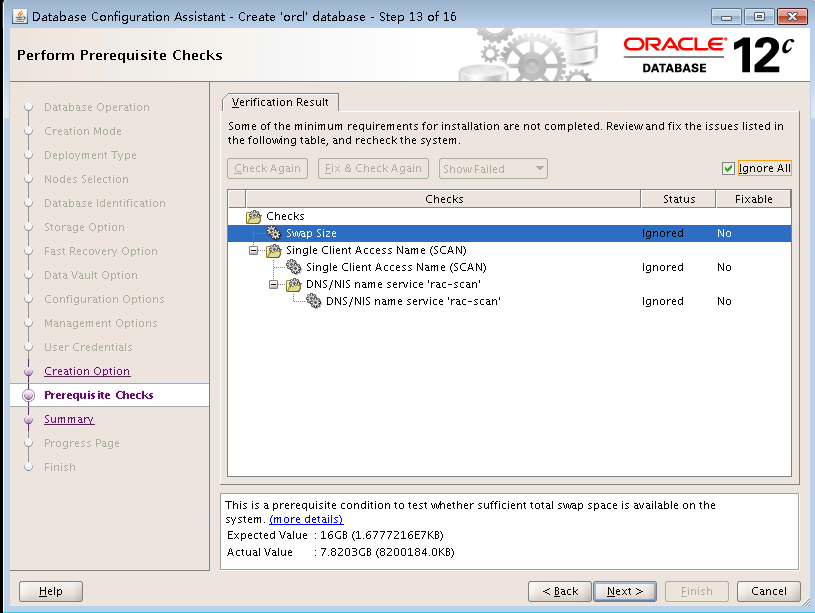
Process alarms as follows:
Single Client Access Name(SCAN)—If you configure only one scan IP address, ignore the alarm.
DNS/NIS name service "dbn-scan"—If you do not configure a scan IP for the DNS server, ignore the alarm.
Figure-12 Performing prerequisite checks
Click Finish.
View the configuration summary, and then click Install.