Configure Server 2016 AlwaysOn
Prepare data
SQL Server 2016 AlwaysOn availability groups are based on databases. You need to configure an AlwaysOn policy for each database instance. The following information introduces only AlwaysOn availability group configuration.
To prepare data:
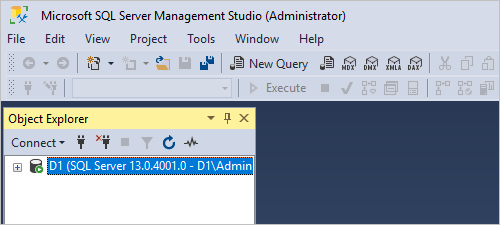
Log in to the database from Microsoft SQL Server Management Studio.
Figure-1 Logging in to the database
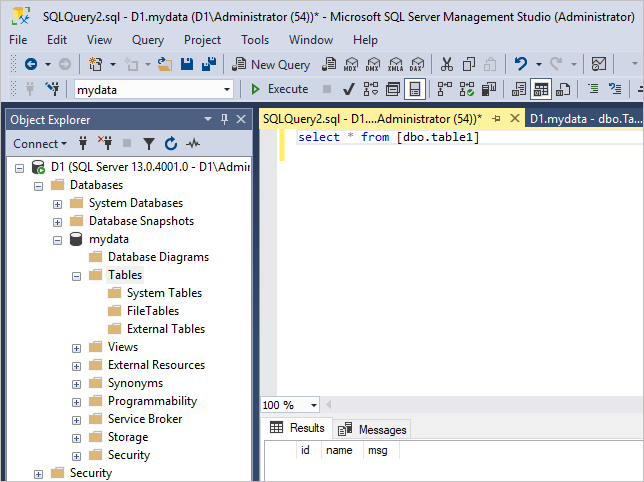
Create the mydata database and write initial data or import existing data into it.
Figure-2 Creating the mydata database
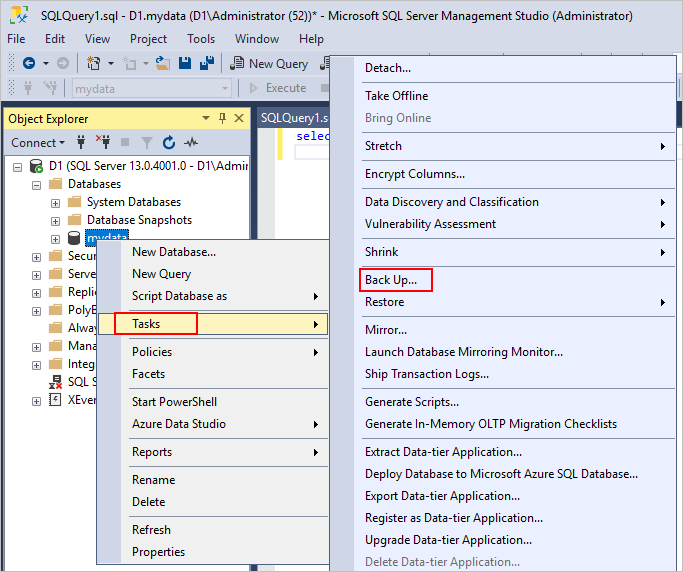
Back up data.
Figure-3 Backing up data
Enable AlwaysOn availability groups
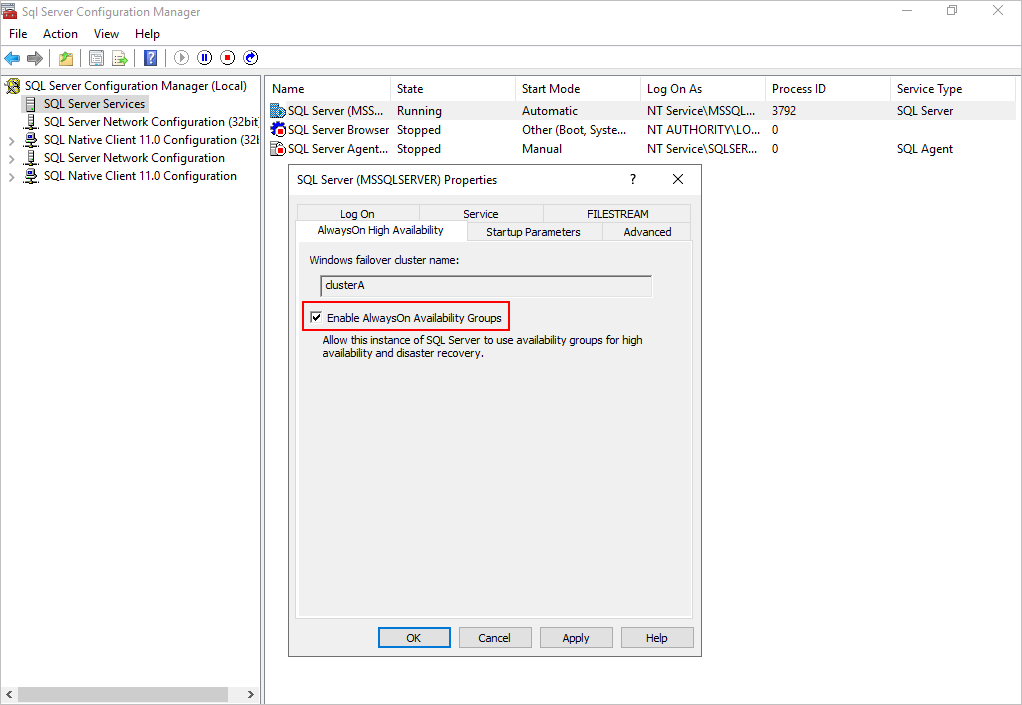
Enable AlwaysOn availability groups and restart the database service.
Figure-4 Enabling AlwaysOn availability groups
Create and distribute certificates
Perform the following tasks on all nodes:
Create the share folder for storing certificate files.
Grant everyone write and read permissions to the folder.
Create certificates.
USE master;
GO
--Create the master key.
CREATE MASTER KEY ENCRYPTION BY PASSWORD = 'Abc123';
--Create certificates. As a best practice, use unique certificate names on the nodes.
CREATE CERTIFICATE CERT1 WITH SUBJECT = 'CERT1', START_DATE = '2017-01-01',EXPIRY_DATE = '2099-12-30';
--Back up the certificates to the share folder.
BACKUP CERTIFICATE CERT1 TO FILE = 'D:\share\CERT1.cer';
--Create an endpoint and configure certificate authentication.
CREATE ENDPOINT [group0_endpoint] AUTHORIZATION [sa] STATE=STARTED AS TCP (LISTENER_PORT = 5022, LISTENER_IP = ALL)
FOR DATA_MIRRORING (ROLE = ALL,AUTHENTICATION = CERTIFICATE CERT1, ENCRYPTION = REQUIRED ALGORITHM AES)
GO
--To roll back failed operation, use the following commands:
--Delete an endpoint.
drop ENDPOINT [group0_endpoint];
go
--Delete a certificate.
DROP CERTIFICATE CERT1;
--Delete a master key.
drop master key
go
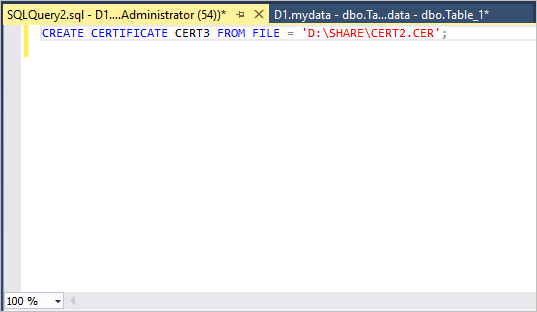
Distribute certificates to the other nodes.
Install the certificates of the other nodes.
CREATE CERTIFICATE CERT1 FROM FILE = 'D:\share\CERT1.cer';
CREATE CERTIFICATE CERT2 FROM FILE = 'D:\share\CERT2.cer';
CREATE CERTIFICATE CERT3 FROM FILE = 'D:\share\CERT3.cer';
GO
|
|
Do not install the certificates of the local node. |
Figure-5 Installing certificates
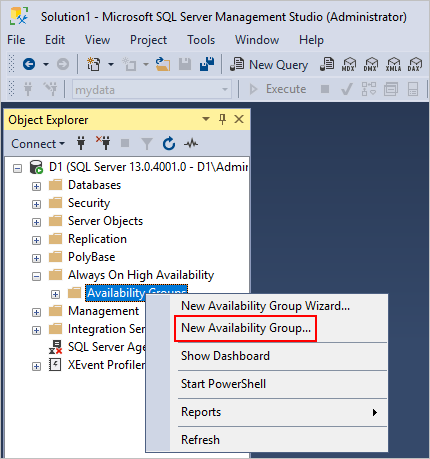
Create an availability group
Right-click the Availability Groups node and select New Availability Group.
Figure-6 Creating an availability group
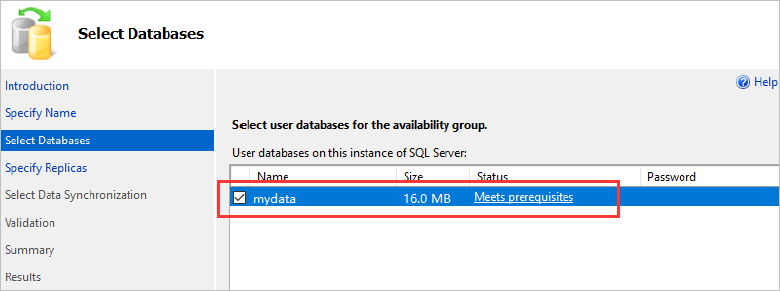
Configure the availability group parameters.
Figure-7 Entering a group name
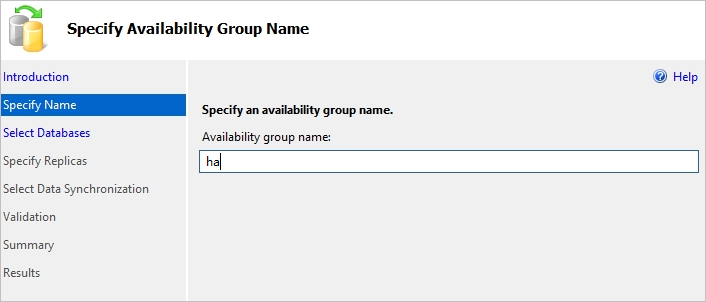
Figure-8 Selecting a database
Configure replicas, and then click Next.
|
|
In asynchronous synchronization mode, the performance of the cluster is almost the same as that of standalone deployment. In synchronous synchronization mode, the performance of the cluster is 30% lower than that of standalone deployment. |
Figure-9 Configuring replicas

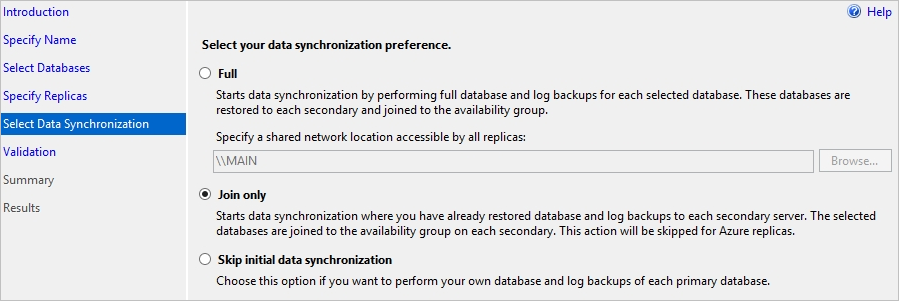
Configure data synchronization, and then click Next.
Figure-10 Configuring data synchronization
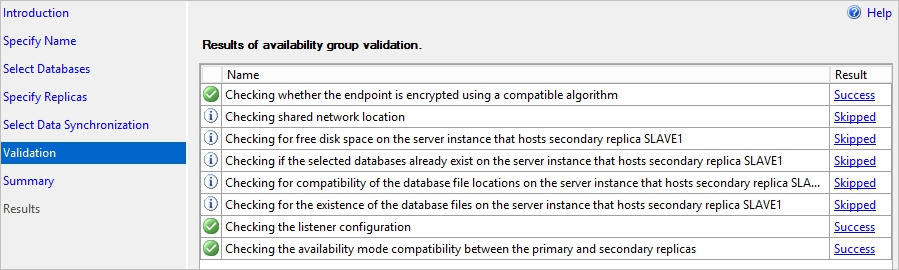
Verify the configuration and click Next.
Figure-11 Verifying the configuration
Click Finish.
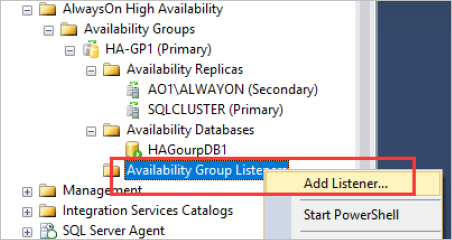
Create a listener
Right-click Availability Group Listeners and then select Add Listener..
Figure-12 Creating a listener
Configure the listener name, por number, and IP address.
Figure-13 Configuring a listener
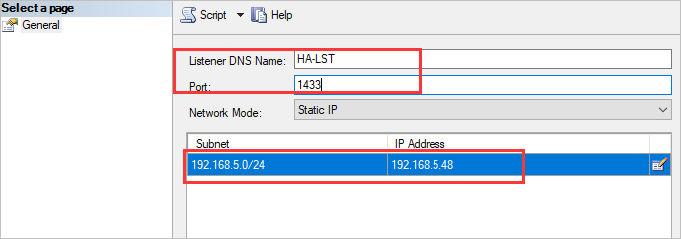
Figure-14 Configuration result
