Network QoS
About network QoS
Network QoS uses port profiles for bandwidth management, traffic isolation, and traffic shaping of VMs. A port profile contains a set of rules such as ACLs, VLAN settings, and QoS policies. It defines the priority for VMs to access networks. You can use a port profile to control the bandwidth between a VM and a site or limit the traffic rate on a per-subnet basis. You can apply a port profile to the NICs of multiple VMs.
Apply a port profile to a VM
On the top navigation bar, click Resources.
From the left navigation pane, select Host Pool Name > Cluster Name > Host Name > VM Name or Host Pool Name > Host Name > VM Name.
Click Edit.
Click the Network tab.
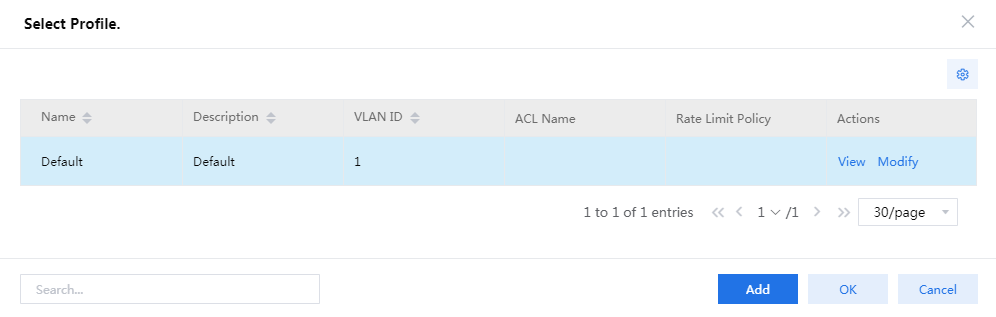
Click the Select icon for the Port Profile parameter.
|
|
Alternatively, you can apply a port profile to a VM during VM creation. |
Figure-1 Selecting a port profile

Click Add to create a new port profile and then select it for the VM.
|
|
Alternatively, you can select an existing port profile. |
Figure-2 Adding a port profile
Configure inbound and outbound traffic limits
On the top navigation bar, click Resources.
From the left navigation pane, select Host Pool Name > Cluster Name > Host Name > VM Name or Host Pool Name > Host Name > VM Name.
Click Edit.
Click the Network tab.
Click the Select icon for the Port Profile parameter.
Click Add.
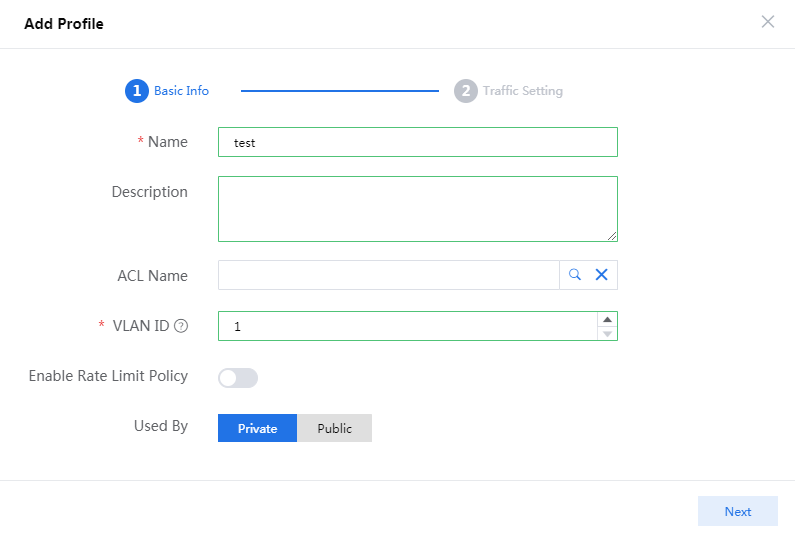
Configure the port profile name and VLAN ID, and then click Next.
Figure-3 Specifying a port profile name
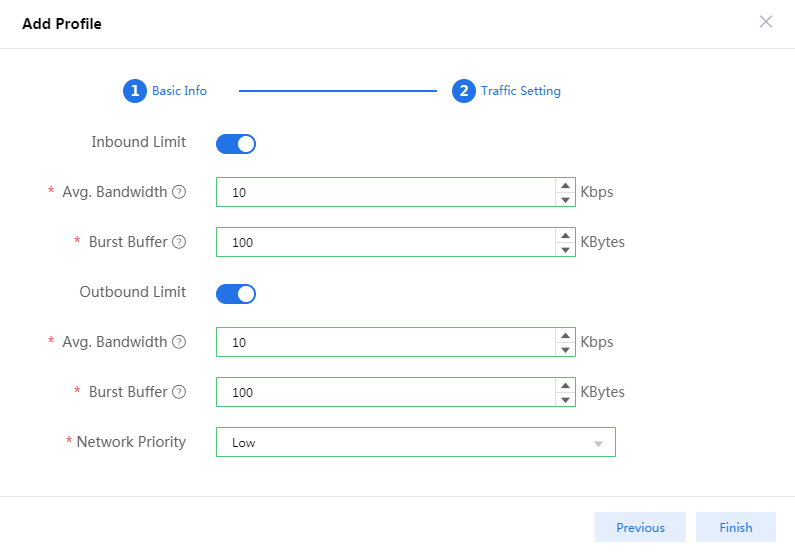
Configure the following parameters:
Inbound Limit: Limit the traffic from a virtual switch to a VM.
Avg. Bandwidth: Enter the average inbound bandwidth in Kbps.
Burst Buffer: Enter the inbound burst buffer in KBytes.
Outbound Limit: Limit the traffic from a VM to a virtual switch.
Avg. Bandwidth: Enter the average outbound bandwidth in Kbps.
Burst Buffer: Enter the outbound burst buffer in KBytes.
Figure-4 Configuring inbound and outbound traffic limits
Configure the network priority
About network priorities
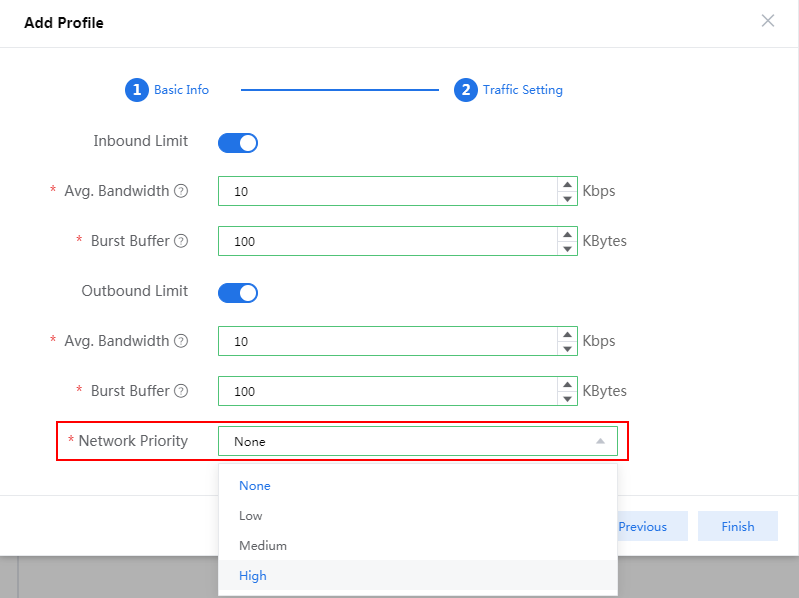
A network priority determines the sequence in which VMs are assigned bandwidth when the VMs are competing for network resources. Network priorities can be high, medium, or low. The system allocates bandwidth to VMs with high, medium, and low network priorities in a ratio of 6:3:1.
Procedure
On the top navigation bar, click Resources.
From the left navigation pane, select Host Pool Name > Cluster Name > Host Name > VM Name or Host Pool Name > Host Name > VM Name.
Click Edit.
Click the Network tab.
Click the Select icon for the Port Profile parameter.
Click Add.
Configure the port profile name and VLAN ID, and then click Next.
Set the network priority.
Figure-5 Setting the network priority
Configure a rate limit policy
About rate limit policies
A rate limit policy is a set of rules that define average bandwidth and burst buffer for specific traffic flows. A rate limit policy provides accurate bandwidth control for the traffic between a VM and a network site.
To apply a rate limit policy to VMs, you must specify it in a port profile. Compared with the inbound and outbound traffic limits of a port profile, a rate limit policy provides more granular traffic control.
|
|
A rate limit policy is mutually exclusive with the inbound and outbound limits and network priority. |
Procedure
On the top navigation bar, click Resources.
From the left navigation pane, select Host Pool Name > Cluster Name > Host Name > VM Name or Host Pool Name > Host Name > VM Name.
Click Edit.
Click the Network tab.
Click the Select icon for the Port Profile parameter.
Click Add.
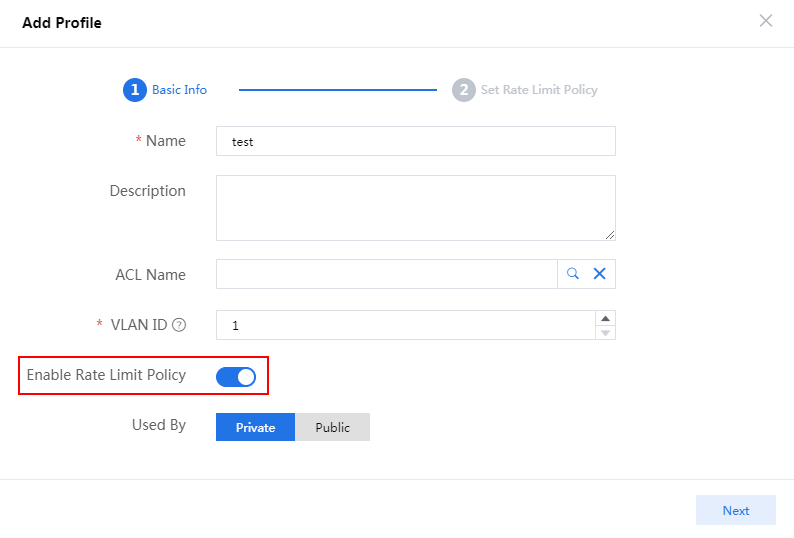
Configure the port profile name and VLAN ID, enable the rate limit policy, and then click Next.
Figure-6 Enabling the rate limit policy
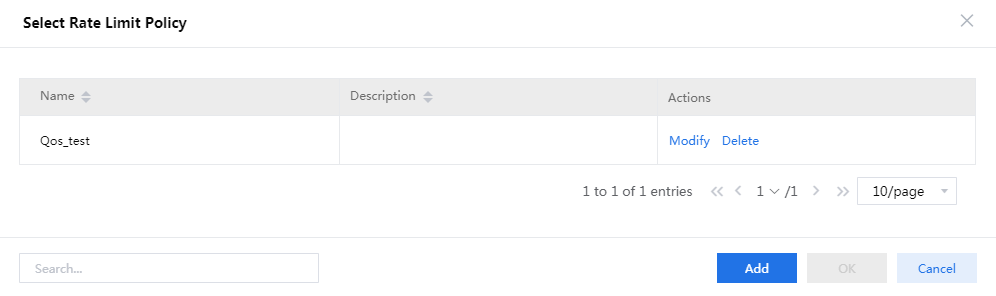
Select a rate limit policy, and then click OK.
|
|
Alternatively, you can create a rate limit policy. |
Figure-7 Selecting a rate limit policy
Create a rate limit policy
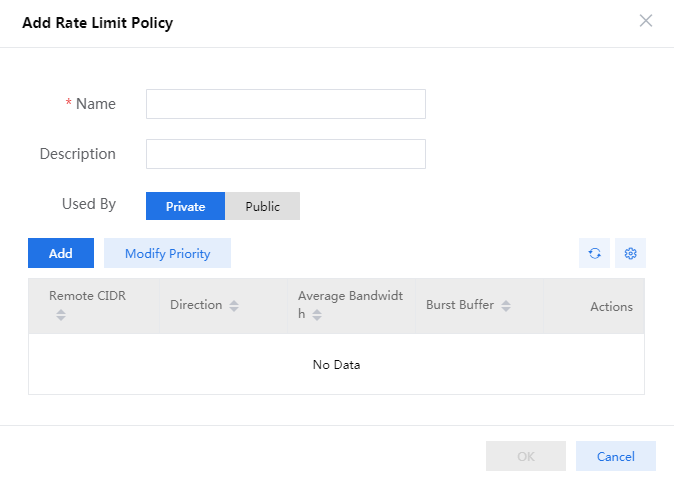
On the rate limit policy selection page, click Add.
Enter a name for the policy, and then click Add.
Figure-8 Adding a rate limit rule
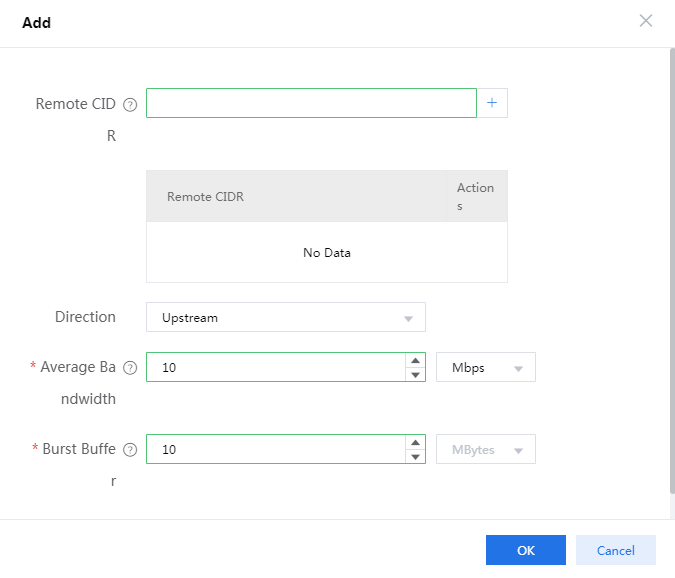
Configure the subnets, traffic direction for rate limiting, average bandwidth and burst buffer, and then click OK.
Figure-9 Configuring the rate limit parameters
Confirm the rule, and then click OK.