Perform a migration
Restrictions and guidelines
The migration process will occupy the network bandwidth and affect the computing performance of the source device, and services will be interrupted during migration. As a best practice, perform data migration during off-peak periods, and properly arrange the service switchover time.
To avoid migration failures or other compatibility issues, verify that the platform is compatible with the operating system of the source device and the destination device has sufficient hardware resources.
You might need to reload or update the drivers for some hardware after migration. Some hardware settings such as the MAC address of the NIC and hard drive letter might change. If there are applications bound to hardware, you must edit the applications accordingly.
Create a migration task
On the top navigation bar, click Services.
From the left navigation pane, select Heterogeneous Migration.
Click Create Migration Task.
Select I have read the restrictions and guidelines, and then click Next.
Specify the source device and destination VM.
Figure-1 Specifying the source device and destination VM
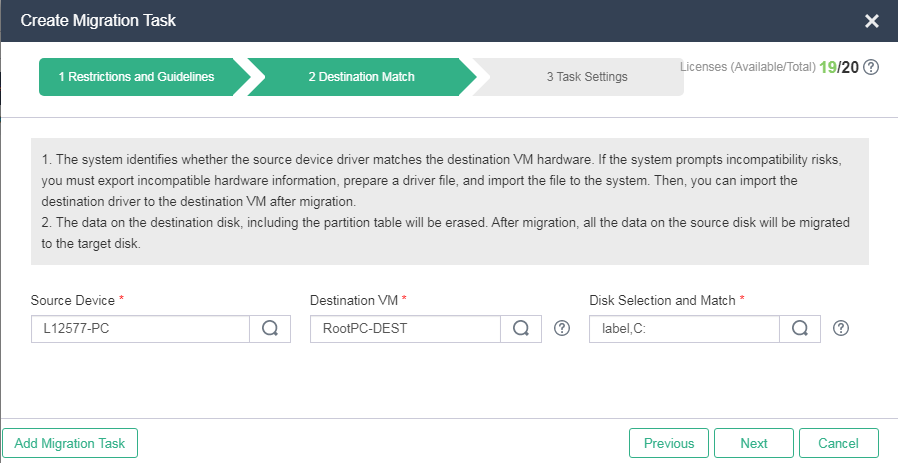
Select source and destination disks. By default, the system maps each source device disk to a target device disk. If you manually map a source disk to a target disk, make sure the target disk has a same or larger size than the source disk. For dynamic source disks, the destination disks and source disks must have the same size.
|
|
· Only system disks and data disks can be migrated. · The data on the destination disk, including the partition table will be erased. After migration, all the data on the source disk will be migrated to the target disk. · You do not need to select a destination disk for an LVM disk because it is a logical volume, but the system also migrates LVM data. |
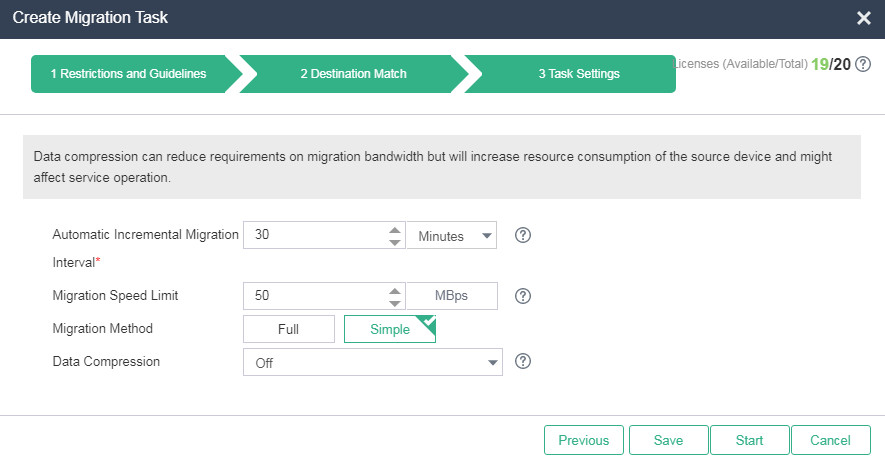
Configure task parameters as needed. To start the migration task immediately, click Start. To save the migration task, click Save. You can access the migration task list later to start a saved task.
|
|
|
Figure-2 Configuring task parameters
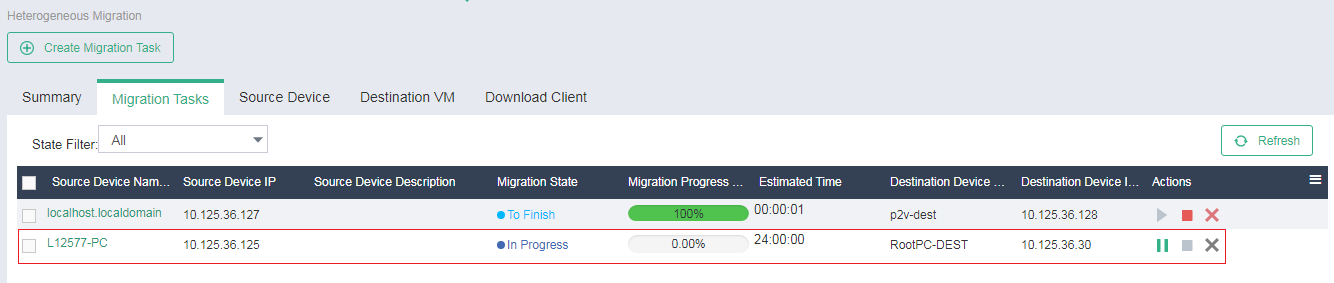
To view the migration task list, click the Migration Tasks tab. The system names migration tasks by source device names and updates the list every 30 seconds.
|
|
A migration task is named the source device name by default. |
Figure-3 Migration task list
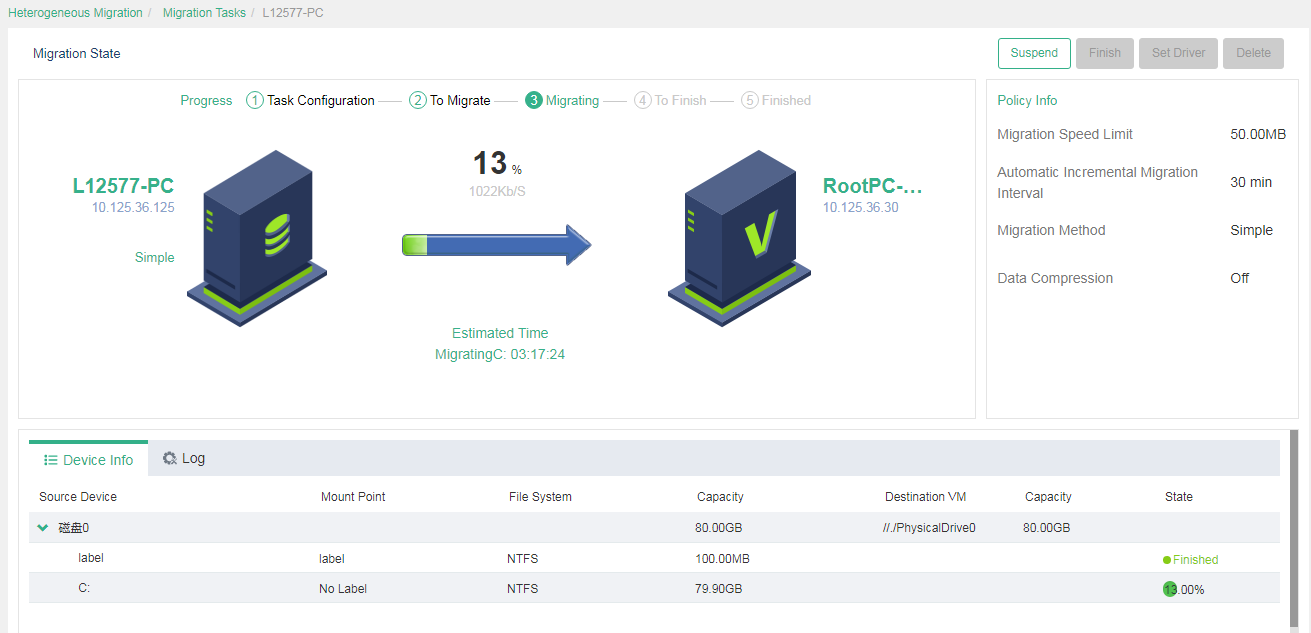
To view detailed information about a migration task, click the source device name. The detailed information page displays the migration process, device information, and logs.
|
|
The system calculates the execution progress of a migration task by periodically sampling data. The system might not refresh the execution progress in real time when migrating a large number of disks, which does not affect migration. You can check the migration progress for the migration state of each disk. |
Figure-4 Viewing detailed information about a migration task
The system executes a migration task periodically at the incremental migration interval if you do not finish it manually. To manually finish a migration task, click Finish.
Before manually finishing a task, you must stop the services on the source device to prevent the device from generating new data.
|
|
You can manually perform incremental data migration for a migration task that is not finished after its first execution. Incremental migration copies only the changed or new data since the previous migration. You can verify data integrity and restore data for a migration task that is not finished after its first execution. |
Figure-5 Finishing a migration task

After you finish the task, the task enters Finished state.
Figure-6 Migration completion

Configure a driver
|
|
As a best practice, use Virtio drivers for Linux OSs if the kernel version is 2.6.25 or higher (for example, redhat 5.2), and use IDE drivers if the kernel version is not. |
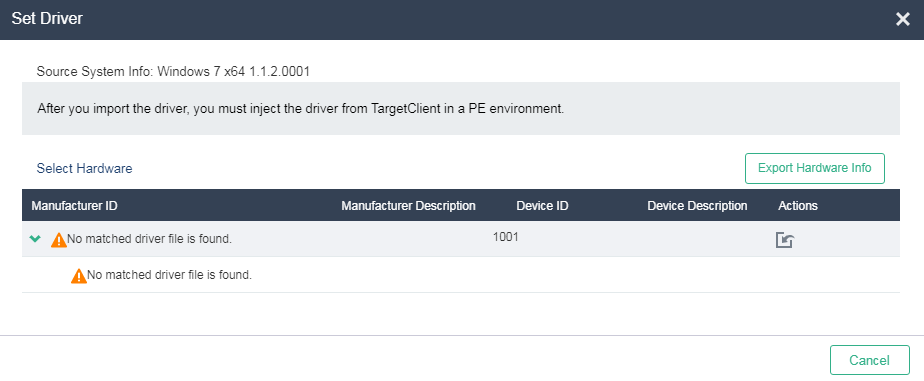
The system can detect disk driver incompatibility risks for a migration task. You can export information about the hardware that might have driver incompatibility issues and import drivers for the hardware to the destination VM.
On the details page for the migration task, c lick Set Driver.
Figure-7 Configuring a driver

Click Export Hardware Info. The system exports hardware information about disks of the destination VM in TXT format.
Open the downloaded file to view information about the required drivers. The file name is Destination_VM_name Driver Hardware Info.txt.
Compress driver files to be uploaded into a .zip file and name the compressed file mptspi.zip.
Typically, driver files are .sys or .inf files and .ko files for Windows and Linux, respectively.
Make sure the compressed file does not contain multi-layered folders.
On the detailed task information page, click the import button to import the compressed file to UIS Manager.
Figure-8 Importing the compressed file to UIS Manager
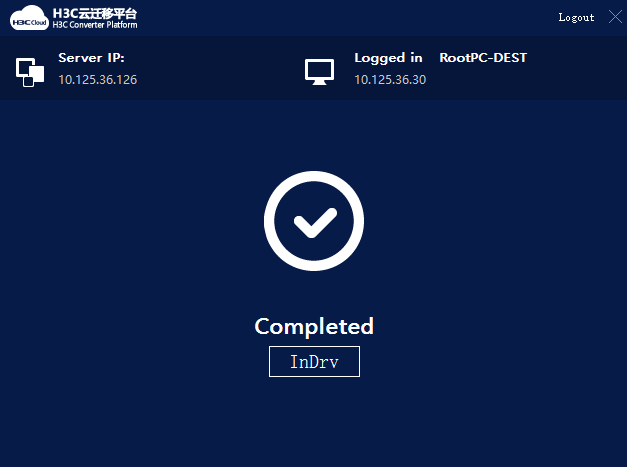
Click InDrv in TargetClient to install drivers to the destination VM.
Figure-9 Installing drivers
Access the destination VM
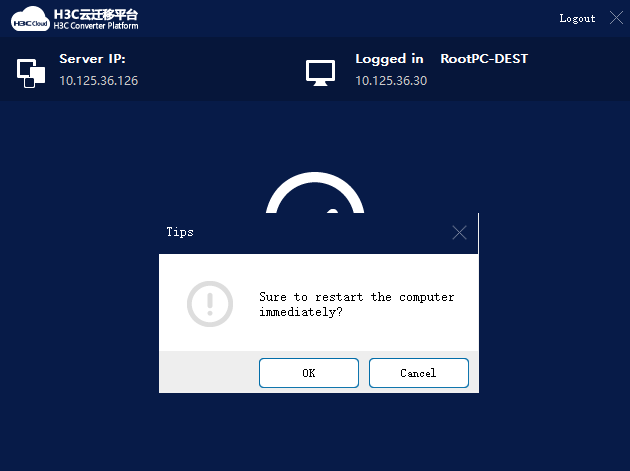
Access the console of the destination VM and exit the H3C Converter Platform.
At the prompt, click OK to restart the destination VM.
|
|
If you cannot access the VM's operating system or the system prompts partition or disk not found, power off the VM, restart the VM, and select boot from CAS. |
Figure-10 Restarting the destination VM
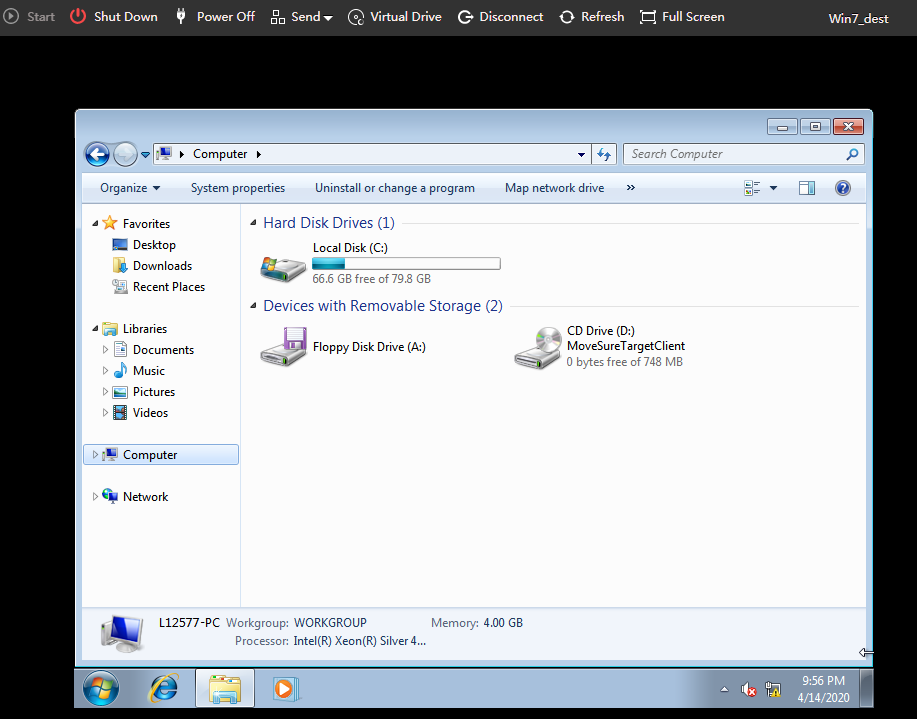
Enter the username and password and access the destination VM. Verify that all data in the source device has been migrated to the destination VM.
|
|
By default, the destination VM uses the same username and password as the source device. |
Figure-11 Verifying data on the destination VM