Deploy a Windows cluster
This example installs SQL Server 2016 standard edition on a two-node cluster.
|
|
|
To deploy a Windows cluster:
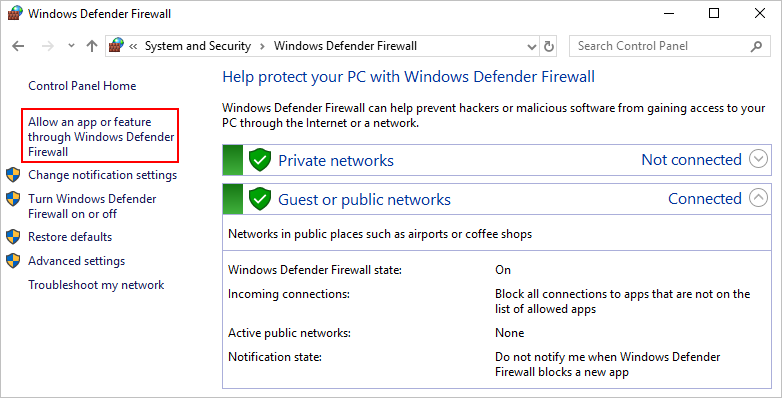
Open Windows Defender Firewall on one cluster node.
Select Allow an app or feature through Windows Defender Firewall.
Figure-1 Allowing an app or feature through Windows Defender Firewall
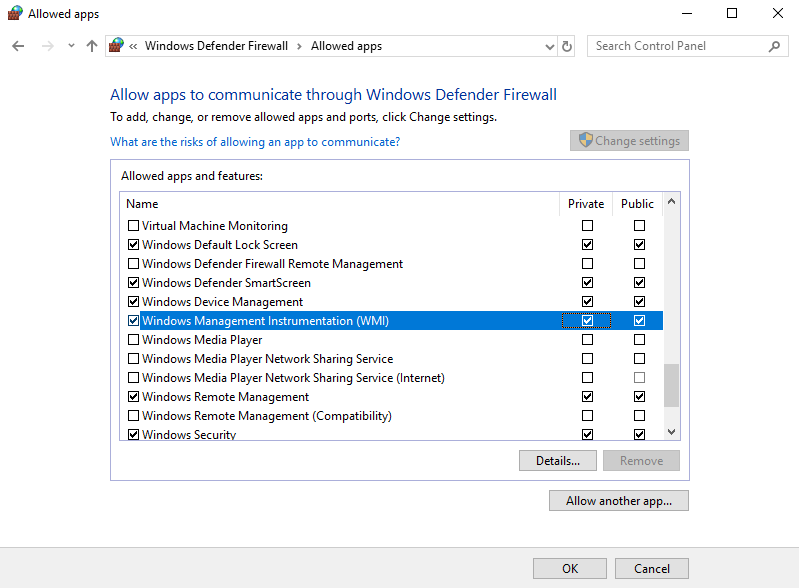
Select both the Private and Public options for Windows Management Instrumentation (WMI).
Figure-2 Configuring Windows Management Instrumentation (WMI)
Select the Public option for Remote Service Management, Remote Shutdown, Remote Scheduled Tasks Management, Remote Volume Management, Remote Event Monitor, and Remote Event Log Management, and select both the Private and Public options for Remote Desktop.
Figure-3 Configuring remote management services

Click OK.
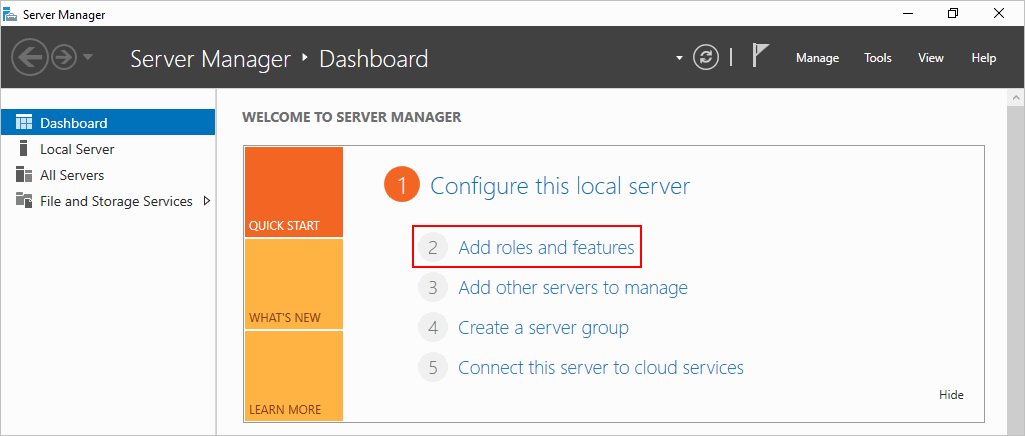
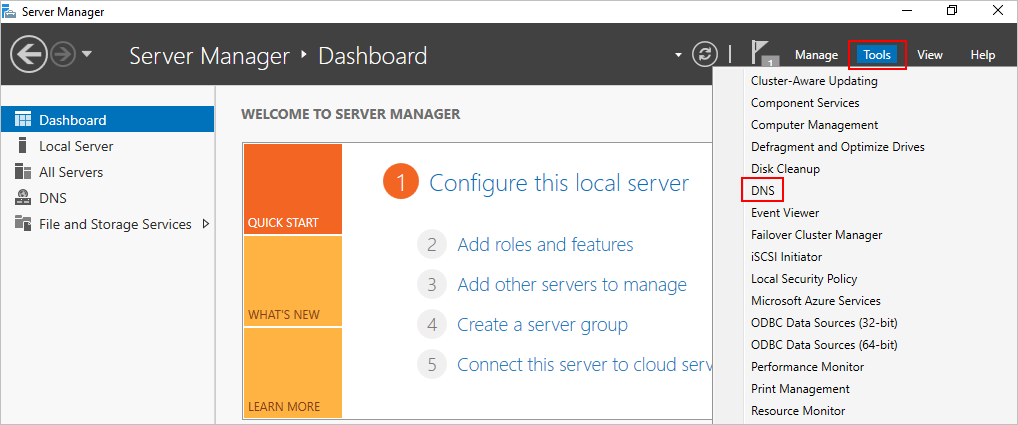
Open Server Manager.
Click Add roles and features on the dashboard.
Figure-4 Adding a role
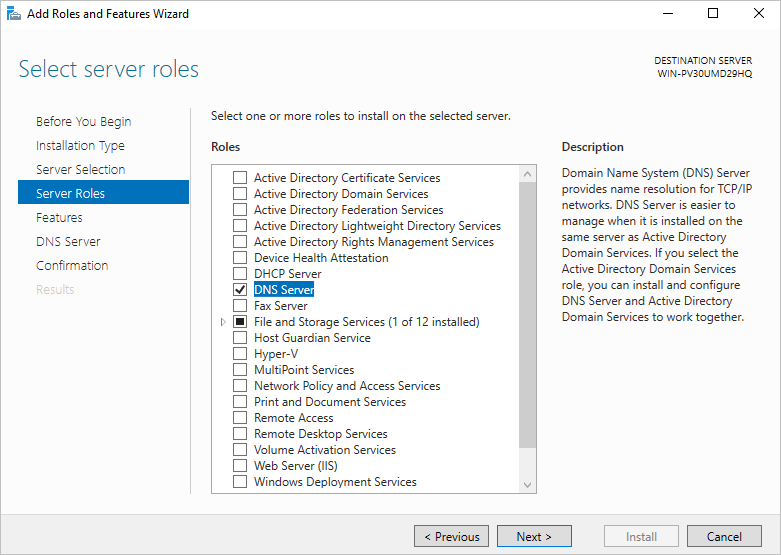
Select DNS Server (Installed) from the Roles list, and then click Next.
Figure-5 Selecting a server role
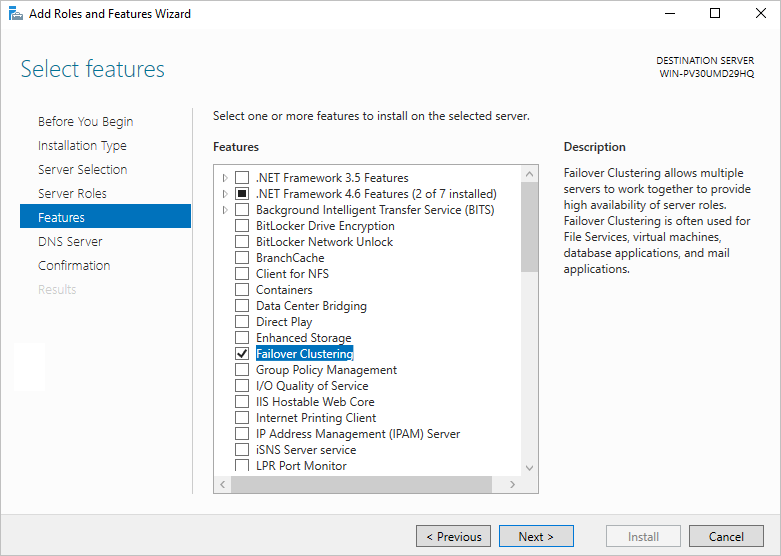
Select Failover Clustering from the Features list, and then click Next.
Figure-6 Selecting features
Follow the instructions to finish configuration.
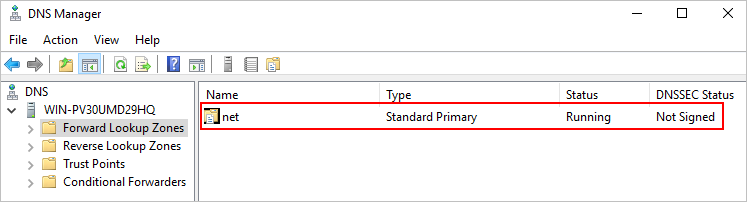
Open DNS Manager.
Figure-7 DNS Manager
Create primary DNS zone net, and use the default for other settings.
Figure-8 Creating a DNS zone
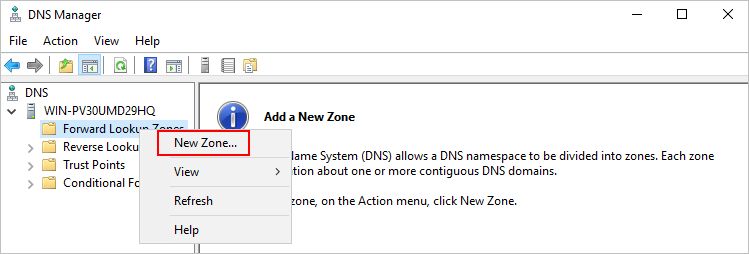
Figure-9 DNS management
Add DNS information for all cluster nodes.
Figure-10 Configuring DNS
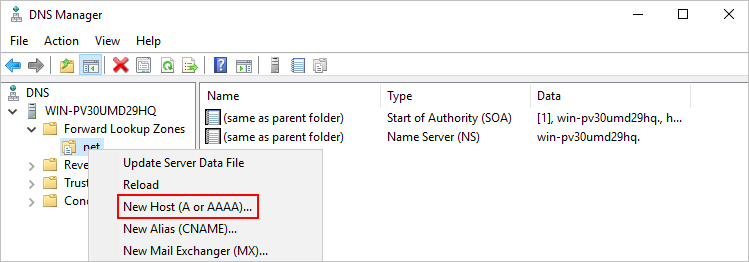
Figure-11 Adding a new host
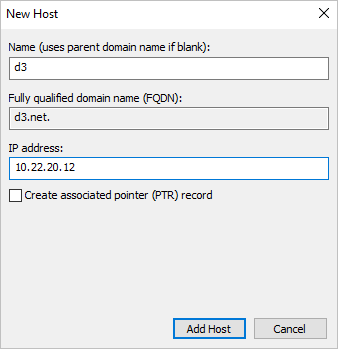
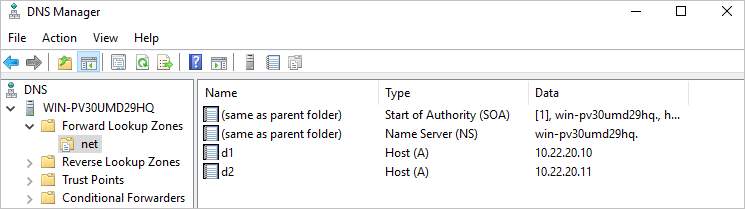
Figure-12 DNS configured
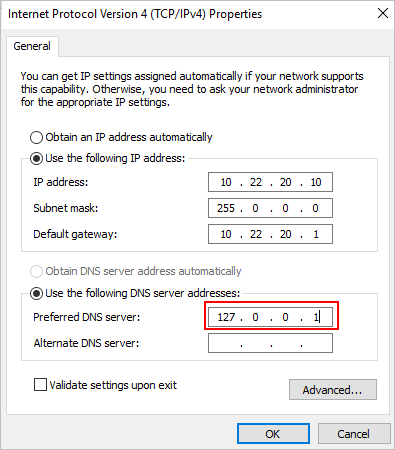
Set the primary DNS server IP address to 127.0.0.1.
Figure-13 Setting the primary DNS server IP
Configure the computer name:
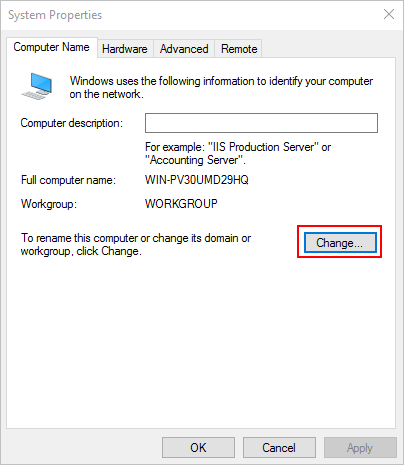
Open the System Properties window.
Click Change on the Computer Name tab.
Figure-14 Changing the computer name
Enter the correct domain name prefix in the Computer name field.
Figure-15 Entering a computer name

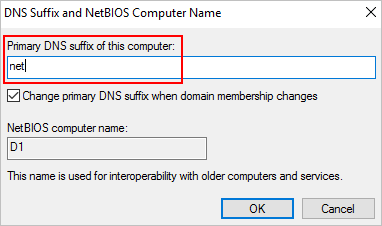
Click More.
Enter net as the DNS suffix.
Figure-16 Entering a DNS suffix
Click OK and reboot the server.
Repeat steps 1 through 15 to configure the other cluster node.
Set up a failover cluster from one of the cluster node:
Open Failover Cluster Manager of Server Manager.
Right-click on the Failover Cluster Manager node and then select Create Cluster.
Enter the domain names of the cluster nodes, and click Add.
Skip the validation test, and then click Next.
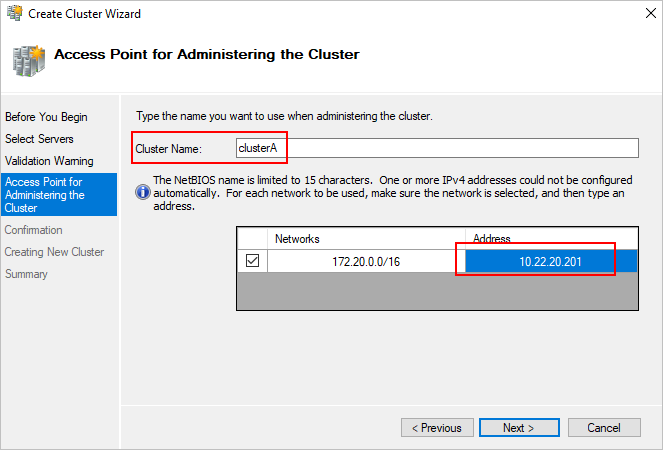
Enter a cluster name and a cluster IP address.
Follow the instructions to finish configuration.
Figure-17 Failover Cluster Manager
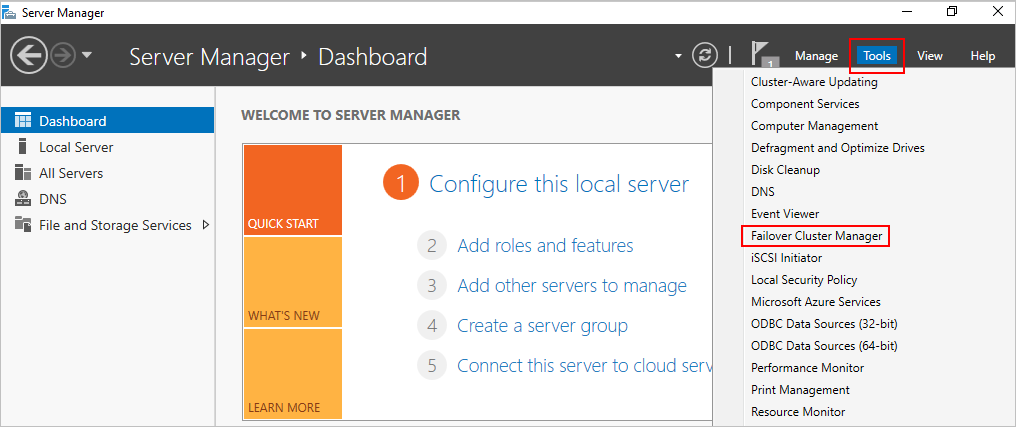
Figure-18 Creating a cluster

Figure-19 Selecting a server
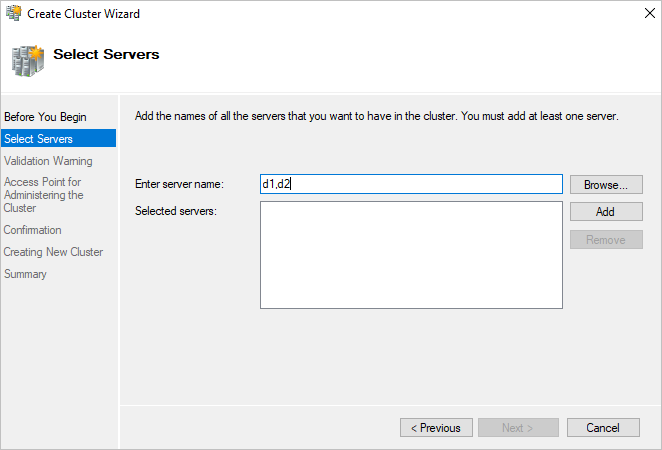
Figure-20 Skipping the validation test
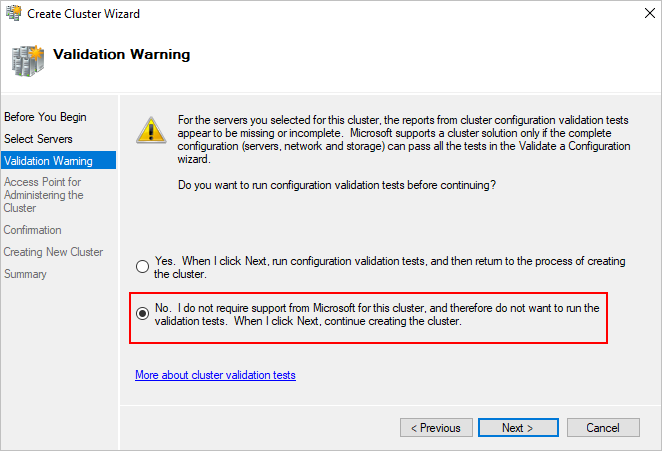
Figure-21 Entering a cluster name
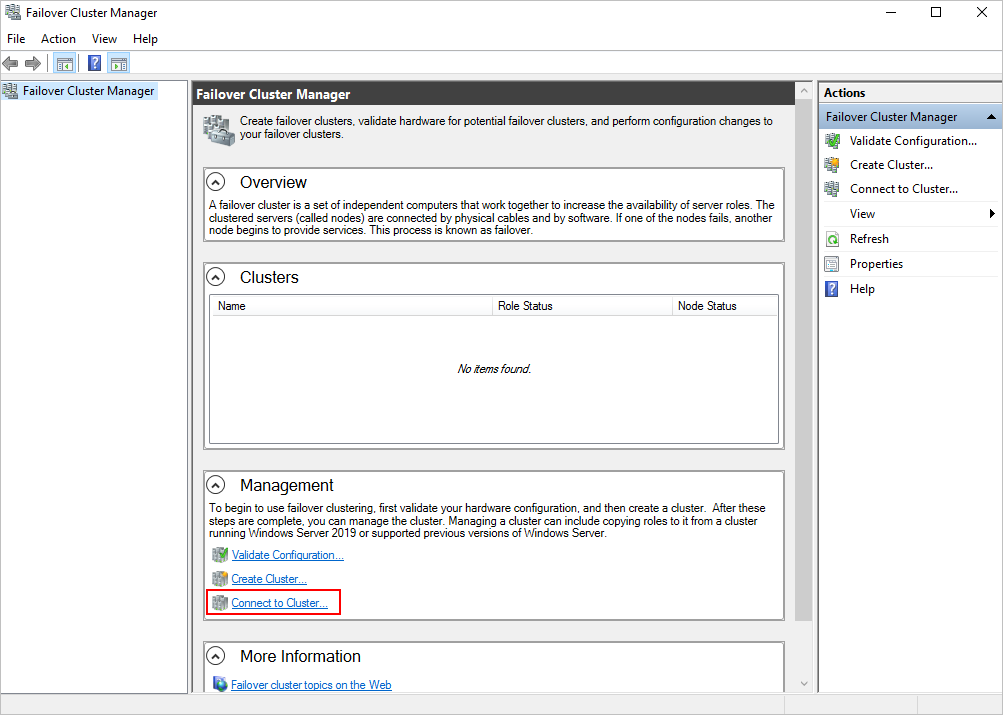
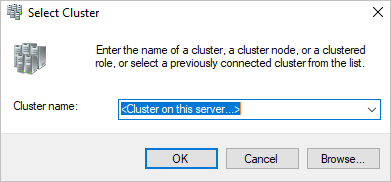
Open Failover Cluster Manager on the other cluster node.
Click Connect to Cluster.
This task enables you to manage the cluster you have set up.
Figure-22 Connecting to a cluster
Select the cluster, and then click OK.
Figure-23 Selecting a cluster
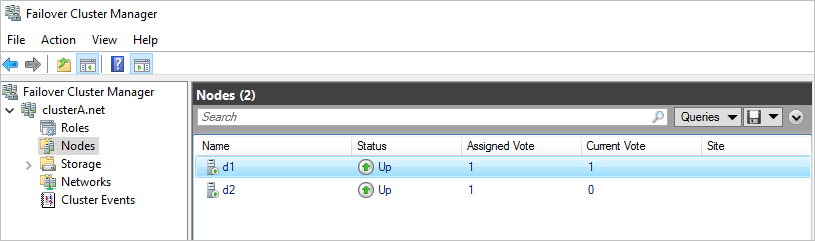
View nodes in the cluster.
Figure-24 Viewing nodes