- Released At: 18-11-2019
- Page Views:
- Downloads:
- Table of Contents
- Related Documents
-
Contents
Software file naming conventions
Upgrading Comware software from the BootWare menus
Using TFTP to upgrade through the management Ethernet port
Using FTP to upgrade through the management Ethernet port
Using Xmodem to upgrade through the console port
Upgrading BootWare from the BootWare menus
Using TFTP to upgrade through the management Ethernet port
Using FTP to upgrade through the management Ethernet port
Using Xmodem to upgrade through the console port
Appendix A Using BootWare menus
Modifying serial port parameters
Updating the extended BootWare segment
Running the primary extended BootWare segment
Running the backup extended BootWare segment
Accessing the BASIC ASSISTANT menu
Using the EXTENDED-BOOTWARE menu
Disabling password recovery capability
Upgrading Comware software through the console port
Upgrading Comware software through an Ethernet port
Restoring the factory-default configuration
Starting up without loading the configuration file
Skipping console login authentication
Using the EXTENDED ASSISTANT menu
Overview
Software upgrade enables you to add new features and fix bugs. Before performing an upgrade, use the release notes for the new software version to verify software and hardware compatibility and evaluate upgrade impacts.
Software types
The following software types are available:
· BootWare image—A .bin file that contains a basic segment and an extended segment. The basic segment is the minimum code that bootstraps the system. The extended segment enables hardware initialization and provides system management menus. You can use these menus to load software and the startup configuration file or manage files when the device cannot start up correctly.
· Comware image—Includes the following image subcategories:
¡ Boot image—A .bin file that contains the Linux operating system kernel. It provides process management, memory management, and file system management.
¡ System image—A .bin file that contains the minimum feature modules required for device operation and some basic features, including device management, interface management, configuration management, and routing. To have advanced features, you must purchase feature packages.
¡ Feature package—Includes a set of advanced software features. Users purchase feature packages as needed.
¡ Patch packages—Irregularly released packages for fixing bugs without rebooting the device. A patch package does not add new features or functions.
Comware software images that have been loaded are called "current software images." Comware images specified to load at the next startup are called "startup software images."
BootWare image, boot image, and system image are required for the system to work. These images are released as a whole in one .ipe file. The system automatically decompresses the file, loads the boot and system images and sets them as startup software images.
Software file naming conventions
Software image file names use the chassis-comware version-image type-release format, for example, S12500X-CMW710-SYSTEM-R1135.bin and S12500X-CMW710-BOOT-R1135.bin. This document uses boot.bin and system.bin as boot and system image file names.
Upgrade methods
You can use one of the following methods to upgrade software:
|
Upgrade method |
Software type |
Remarks |
|
· BootWare image · Comware images (excluding patches) |
This method is disruptive. If you are upgrading MPUs, you must reboot the switch to complete the upgrade. If you are upgrading the BootWare image of a card (an LPU or switching fabric module), you must reboot the card. NOTE: You can upgrade the BootWare of LPUs and switching fabric modules from the CLI only. |
|
|
Upgrading from BootWare menus: |
· BootWare image · Comware images |
Use this method when the device cannot start up correctly. |
Restrictions and guidelines
When you upgrade software, follow these restrictions and guidelines:
· Use the same method to upgrade software for all MPUs to ensure software version consistency across MPUs.
· Make sure the Comware software and BootWare are compatible. For the compatibility between the Comware software and BootWare, see the hardware and software compatibility matrix in the Release Notes.
· If the switch uses the LSXM1SUPB1 MPU, follow these restrictions and guidelines when you use the management ports on the MPU:
¡ If multiple management ports are connected to one remote switch, you must assign their peer ports to different VLANs on the remote switch. Login or file transfer will fail if the peer ports are in the same VLAN.
¡ To transfer files from the BootWare menu through TFTP or FTP, you can use only the management port M0/0/3. This port is marked with a number of 3 on the card panel.
|
|
NOTE: The command output in this document is for reference only. |
Upgrading from the CLI
This section describes the upgrade procedures for standalone S12500X-AF switches and S12500X-AF IRF fabrics. For more information about IRF, see H3C S12500-X & S12500X-AF Switch Series IRF Configuration Guide.
Upgrading a standalone switch
Preparing for the upgrade
1. Telnet to the switch or log in through the console port. (Details not shown.)
2. Display device information.
<Sysname> display device
Slot No. Brd Type Brd Status Subslot Sft Ver Patch Ver
0 LSXM1SUPA1 Master 0 S12516X-AF-a0090 None
1 LSXM1SUPA1 Standby 0 S12516X-AF-a0090 None
2 LSXM1TGS48FX1 Normal 0 S12516X-AF-a0090 None
3 NONE Absent 0 NONE None
4 NONE Absent 0 NONE None
5 NONE Absent 0 NONE None
6 NONE Absent 0 NONE None
7 NONE Absent 0 NONE None
8 NONE Absent 0 NONE None
9 NONE Absent 0 NONE None
10 NONE Absent 0 NONE None
11 NONE Absent 0 NONE None
12 NONE Absent 0 NONE None
13 NONE Absent 0 NONE None
14 NONE Absent 0 NONE None
15 NONE Absent 0 NONE None
16 NONE Absent 0 NONE None
17 NONE Absent 0 NONE None
18 LSXM1SFF16B1 Normal 0 S12516X-AF-a0090 None
19 LSXM1SFF16B1 Normal 0 S12516X-AF-a0090 None
20 NONE Absent 0 NONE None
21 NONE Absent 0 NONE None
22 NONE Absent 0 NONE None
23 NONE Absent 0 NONE None
The output shows that the switch has two MPUs, an active MPU in slot 0 and a standby MPU in slot 1. You must upgrade software for the two MPUs.
|
|
NOTE: You only need to upgrade the active MPU if the device has no standby MPU. |
3. Verify that the MPUs have enough free storage space for the upgrade files:
# On the active MPU:
<Sysname> dir
Directory of flash:
0 drw- - Aug 06 2013 17:26:38 diagfile
1 -rw- 42 Aug 07 2013 08:55:30 ifindex.dat
2 drw- - Aug 06 2013 17:26:38 license
3 drw- - Aug 06 2013 18:26:41 logfile
4 -rw- 102294528 Apr 07 2013 13:47:21 S12500X-CMW710-A0090.ipe
5 -rw- 14908416 Aug 06 2013 17:21:31 s12500x-cmw710-boot-a0090.bin
6 -rw- 110083072 Aug 06 2013 17:23:20 s12500x-cmw710-system-a0090.bin
7 drw- - Aug 06 2013 17:26:38 seclog
8 -rw- 1982 Aug 07 2013 08:55:30 startup.cfg
9 -rw- 33368 Aug 07 2013 08:55:31 startup.mdb
10 drw- - Aug 06 2013 17:26:40 versionInfo
503808 KB total (267896 KB free)
# On the standby MPU:
<Sysname> dir slot1#flash:
Directory of slot1#flash:
0 drw- - Aug 06 2013 17:26:38 diagfile
1 -rw- 42 Aug 07 2013 08:55:30 ifindex.dat
2 drw- - Aug 06 2013 17:26:38 license
3 drw- - Aug 06 2013 18:26:41 logfile
4 -rw- 102294528 Apr 07 2013 13:47:21 S12500X-CMW710-A0090.ipe
5 -rw- 14908416 Aug 06 2013 17:21:31 s12500x-cmw710-boot-a0090.bin
6 -rw- 110083072 Aug 06 2013 17:23:20 s12500x-cmw710-system-a0090.bin
7 drw- - Aug 06 2013 17:26:38 seclog
8 -rw- 1982 Aug 07 2013 08:55:30 startup.cfg
9 -rw- 33368 Aug 07 2013 08:55:31 startup.mdb
10 drw- - Aug 06 2013 17:26:40 versionInfo
503808 KB total (267896 KB free)
4. If the free storage space is not sufficient, delete unused files:
# On the active MPU:
<Sysname> delete /unreserved flash:/S12500X-CMW710-A0090.ipe
The file cannot be restored. Delete flash:/S12500X-CMW710-A0090.ipe?[Y/N]:y
Deleting the file permanently will take a long time. Please wait...
..................................................
Deleting file flash:/S12500X-CMW710-A0090.ipe... Done.
# On the standby MPU:
<Sysname> delete /unreserved slot1#flash:/S12500X-CMW710-A0090.ipe
The file cannot be restored. Delete chassis1#slot1#flash:/S12500X-CMW710-A0090.ipe?[Y/N]:y
Deleting the file permanently will take a long time. Please wait...
..................................................
Deleting file flash:/S12500X-CMW710-A0090.ipe... Done.
|
|
NOTE: · The delete /unreserved file-url command deletes a file permanently, and the action cannot be undone. · The delete file-url command moves a file to the recycle bin and the file still occupies storage space. To delete the file from the recycle bin, execute the reset recycle-bin command in the original directory of the file. |
Downloading upgrade files to the flash memories of MPUs
You can use FTP or TFTP to download files.
|
|
NOTE: The switch does not come with FTP or TFTP software. Prepare the software yourself. |
This example uses FTP to download files from an FTP server and assumes that the FTP client and server can reach each other.
To download the software file (for example, newest.ipe) from the FTP server:
1. Run the FTP server program on the PC at 10.10.110.1, and set the username, password, and the file directory where the software file is stored.
2. Download the file to the active MPU:
# Log in to the PC with FTP.
<Sysname> ftp 10.10.110.1
Connected to 10.10.110.1 (10.10.110.1).
220 WFTPD 2.0 service (by Texas Imperial Software) ready for new user
User (10.10.110.1:(none)):username ---Enter the username.
331 Give me your password, please
Password: ---Enter the password.
230 Logged in successfully
Remote system type is MSDOS.
ftp>
# Set the file transfer mode to binary. By default, the file transfer mode is binary.
ftp> binary
200 Type is Image (Binary)
# Download the file from the PC to the root directory of the flash memory on the active MPU.
ftp> get newest.ipe
227 Entering Passive Mode (10,10,110,1,7,100)
150 "C:\ newest.ipe " file ready to send (385 bytes) in IMAGE / Binary mode
226 Transfer finished successfully.
74948608 bytes received in 35.974 seconds (896.00 kbyte/s)
ftp> bye
221 Windows FTP Server (WFTPD, by Texas Imperial Software) says goodbye
3. Copy the file to the root directory of the flash memory on the standby MPU.
<Sysname> copy newest.bin slot1#flash:/
Copy flash:/newest.bin to slot1#flash:/newest.bin?[Y/N]:y
Copying file flash:/newest.ipe to slot1#flash:/newest.ipe...Done.
|
|
NOTE: You can configure the switch as the FTP server, FTP client, or TFTP client. The transfer procedures vary slightly. For more information about FTP and TFTP, see H3C S12500-X & S12500X-AF Switch Series Fundamentals Configuration Guide. |
Upgrading software from the CLI
Before upgrading software, verify that the software file is stored in the root directory of the flash memory on the active MPU.
Perform the following tasks as needed:
1. Upgrade BootWare:
The following example uses newest.ipe to upgrade the BootWare.
# Decompress the file newest.ipe to the flash memory on the active MPU (in slot 0).
<Sysname> install add flash:/newest.ipe flash:
Verifying image file...Done.
This operation will take several minutes, please wait...........................
....................................................Done.
In this example, the decompressed image files include a boot image S12500X-CMW710-BOOT-R1135.bin and a system image S12500X-CMW710-SYSTEM-R1135.bin.
# Upgrade the BootWare on the active MPU (in slot 0).
<Sysname> bootrom update file flash:/S12500X-CMW710-BOOT-R1135.bin slot 0
This command will update the Boot ROM file on the specified board(s),
Continue? [Y/N]:y
Now updating the Boot ROM, please wait...
............Done.
# Upgrade the BootWare on the standby MPU (in slot 1).
<Sysname> bootrom update file slot1#flash:/S12500X-CMW710-BOOT-R1135.bin slot 1
This command will update the Boot ROM file on the specified board(s),
Continue? [Y/N]:y
Now updating the Boot ROM, please wait...
............Done.
# Upgrade the BootWare on the LPU in slot 2. (Upgrade other LPUs in the same way.)
<Sysname> bootrom update file flash:/S12500X-CMW710-BOOT-R1135.bin slot 2
This command will update the Boot ROM file on the specified board(s),
Continue? [Y/N]:y
Now updating the Boot ROM, please wait...
............Done.
# Upgrade the BootWare of the switching fabric module in slot 18. (Upgrade other switching fabric modules in the same way.)
<Sysname> bootrom update file flash:/S12500X-CMW710-BOOT-R1135.bin slot 18
This command will update the Boot ROM file on the specified board(s),
Continue? [Y/N]:y
Now updating the Boot ROM, please wait...
............Done.
# Reboot the switch to complete the upgrade.
<Sysname> reboot
Start to check configuration with next startup configuration file, please wait.........DONE!
Current configuration may be lost after the reboot, save current configuration?[Y/N]:y
Now rebooting, please wait...
2. Upgrade Comware software:
# Specify the images as the main startup software images for the active MPU.
<Sysname> boot-loader file boot flash:/S12500X-CMW710-BOOT-R1135.bin system flash:/S12500X-CMW710-SYSTEM-R1135.bin slot 0 main
This command will set the main startup software images. Continue? [Y/N]:y
Verifying the file flash:/s12500X-CMW710-BOOT-R1135.bin on slot 0...Done.
Verifying the file flash:/s12500X-CMW710-SYSTEM-R1135.bin on slot 0...
...................................................................Done.
The images that have passed all examinations will be used as the main startup software images at the next reboot on slot 0.
# Specify the images as the main startup software images for the standby MPU.
<Sysname> boot-loader file boot flash:/S12500X-CMW710-BOOT-R1135.bin system flash:/S12500X-CMW710-SYSTEM-R1135.bin slot 1 main
This command will set the main startup software images. Continue? [Y/N]:y
File flash:/s12500X-CMW710-BOOT-R1135.bin already exists on slot 1.
File flash:/s12500X-CMW710-SYSTEM-R1135.bin already exists on slot 1.
Overwrite the existing files? [Y/N]:n
Verifying the file flash:/s12500X-CMW710-BOOT-R1135.bin on slot 1...Done.
Verifying the file flash:/s12500X-CMW710-SYSTEM-R1135.bin on slot 1...
...................................................................Done
The images that have passed all examinations will be used as the main startup software images at the next reboot on slot 1
For more information about the boot-loader command, see H3C S12500-X & S12500X-AF Switch Series Fundamentals Command Reference.
# To prevent configuration loss at reboot, save the running configuration.
<Sysname> save
# Reboot the switch to complete the upgrade.
<Sysname> reboot
Start to check configuration with next startup configuration file, please wait.........DONE!
........DONE!
Current configuration may be lost after the reboot, save current configuration?[Y/N]:y
Now rebooting, please wait...
3. Install a patch package:
|
|
IMPORTANT: Use the display install active command to verify whether patches have been installed on the device. If the device has patches, uninstall them. Only one patch package file can be installed on the device. |
# Install the patch package S12500X-CMW710-SYSTEM-R1135H01.bin. Make sure the file is saved to the root directory of the flash memories on both MPUs.
<Sysname> install activate patch flash:/S12500X-CMW710-SYSTEM-R1135H01.bin slot 0
<Sysname> install activate patch flash:/S12500X-CMW710-SYSTEM-R1135H01.bin slot 1
The patches run immediately without requiring a reboot.
# Commit the installed patches to have the patches continue to run at the next reboot.
<Sysname> install commit
For more information about installing patches, see H3C S12500-X & S12500X-AF Switch Series Configuration Guide.
4. Verify the software upgrade and patching.
<Sysname> display install active
Active packages on slot 0:
flash:/S12500X-CMW710-BOOT-R1135.bin
flash:/S12500X-CMW710-SYSTEM-R1135.bin
flash:/S12500X-CMW710-SYSTEM-R1135H01.bin
Active packages on slot 1:
flash:/S12500X-CMW710-BOOT-R1135.bin
flash:/S12500X-CMW710-SYSTEM-R1135.bin
flash:/S12500X-CMW710-SYSTEM-R1135H01.bin
Active packages on slot 2:
flash:/S12500X-CMW710-BOOT-R1135.bin
flash:/S12500X-CMW710-SYSTEM-R1135.bin
flash:/S12500X-CMW710-SYSTEM-R1135H01.bin
Active packages on slot 18:
flash:/S12500X-CMW710-BOOT-R1135.bin
flash:/S12500X-CMW710-SYSTEM-R1135.bin
flash:/S12500X-CMW710-SYSTEM-R1135H01.bin
Active packages on slot 19:
flash:/S12500X-CMW710-BOOT-R1135.bin
flash:/S12500X-CMW710-SYSTEM-R1135.bin
flash:/S12500X-CMW710-SYSTEM-R1135H01.bin
Upgrading an IRF fabric
Preparing for the upgrade
1. Telnet to the switch or log in through the console port. (Details not shown.)
2. Display device information.
<Sysname> display device
Chassis Slot Type State Subslot Soft Ver Patch Ver
1 0 LSXM1SUPA1 Master 0 S12516X-AF-a0090 None
1 1 LSXM1SUPA1 Standby 0 S12516X-AF-a0090 None
1 2 LSXM1TGS48FX1 Normal 0 S12516X-AF-a0090 None
1 3 NONE Absent 0 NONE None
1 4 NONE Absent 0 NONE None
1 5 NONE Absent 0 NONE None
1 6 NONE Absent 0 NONE None
1 7 NONE Absent 0 NONE None
1 8 NONE Absent 0 NONE None
1 9 NONE Absent 0 NONE None
1 10 NONE Absent 0 NONE None
1 11 NONE Absent 0 NONE None
1 12 NONE Absent 0 NONE None
1 13 NONE Absent 0 NONE None
1 14 NONE Absent 0 NONE None
1 15 NONE Absent 0 NONE None
1 16 NONE Absent 0 NONE None
1 17 NONE Absent 0 NONE None
1 18 LSXM1SFF16B1 Normal 0 S12516X-AF-a0090 None
1 19 LSXM1SFF16B1 Normal 0 S12516X-AF-a0090 None
1 20 NONE Absent 0 NONE None
1 21 NONE Absent 0 NONE None
1 22 NONE Absent 0 NONE None
1 23 NONE Absent 0 NONE None
2 0 LSXM1SUPA1 Standby 0 S12516X-AF-a0090 None
2 1 LSXM1SUPA1 Standby 0 S12516X-AF-a0090 None
2 2 LSXM1TGS48FX1 Normal 0 S12516X-AF-a0090 None
2 3 NONE Absent 0 NONE None
2 4 NONE Absent 0 NONE None
2 5 NONE Absent 0 NONE None
2 6 NONE Absent 0 NONE None
2 7 NONE Absent 0 NONE None
2 8 NONE Absent 0 NONE None
2 9 NONE Absent 0 NONE None
2 10 NONE Absent 0 NONE None
2 11 NONE Absent 0 NONE None
2 12 NONE Absent 0 NONE None
2 13 NONE Absent 0 NONE None
2 14 NONE Absent 0 NONE None
2 15 NONE Absent 0 NONE None
2 16 NONE Absent 0 NONE None
2 17 NONE Absent 0 NONE None
2 18 LSXM1SFF16B1 Normal 0 S12516X-AF-a0090 None
2 19 LSXM1SFF16B1 Normal 0 S12516X-AF-a0090 None
2 20 NONE Absent 0 NONE None
2 21 NONE Absent 0 NONE None
2 22 NONE Absent 0 NONE None
2 23 NONE Absent 0 NONE None
The output shows that two switches form an IRF fabric. The following table shows MPU information.
Table 1 MPU information of the IRF fabric
|
MPU role |
Member ID |
Slot number |
|
Master MPU (also called the "global active MPU") |
1 |
0 |
|
Standby MPU |
1 |
1 |
|
Standby MPU |
2 |
0 |
|
Standby MPU |
2 |
1 |
3. Verify that all the MPUs have enough free storage space for the upgrade files:
# On the global active MPU:
<Sysname> dir
Directory of flash:
0 drw- - Aug 06 2013 17:26:38 diagfile
1 -rw- 42 Aug 07 2013 08:55:30 ifindex.dat
2 drw- - Aug 06 2013 17:26:38 license
3 drw- - Aug 06 2013 18:26:41 logfile
4 -rw- 102294528 Apr 07 2013 13:47:21 S12500X-CMW710-A0090.ipe
5 -rw- 14908416 Aug 06 2013 17:21:31 s12500x-cmw710-boot-a0090.bin
6 -rw- 110083072 Aug 06 2013 17:23:20 s12500x-cmw710-system-a0090.bin
7 drw- - Aug 06 2013 17:26:38 seclog
8 -rw- 1982 Aug 07 2013 08:55:30 startup.cfg
9 -rw- 33368 Aug 07 2013 08:55:31 startup.mdb
10 drw- - Aug 06 2013 17:26:40 versionInfo
503808 KB total (267896 KB free)
# On the standby MPU in slot 1 of member device 1:
<Sysname> dir chassis1#slot1#flash:
Directory of chassis1#slot1#flash:
0 drw- - Aug 06 2013 17:26:38 diagfile
1 -rw- 42 Aug 07 2013 08:55:30 ifindex.dat
2 drw- - Aug 06 2013 17:26:38 license
3 drw- - Aug 06 2013 18:26:41 logfile
4 -rw- 102294528 Apr 07 2013 13:47:21 S12500X-CMW710-A0090.ipe
5 -rw- 14908416 Aug 06 2013 17:21:31 s12500x-cmw710-boot-a0090.bin
6 -rw- 110083072 Aug 06 2013 17:23:20 s12500x-cmw710-system-a0090.bin
7 drw- - Aug 06 2013 17:26:38 seclog
8 -rw- 1982 Aug 07 2013 08:55:30 startup.cfg
9 -rw- 33368 Aug 07 2013 08:55:31 startup.mdb
10 drw- - Aug 06 2013 17:26:40 versionInfo
503808 KB total (267896 KB free)
# On the standby MPU in slot 0 of member device 2:
<Sysname> dir chassis2#slot0#flash:
Directory of chassis2#slot0#flash:
0 drw- - Aug 06 2013 17:26:38 diagfile
1 -rw- 42 Aug 07 2013 08:55:30 ifindex.dat
2 drw- - Aug 06 2013 17:26:38 license
3 drw- - Aug 06 2013 18:26:41 logfile
4 -rw- 102294528 Apr 07 2013 13:47:21 S12500X-CMW710-A0090.ipe
5 -rw- 14908416 Aug 06 2013 17:21:31 s12500x-cmw710-boot-a0090.bin
6 -rw- 110083072 Aug 06 2013 17:23:20 s12500x-cmw710-system-a0090.bin
7 drw- - Aug 06 2013 17:26:38 seclog
8 -rw- 1982 Aug 07 2013 08:55:30 startup.cfg
9 -rw- 33368 Aug 07 2013 08:55:31 startup.mdb
10 drw- - Aug 06 2013 17:26:40 versionInfo
503808 KB total (267896 KB free)
# On the standby MPU in slot 1 of member device 2:
<Sysname> dir chassis2#slot1#flash:
Directory of chassis2#slot1#flash:
0 drw- - Aug 06 2013 17:26:38 diagfile
1 -rw- 42 Aug 07 2013 08:55:30 ifindex.dat
2 drw- - Aug 06 2013 17:26:38 license
3 drw- - Aug 06 2013 18:26:41 logfile
4 -rw- 102294528 Apr 07 2013 13:47:21 S12500X-CMW710-A0090.ipe
5 -rw- 14908416 Aug 06 2013 17:21:31 s12500x-cmw710-boot-a0090.bin
6 -rw- 110083072 Aug 06 2013 17:23:20 s12500x-cmw710-system-a0090.bin
7 drw- - Aug 06 2013 17:26:38 seclog
8 -rw- 1982 Aug 07 2013 08:55:30 startup.cfg
9 -rw- 33368 Aug 07 2013 08:55:31 startup.mdb
10 drw- - Aug 06 2013 17:26:40 versionInfo
503808 KB total (267896 KB free)
4. If the free storage space is not sufficient, delete unused files:
# Delete unused files from the global active MPU.
<Sysname> delete /unreserved flash:/S12500X-CMW710-A0090.ipe
The contents cannot be restored!!! Delete flash:/S12500X-CMW710-A0090.ipe?[Y/N]:y
Deleting a file permanently will take a long time. Please wait...
..................................................
Deleting file flash:/S12500X-CMW710-A0090.ipe...Done.
# Delete unused files from the standby MPU in slot 1 of member device 1.
<Sysname> delete /unreserved chassis1#slot1#flash:/S12500X-CMW710-A0090.ipe
The contents cannot be restored!!! Delete chassis1#slot1#flash:/S12500X-CMW710-A0090.ipe?[Y/N]:y
Deleting a file permanently will take a long time. Please wait...
..................................................
Deleting file chassis1#slot1#flash:/S12500X-CMW710-A0090.ipe...Done.
# Delete unused files on other standby MPUs. (Details not shown.)
|
|
NOTE: · The delete /unreserved file-url command deletes a file permanently and the action cannot be undone. · The delete file-url command moves a file to the recycle bin and the file still occupies storage space. To delete the file from the recycle bin, execute the reset recycle-bin command in the original directory of the file. |
Downloading upgrade files to the flash memories of MPUs
You can use FTP or TFTP to download files.
|
|
NOTE: The switch does not come with FTP or TFTP software. Prepare the software yourself. |
This example uses FTP to download files from an FTP server and assumes that the FTP client and server can reach each other.
To download the software file (for example, newest.ipe) from the FTP server:
1. Run the FTP server program on the PC at 10.10.110.1, and set the username, password, and the file directory where the software file is stored.
2. Download the file to the global active MPU:
# Log in to the PC with FTP.
<Sysname> ftp 10.10.110.1
Connected to 10.10.110.1 (10.10.110.1).
220 WFTPD 2.0 service (by Texas Imperial Software) ready for new user
User (10.10.110.1:(none)):username --- Enter the username.
331 Give me your password, please
Password: --- Enter the password.
230 Logged in successfully
Remote system type is MSDOS.
ftp>
# Set the file transfer mode to binary. By default, the file transfer mode is binary.
ftp> binary
200 Type is Image (Binary)
# Download the file from the PC to the root directory of the flash memory on the global active MPU.
ftp> get newest.ipe
227 Entering Passive Mode (10,10,100,1,7,100)
150 "C:\ newest.ipe " file ready to send (385 bytes) in IMAGE / Binary mode
226 Transfer finished successfully.
74948608 bytes received in 35.974 seconds (896.00 kbyte/s)
ftp> bye
221 Windows FTP Server (WFTPD, by Texas Imperial Software) says goodbye
3. Copy the file to the root directory of the flash memories on the standby MPUs:
# Copy the file to the standby MPU in slot 1 of member device 1.
<Sysname> copy newest.bin chassis1#slot1#flash:/
Copy flash:/newest.bin to chassis1#slot1#flash:/newest.bin?[Y/N]:y
Copying file flash:/newest.ipe to chassis1#slot1#flash:/newest.ipe...Done.
# Copy the file to the standby MPU in slot 0 of member device 2.
<Sysname> copy newest.bin chassis2#slot0#flash:/
Copy flash:/newest.bin to chassis2#slot0#flash:/newest.bin?[Y/N]:y
Copying file flash:/newest.ipe to chassis2#slot0#flash:/newest.ipe...Done.
# Copy the file to the standby MPU in slot 1 of member device 2.
<Sysname> copy newest.bin chassis2#slot1#flash:/
Copy flash:/newest.bin to chassis2#slot1#flash:/newest.bin?[Y/N]:y
Copying file flash:/newest.ipe to chassis2#slot1#flash:/newest.ipe...Done.
|
|
NOTE: You can configure the switch as the FTP server, FTP client, or TFTP client. The transfer procedures vary slightly. For more information about FTP and TFTP, see H3C S12500-X & S12500X-AF Switch Series Fundamentals Configuration Guide. |
Upgrading software from the CLI
Before upgrading software, verify that the software file is stored in the root directory of the flash memory on the global active MPU.
Perform the following tasks as needed:
1. Upgrade BootWare:
The following example uses newest.ipe to upgrade the BootWare.
# Decompress the file newest.ipe to the flash memory on the global active MPU (in slot 0).
<Sysname> install add flash:/newest.ipe flash:
Verifying image file...Done.
This operation will take several minutes, please wait...........................
....................................................Done.
In this example, the decompressed image files include a boot image S12500X-CMW710-BOOT-R1135.bin and a system image S12500X-CMW710-SYSTEM-R1135.bin.
# Upgrade the BootWare on the global active MPU.
<Sysname> bootrom update file flash:/S12500X-CMW710-BOOT-R1135.bin chassis 1 slot 0
This command will update the Boot ROM file on the specified board(s),
Continue? [Y/N]:y
Now updating the Boot ROM, please wait........... ...........Done.
# Upgrade the BootWare of the standby MPU in slot 1 of member device 1. (Upgrade other standby MPUs in the same way.)
<Sysname> bootrom update file chassis1#slot1#flash:/S12500X-CMW710-BOOT-R1135.bin chassis 1 slot 1
This command will update the Boot ROM file on the specified board(s), Continue? [Y/N]:y
Now updating the Boot ROM, please wait........... ...........Done.
# Upgrade the BootWare of the LPU in slot 2 of member device 2. (Upgrade other LPUs in the same way.)
<Sysname> bootrom update file flash:/S12500X-CMW710-BOOT-R1135.bin chassis 2 slot 2
This command will update the Boot ROM file on the specified board(s), Continue? [Y/N]:y
Now updating the Boot ROM, please wait........... ...........Done.
# Upgrade the BootWare of the switching fabric module in slot 18 of member device 2. (Upgrade other switching fabric modules in the same way.)
<Sysname> bootrom update file flash:/S12500X-CMW710-BOOT-R1135.bin chassis 2 slot 18
This command will update the Boot ROM file on the specified board(s), Continue? [Y/N]:y
Now updating the Boot ROM, please wait........... ...........Done.
# Reboot the IRF fabric to complete the upgrade.
<Sysname> reboot
Start to check configuration with next startup configuration file, please wait.........DONE!
Current configuration may be lost after the reboot, save current configuration?[Y/N]:y
Now rebooting, please wait...
2. Upgrade Comware software:
# Specify the images as the main startup software images for the global active MPU.
<Sysname> boot-loader file boot flash:/S12500X-CMW710-BOOT-R1135.bin system flash:/S12500X-CMW710-SYSTEM-R1135.bin chassis 1 slot 0 main
This command will set the main startup software images. Continue? [Y/N]:y
Verifying the file flash:/s12500x-cmw710-boot-r1135.bin on chassis 1 slot 0...Done.
Verifying the file flash:/s12500x-cmw710-system-r1135.bin on chassis 1 slot 0...
.........Done.
The images that have passed all examinations will be used as the main startup software images at the next reboot on chassis 1 slot 0.
# Specify the images as the main startup software images for the standby MPUs:
¡ On the standby MPU in slot 1 of member device 1:
<Sysname> boot-loader file boot flash:/S12500X-CMW710-BOOT-R1135.bin system flash:/S12500X-CMW710-SYSTEM-R1135.bin chassis 1 slot 1 main
This command will set the main startup software images. Continue? [Y/N]:y
File flash:/s12500x-cmw710-boot-r1135.bin already exists on chassis 1 slot 1.
File flash:/s12500x-cmw710-system-r1135.bin already exists on chassis 1 slot 1.
Overwrite the existing files? [Y/N]:n
Verifying the file flash:/s12500x-cmw710-boot-r1135.bin on chassis 1 slot 1...Done.
Verifying the file flash:/s12500x-cmw710-system-r1135.bin on chassis 1 slot 1...
.........Done.
The images that have passed all examinations will be used as the main startup software images at the next reboot on chassis 1 slot 1.
¡ On the standby MPU in slot 0 of member device 2:
<Sysname> boot-loader file boot flash:/S12500X-CMW710-BOOT-R1135.bin system flash:/S12500X-CMW710-SYSTEM-R1135.bin chassis 2 slot 0 main
This command will set the main startup software images. Continue? [Y/N]:y
File flash:/s12500x-cmw710-boot-r1135.bin already exists on chassis 2 slot 0.
File flash:/s12500x-cmw710-system-r1135.bin already exists on chassis 2 slot 0.
Overwrite the existing files? [Y/N]:n
Verifying the file flash:/s12500x-cmw710-boot-r1135.bin on chassis 2 slot 0...Done.
Verifying the file flash:/s12500x-cmw710-system-r1135.bin on chassis 2 slot 0...
.........Done.
The images that have passed all examinations will be used as the main startup software images at the next reboot on chassis 2 slot 0.
¡ On the standby MPU in slot 1 of member device 2:
<Sysname> boot-loader file boot flash:/S12500X-CMW710-BOOT-R1135.bin system flash:/S12500X-CMW710-SYSTEM-R1135.bin chassis 2 slot 1 main
This command will set the main startup software images. Continue? [Y/N]:y
File flash:/s12500x-cmw710-boot-r1135.bin already exists on chassis 2 slot 1.
File flash:/s12500x-cmw710-system-r1135.bin already exists on chassis 2 slot 1.
Overwrite the existing files? [Y/N]:n
Verifying the file flash:/s12500x-cmw710-boot-r1135.bin on chassis 2 slot 1...Done.
Verifying the file flash:/s12500x-cmw710-system-r1135.bin on chassis 2 slot 1...
.........Done.
The images that have passed all examinations will be used as the main startup software images at the next reboot on chassis 2 slot 1.
For more information about the boot-loader command, see H3C S12500-X & S12500X-AF Switch Series Fundamentals Command Reference.
# To prevent configuration loss at reboot, save the running configuration.
<Sysname> save
# Reboot the IRF fabric to complete the upgrade.
<Sysname> reboot
Start to check configuration with next startup configuration file, please wait.........DONE!
Current configuration may be lost after the reboot, save current configuration?[Y/N]:y
Now rebooting, please wait...
3. Install a patch package:
|
|
IMPORTANT: Use the display install active command to verify whether patches have been installed on the device. If the device has patches, uninstall them. Only one patch package file can be installed on the device. |
# Install the patch package S12500X-CMW710-SYSTEM-R1135H01.bin. Make sure the patch package file is saved to the root directory of the flash memories on all MPUs in the IRF fabric.
<Sysname> install activate patch flash:/S12500X-CMW710-SYSTEM-R1135H01.bin chassis 1 slot 0
<Sysname> install activate patch flash:/S12500X-CMW710-SYSTEM-R1135H01.bin chassis 1 slot 1
<Sysname> install activate patch flash:/S12500X-CMW710-SYSTEM-R1135H01.bin chassis 2 slot 0
<Sysname> install activate patch flash:/S12500X-CMW710-SYSTEM-R1135H01.bin chassis 2 slot 1
The patches run immediately without requiring a reboot.
# Commit the installed patches to have the patches continue to run at the next reboot.
<Sysname> install commit
For more information about installing patches, see H3C S12500-X & S12500X-AF Switch Series Configuration Guide.
4. Verify the software upgrade and patching.
<Sysname> display install active
Active packages on chassis 1 slot 0:
flash:/S12500X-CMW710-BOOT-R1135.bin
flash:/S12500X-CMW710-SYSTEM-R1135.bin
flash:/S12500X-CMW710-SYSTEM-R1135H01.bin
Active packages on chassis 1 slot 1:
flash:/S12500X-CMW710-BOOT-R1135.bin
flash:/S12500X-CMW710-SYSTEM-R1135.bin
flash:/S12500X-CMW710-SYSTEM-R1135H01.bin
Active packages on chassis 1 slot 2:
flash:/S12500X-CMW710-BOOT-R1135.bin
flash:/S12500X-CMW710-SYSTEM-R1135.bin
flash:/S12500X-CMW710-SYSTEM-R1135H01.bin
Active packages on chassis 1 slot 18:
flash:/S12500X-CMW710-BOOT-R1135.bin
flash:/S12500X-CMW710-SYSTEM-R1135.bin
flash:/S12500X-CMW710-SYSTEM-R1135H01.bin
Active packages on chassis 1 slot 19:
flash:/S12500X-CMW710-BOOT-R1135.bin
flash:/S12500X-CMW710-SYSTEM-R1135.bin
flash:/S12500X-CMW710-SYSTEM-R1135H01.bin
Active packages on chassis 2 slot 0:
flash:/S12500X-CMW710-BOOT-R1135.bin
flash:/S12500X-CMW710-SYSTEM-R1135.bin
flash:/S12500X-CMW710-SYSTEM-R1135H01.bin
Active packages on chassis 2 slot 1:
flash:/S12500X-CMW710-BOOT-R1135.bin
flash:/S12500X-CMW710-SYSTEM-R1135.bin
flash:/S12500X-CMW710-SYSTEM-R1135H01.bin
Active packages on chassis 2 slot 2:
flash:/S12500X-CMW710-BOOT-R1135.bin
flash:/S12500X-CMW710-SYSTEM-R1135.bin
flash:/S12500X-CMW710-SYSTEM-R1135H01.bin
Active packages on chassis 2 slot 18:
flash:/S12500X-CMW710-BOOT-R1135.bin
flash:/S12500X-CMW710-SYSTEM-R1135.bin
flash:/S12500X-CMW710-SYSTEM-R1135H01.bin
Active packages on chassis 2 slot 19:
flash:/S12500X-CMW710-BOOT-R1135.bin
flash:/S12500X-CMW710-SYSTEM-R1135.bin
flash:/S12500X-CMW710-SYSTEM-R1135H01.bin
Upgrading Comware software from the BootWare menus
Upgrade Comware software by using one of the following methods:
· Using TFTP to upgrade through the management Ethernet port
· Using FTP to upgrade through the management Ethernet port
· Using Xmodem to upgrade through the console port
For more information about BootWare, see "Appendix A Using BootWare menus."
|
|
NOTE: · The switch does not come with FTP or TFTP software. Prepare the software yourself. · Upgrading through an Ethernet port is faster than through the console port. |
Using TFTP to upgrade through the management Ethernet port
1. Connect the management Ethernet port of the switch to the PC that stores the source .ipe file, and connect the console port of the switch to the configuration terminal.
The configuration terminal can be co-located with the TFTP server.
2. Run the TFTP server program on the PC connected to the management Ethernet port, and specify the file storage directory.
3. Run the terminal emulation program on the PC connected to the console port.
4. Start the switch and access the EXTENDED-BOOTWARE menu (for more information, see "Appendix A Using BootWare menus").
5. Enter 3 in the EXTENDED-BOOTWARE menu to access the Ethernet submenu.
==========================<Enter Ethernet SubMenu>==========================
|Note:the operating device is flash |
|<1> Download Image Program To SDRAM And Run |
|<2> Update Main Image File |
|<3> Update Backup Image File |
|<4> Modify Ethernet Parameter |
|<0> Exit To Main Menu |
|<Ensure The Parameter Be Modified Before Downloading!> |
============================================================================
Enter your choice(0-4):
6. Enter 4 to set Ethernet port parameters.
|
|
NOTE: To use the default settings, press Enter without modifying the settings. |
======================<ETHERNET PARAMETER SET>==============================
|Note: '.' = Clear field. |
| '-' = Go to previous field. |
| Ctrl+D = Quit. |
============================================================================
Protocol (FTP or TFTP):tftp
Load File Name :test.bin
:newest.ipe
Target File Name :test.bin
:newest.ipe
Server IP Address :192.168.80.22
Local IP Address :192.168.80.10
Subnet Mask :255.255.255.0
Gateway IP Address :0.0.0.0
Table 2 Setting TFTP file transfer parameters
|
Field |
Description |
|
'.' = Clear field |
Press the dot (.), and then press Enter to clear the setting for a field. |
|
'-' = Go to previous field |
Press the hyphen (-), and then press Enter to return to the previous field. |
|
Ctrl+D = Quit |
Press Ctrl + D to exit the Ethernet parameter settings menu. |
|
Protocol (FTP or TFTP) |
Set the file transfer protocol to TFTP. |
|
Load File Name |
Set the name of the file to be downloaded. |
|
Target File Name |
Set a file name for saving the file in the current storage medium on the device. The target file name must have the same suffix as the source file. By default, the target file name is the same as the source file name. |
|
Server IP Address |
Set the IP address of the TFTP server. If a mask must be set, use a colon (:) to separate the mask length from the IP address. For example, 192.168.2.26:24. |
|
Local IP Address |
Set the IP address of the switch. This IP address must be unique in its network segment and can communicate with the FTP or TFTP server. |
|
Subnet Mask |
Set the IP subnet mask of the switch. |
|
Gateway IP Address |
Set a gateway IP address if the switch is on a different network than the server. |
After you finish setting TFTP parameters, the system returns to the Ethernet submenu.
==========================<Enter Ethernet SubMenu>==========================
|Note:the operating device is flash |
|<1> Download Image Program To SDRAM And Run |
|<2> Update Main Image File |
|<3> Update Backup Image File |
|<4> Modify Ethernet Parameter |
|<0> Exit To Main Menu |
|<Ensure The Parameter Be Modified Before Downloading!> |
============================================================================
Enter your choice(0-4):
7. Enter 2 or 3 as needed. For example, to upgrade the main Comware software images, enter 2.
Loading.....................................................................
............................................................................
.........................Done!
31911744 bytes downloaded!
Image file BOOT.bin is self-decompressing... Saving file flash:/ BOOT.bin ..............................................Done.
Image file SYSTEM.bin is self-decompressing...Saving file flash:/ SYSTEM.bin .................................. ..Done.
==========================<Enter Ethernet SubMenu>==========================
|Note:the operating device is flash |
|<1> Download Image Program To SDRAM And Run |
|<2> Update Main Image File |
|<3> Update Backup Image File |
|<4> Modify Ethernet Parameter |
|<0> Exit To Main Menu |
|<Ensure The Parameter Be Modified Before Downloading!> |
============================================================================
Enter your choice(0-4):
8. Enter 0 in the Ethernet submenu to return to the EXTENDED-BOOTWARE menu.
9. Enter 1 in the EXTENDED-BOOTWARE menu to run the new Comware software.
Using FTP to upgrade through the management Ethernet port
1. Connect the management Ethernet port of the switch to the PC that stores the source .ipe file, and connect the console port of the switch to the configuration terminal. The configuration terminal can be co-located with the TFTP server.
2. Run the FTP server program on the PC connected to the management Ethernet port, specify the file storage directory, and set the username and password.
3. Run the terminal emulation program on the PC connected to the console port.
4. Start the switch and access the EXTENDED-BOOTWARE menu (for more information, see "Appendix A Using BootWare menus").
5. Enter 3 in the EXTENDED-BOOTWARE menu to access the Ethernet submenu.
==========================<Enter Ethernet SubMenu>==========================
|Note:the operating device is flash |
|<1> Download Image Program To SDRAM And Run |
|<2> Update Main Image File |
|<3> Update Backup Image File |
|<4> Modify Ethernet Parameter |
|<0> Exit To Main Menu |
|<Ensure The Parameter Be Modified Before Downloading!> |
============================================================================
Enter your choice(0-4):
6. Enter 4 to set Ethernet port parameters.
|
|
NOTE: To use the default settings, press Enter without modifying the settings. |
======================<ETHERNET PARAMETER SET>==============================
|Note: '.' = Clear field. |
| '-' = Go to previous field. |
| Ctrl+D = Quit. |
============================================================================
Protocol (FTP or TFTP):ftp
Load File Name :test.bin
:newest.ipe
Target File Name :test.bin
:newest.ipe
Server IP Address :192.168.80.20
Local IP Address :192.168.80.10
Subnet Mask :255.255.255.0
Gateway IP Address :0.0.0.0
FTP User Name :UserN
FTP User Password :PWD
Table 3 Setting FTP file transfer parameters
|
Field |
Description |
|
'.' = Clear field |
Press the dot (.), and then press Enter to clear the setting for a field. |
|
'-' = Go to previous field |
Press the hyphen (-), and then press Enter to return to the previous field. |
|
Ctrl+D = Quit |
Press Ctrl + D to exit the Ethernet parameter settings menu. |
|
Protocol (FTP or TFTP) |
Set the file transfer protocol to FTP. |
|
Load File Name |
Set the name of the file to be downloaded. |
|
Target File Name |
Set a file name for saving the file in the current storage medium on the device. The target file name must have the same suffix as the source file. By default, the target file name is the same as the source file name. |
|
Server IP Address |
Set the IP address of the FTP server. If a mask must be set, use a colon (:) to separate the mask length from the IP address. For example, 192.168.2.26:24. |
|
Local IP Address |
Set the IP address of the switch. This IP address must be unique in its network segment and can communicate with the FTP or TFTP server. |
|
Subnet Mask |
Set the IP subnet mask of the switch. |
|
Gateway IP Address |
Set a gateway IP address if the switch is on a different network than the server. |
|
FTP User Name |
Set the username for accessing the FTP server. This username must be the same as the one configured on the FTP server. |
|
FTP User Password |
Set the password for accessing the FTP server. This password must be the same as the one configured on the FTP server. |
After you finish setting FTP parameters, the system returns to the Ethernet submenu.
==========================<Enter Ethernet SubMenu>==========================
|Note:the operating device is flash |
|<1> Download Image Program To SDRAM And Run |
|<2> Update Main Image File |
|<3> Update Backup Image File |
|<4> Modify Ethernet Parameter |
|<0> Exit To Main Menu |
|<Ensure The Parameter Be Modified Before Downloading!> |
============================================================================
Enter your choice(0-4):
7. Enter 2 or 3 as needed. For example, to upgrade the main Comware software images, enter 2.
Loading.....................................................................
............................................................................
.........................Done!
31911744 bytes downloaded!
Image file BOOT.bin is self-decompressing... Saving file flash:/BOOT.bin..............................................Done.
Image file SYSTEM.bin is self-decompressing...Saving file flash:/SYSTEM.bin .................................. ..Done.
==========================<Enter Ethernet SubMenu>==========================
|Note:the operating device is flash |
|<1> Download Image Program To SDRAM And Run |
|<2> Update Main Image File |
|<3> Update Backup Image File |
|<4> Modify Ethernet Parameter |
|<0> Exit To Main Menu |
|<Ensure The Parameter Be Modified Before Downloading!> |
============================================================================
Enter your choice(0-4):
8. Enter 0 in the Ethernet submenu to return to the EXTENDED-BOOTWARE menu.
9. Enter 1 in the EXTENDED-BOOTWARE menu to run the new Comware software.
Using Xmodem to upgrade through the console port
1. Connect the console port of the switch to the PC that stores the .ipe file.
2. Run the terminal emulation program on the PC.
3. Start the switch and access the EXTENDED-BOOTWARE menu (see "Appendix A Using BootWare menus").
4. Enter 2 in the EXTENDED-BOOTWARE menu to access the Serial submenu.
===========================<Enter Serial SubMenu>===========================
|Note:the operating device is flash |
|<1> Download Image Program To SDRAM And Run |
|<2> Update Main Image File |
|<3> Update Backup Image File |
|<4> Modify Serial Interface Parameter |
|<0> Exit To Main Menu |
============================================================================
Enter your choice(0-4):
5. Enter 4 in the serial submenu to change the baud rate of the console port.
===============================<BAUDRATE SET>===============================
|Note:'*'indicates the current baudrate |
| Change The HyperTerminal's Baudrate Accordingly |
|---------------------------<Baudrate Available>---------------------------|
|<1> 9600(Default)* |
|<2> 19200 |
|<3> 38400 |
|<4> 57600 |
|<5> 115200 |
|<0> Exit |
============================================================================
Enter your choice(0-5):2
6. Enter an appropriate baud rate option. For example, enter 2 to select 19200 bps.
Baudrate has been changed to 19200 bps.
Please change the terminal's baudrate to 19200 bps, press ENTER when ready.
|
|
NOTE: If you select 9600 bps, directly go to Step 11. |
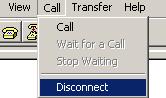
7. Select Call/Disconnect from the HyperTerminal window to disconnect the HyperTerminal from the switch.
Figure 1 Disconnecting the terminal
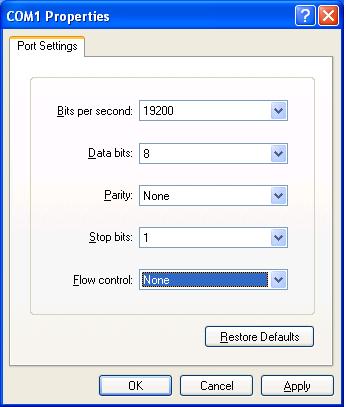
8. Select File > Properties in the HyperTerminal window, click Configure in the popup dialog box, and select the baud rate of 19200 bps in the console port properties dialog box.
Figure 2 Setting switch properties
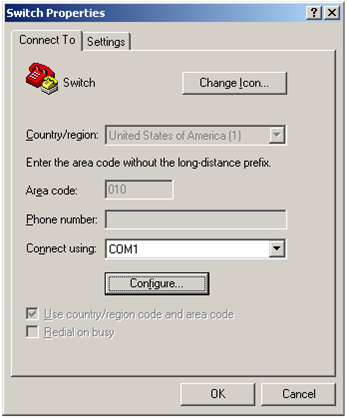
Figure 3 Modifying the baud rate
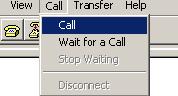
9. Select Call/Call to reconnect to the switch.
Figure 4 Connecting to the switch
10. Press Enter in the BootWare interface.
The current baudrate is 19200 bps
===============================<BAUDRATE SET>===============================
|Note:'*'indicates the current baudrate |
| Change The HyperTerminal's Baudrate Accordingly |
|---------------------------<Baudrate Available>---------------------------|
|<1> 9600(Default) |
|<2> 19200* |
|<3> 38400 |
|<4> 57600 |
|<5> 115200 |
|<0> Exit |
============================================================================
Enter your choice(0-5):
11. Enter 0 to return to the Serial submenu.
===========================<Enter Serial SubMenu>===========================
|Note:the operating device is flash |
|<1> Download Image Program To SDRAM And Run |
|<2> Update Main Image File |
|<3> Update Backup Image File |
|<4> Modify Serial Interface Parameter |
|<0> Exit To Main Menu |
============================================================================
Enter your choice(0-4):
12. Enter 2 or 3 as needed. For example, enter 2 to update the main startup software image.
Please Start To Transfer File, Press <Ctrl+C> To Exit.
Waiting ...CCCCC
13. Select Transfer > Send File in the HyperTerminal window. In the Send File dialog box that appears, click Browse to select the source file, and select Xmodem as the protocol.
Figure 5 Selecting the file to transfer
14. Click Send.
Figure 6 File transfer progress
When the download is complete, the following information appears:
Download successfully!
31911808 bytes downloaded!
Image file S12500X-CMW710-BOOT-R1135 is self-decompressing....
Input the file name: S12500X-CMW710-BOOT-R1135
Save file ...........................................Done
===========================<Enter Serial SubMenu>===========================
|Note:the operating device is flash |
|<1> Download Image Program To SDRAM And Run |
|<2> Update Main Image File |
|<3> Update Backup Image File |
|<4> Modify Serial Interface Parameter |
|<0> Exit To Main Menu |
============================================================================
Enter your choice(0-4):
15. Enter 0 in the Serial submenu to return to the EXTENDED-BOOTWARE menu.
16. Enter 1 in the EXTENDED-BOOTWARE menu to run the new software.
17. Change the baud rate of the HyperTerminal back to 9600 bps, and reconnect to the switch.
Upgrading BootWare from the BootWare menus
Upgrade the BootWare program from the BootWare menu by using one of the following methods:
· Using TFTP to upgrade through the management Ethernet port
· Using FTP to upgrade through the management Ethernet port
· Using Xmodem to upgrade through the console port
For more information about BootWare, see "Appendix A Using BootWare menus."
|
|
NOTE: · The switch does not come with FTP or TFTP software. Prepare the software yourself. · Upgrading through an Ethernet port is faster than through the console port. |
Using TFTP to upgrade through the management Ethernet port
1. Connect the management Ethernet port of the switch to the PC that stores the source .bin BootWare image, and connect the console port of the switch to the configuration terminal.
The configuration terminal can be co-located with the TFTP server.
2. Run the TFTP server program on the PC connected to the management Ethernet port, and specify the file storage directory.
3. Run the terminal emulation program on the PC connected to the console port.
4. Start the switch and access the EXTENDED-BOOTWARE menu (see "Appendix A Using BootWare menus").
5. Enter 7 in the EXTENDED-BOOTWARE menu to access the BootWare Operation menu.
=========================<BootWare Operation Menu>==========================
|Note:the operating device is flash |
|<1> Backup Full BootWare |
|<2> Restore Full BootWare |
|<3> Update BootWare By Serial |
|<4> Update BootWare By Ethernet |
|<0> Exit To Main Menu |
============================================================================
Enter your choice(0-4):
6. Enter 4 to access the BOOTWARE OPERATION ETHERNET submenu.
===================<BOOTWARE OPERATION ETHERNET SUB-MENU>===================
|<1> Update Full BootWare |
|<2> Update Extended BootWare |
|<3> Update Basic BootWare |
|<4> Modify Ethernet Parameter |
|<0> Exit To Main Menu |
============================================================================
Enter your choice(0-4):
7. Enter 4 to set file transfer parameters. For field descriptions, see Table 2.
|
|
NOTE: To use the default settings, press Enter without modifying the settings. |
==========================<ETHERNET PARAMETER SET>==========================
|Note: '.' = Clear field. |
| '-' = Go to previous field. |
| Ctrl+D = Quit. |
============================================================================
Protocol (FTP or TFTP):tftp
Load File Name :test.ipe
:newest.ipe
Target File Name :test.ipe
:newest.ipe
Server IP Address :192.168.80.22
Local IP Address :192.168.80.10
Subnet Mask :255.255.255.0
Gateway IP Address :0.0.0.0
After you finish setting TFTP parameters, the system returns to the BOOTWARE OPERATION ETHERNET submenu.
===================<BOOTWARE OPERATION ETHERNET SUB-MENU>===================
|<1> Update Full BootWare |
|<2> Update Extended BootWare |
|<3> Update Basic BootWare |
|<4> Modify Ethernet Parameter |
|<0> Exit To Main Menu |
============================================================================
Enter your choice(0-4):
8. Enter a number from 1 to 3 as needed. For example, to upgrade the entire BootWare, enter 1.
Loading...........Done!
447612 bytes downloaded!
Updating Basic BootWare? [Y/N]
9. Enter Y to upgrade the basic BootWare.
Updating Basic BootWare.........Done!
Updating Extended BootWare? [Y/N]
10. Enter Y to upgrade the extended BootWare.
Updating Extended BootWare.........Done!
===================<BOOTWARE OPERATION ETHERNET SUB-MENU>===================
|<1> Update Full BootWare |
|<2> Update Extended BootWare |
|<3> Update Basic BootWare |
|<4> Modify Ethernet Parameter |
|<0> Exit To Main Menu |
============================================================================
Enter your choice(0-4):
11. Enter 0 in the BOOTWARE OPERATION ETHERNET submenu to return to the BootWare Operation menu.
12. Enter 0 in the BootWare Operation menu to return to the EXTENDED-BOOTWARE menu.
13. Enter 0 in the EXTENDED-BOOTWARE menu to reboot the switch.
Using FTP to upgrade through the management Ethernet port
1. Connect the management Ethernet port of the switch to the PC that stores the source .bin BootWare image, and connect the console port of the switch to the configuration terminal.
The configuration terminal can be co-located with the FTP server.
2. Run the FTP server program on the PC connected to the management Ethernet port, specify the file storage directory, and set the username and password.
3. Run the terminal emulation program on the PC connected to the console port.
4. Start the switch and access the EXTENDED-BOOTWARE menu (see "Appendix A Using BootWare menus").
5. Enter 7 in the EXTENDED-BOOTWARE menu to access the BootWare Operation menu.
=========================<BootWare Operation Menu>==========================
|Note:the operating device is flash |
|<1> Backup Full BootWare |
|<2> Restore Full BootWare |
|<3> Update BootWare By Serial |
|<4> Update BootWare By Ethernet |
|<0> Exit To Main Menu |
============================================================================
Enter your choice(0-4):
6. Enter 4 to access the BOOTWARE OPERATION ETHERNET submenu.
===================<BOOTWARE OPERATION ETHERNET SUB-MENU>===================
|<1> Update Full BootWare |
|<2> Update Extended BootWare |
|<3> Update Basic BootWare |
|<4> Modify Ethernet Parameter |
|<0> Exit To Main Menu |
============================================================================
Enter your choice(0-4):
7. Enter 4 to set file transfer parameters. For field descriptions, see Table 3.
|
|
NOTE: To use the default settings, press Enter without modifying the settings. |
==========================<ETHERNET PARAMETER SET>==========================
|Note: '.' = Clear field. |
| '-' = Go to previous field. |
| Ctrl+D = Quit. |
============================================================================
Protocol (FTP or TFTP):ftp
Load File Name :test.ipe
:newest.ipe
Target File Name :test.ipe
:newest.ipe
Server IP Address :192.168.80.20
Local IP Address :192.168.80.10
Subnet Mask :255.255.255.0
Gateway IP Address :0.0.0.0
FTP User Name :UserN
FTP User Password :PWD
After you finish setting FTP parameters, the system returns to the BOOTWARE OPERATION ETHERNET submenu.
===================<BOOTWARE OPERATION ETHERNET SUB-MENU>===================
|<1> Update Full BootWare |
|<2> Update Extended BootWare |
|<3> Update Basic BootWare |
|<4> Modify Ethernet Parameter |
|<0> Exit To Main Menu |
============================================================================
Enter your choice(0-4):
8. Enter a number from 1 to 3 as needed. For example, to upgrade the entire BootWare, enter 1.
Loading...........Done!
447612 bytes downloaded!
Updating Basic BootWare? [Y/N]
9. Enter Y to upgrade the basic BootWare.
Updating Basic BootWare.........Done!
Updating Extended BootWare? [Y/N]
10. Enter Y to upgrade the extended BootWare.
Updating Extended BootWare.........Done!
===================<BOOTWARE OPERATION ETHERNET SUB-MENU>===================
|<1> Update Full BootWare |
|<2> Update Extended BootWare |
|<3> Update Basic BootWare |
|<4> Modify Ethernet Parameter |
|<0> Exit To Main Menu |
============================================================================
Enter your choice(0-4):
11. Enter 0 to return to the BootWare Operation menu.
12. Enter 0 in the BootWare Operation menu to return to the EXTENDED-BOOTWARE menu.
13. Enter 0 in the EXTENDED-BOOTWARE menu to reboot the switch.
Using Xmodem to upgrade through the console port
1. Connect the console port of the switch to the PC that stores the source .bin BootWare image.
2. Run the terminal emulation program on the PC.
3. Start the switch and access the EXTENDED-BOOTWARE menu (see "Appendix A Using BootWare menus").
4. Enter 7 in the EXTENDED-BOOTWARE menu to access the BootWare Operation menu.
=========================<BootWare Operation Menu>==========================
|Note:the operating device is flash |
|<1> Backup Full BootWare |
|<2> Restore Full BootWare |
|<3> Update BootWare By Serial |
|<4> Update BootWare By Ethernet |
|<0> Exit To Main Menu |
============================================================================
Enter your choice(0-4):
5. Enter 3 in the BootWare Operation menu to access the Serial submenu.
====================<BOOTWARE OPERATION SERIAL SUB-MENU>====================
|<1> Update Full BootWare |
|<2> Update Extended BootWare |
|<3> Update Basic BootWare |
|<4> Modify Serial Interface Parameter |
|<0> Exit To Main Menu |
============================================================================
Enter your choice(0-4):
6. Enter 4 in the Serial submenu to change the baud rate of the console port.
===============================<BAUDRATE SET>===============================
|Note:'*'indicates the current baudrate |
| Change The HyperTerminal's Baudrate Accordingly |
|---------------------------<Baudrate Available>---------------------------|
|<1> 9600(Default)* |
|<2> 19200 |
|<3> 38400 |
|<4> 57600 |
|<5> 115200 |
|<0> Exit |
============================================================================
Enter your choice(0-5):2
7. Enter an appropriate baud rate option. For example, enter 2 to select 19200 bps.
Baudrate has been changed to 19200 bps.
Please change the terminal's baudrate to 19200 bps, press ENTER when ready.
|
|
NOTE: If you select the baud rate of 9600 bps, directly go to Step 12. |
8. Select Call/Disconnect from the HyperTerminal window to disconnect the HyperTerminal from the switch.
Figure 7 Disconnecting the terminal
9. Select File > Properties in the HyperTerminal window, click Configure in the popup dialog box, and select the baud rate of 19200 bps in the console port properties dialog box.
Figure 8 Setting switch properties
Figure 9 Modifying the baud rate

10. Select Call/Call to reconnect to the switch.
Figure 10 Connecting to the switch
11. Press Enter in the BootWare interface.
The current baudrate is 19200 bps
===============================<BAUDRATE SET>===============================
|Note:'*'indicates the current baudrate |
| Change The HyperTerminal's Baudrate Accordingly |
|---------------------------<Baudrate Available>---------------------------|
|<1> 9600(Default) |
|<2> 19200* |
|<3> 38400 |
|<4> 57600 |
|<5> 115200 |
|<0> Exit |
============================================================================
Enter your choice(0-5):
12. Enter 0 to return to the BOOTWARE OPERATION SERIAL submenu.
====================<BOOTWARE OPERATION SERIAL SUB-MENU>====================
|<1> Update Full BootWare |
|<2> Update Extended BootWare |
|<3> Update Basic BootWare |
|<4> Modify Serial Interface Parameter |
|<0> Exit To Main Menu |
============================================================================
Enter your choice(0-4):
13. Enter a number from 1 to 3 as needed. For example, enter 1 to upgrade the entire BootWare.
Please Start To Transfer File, Press <Ctrl+C> To Exit.
Waiting ...CCCC
14. Select Transfer > Send File in the HyperTerminal window. In the Send File dialog box that appears, click Browse to select the source file, and select Xmodem as the protocol.
Figure 11 Selecting the file to transfer
15. Click Send.
Figure 12 File transfer progress
When the download is complete, the following information appears:
Download successfully!
447616 bytes downloaded!
Updating Basic BootWare? [Y/N]
16. Enter Y to upgrade the basic BootWare.
Updating Basic BootWare.........Done!
Updating Extended BootWare? [Y/N]
17. Enter Y to upgrade the extended BootWare.
Updating Extended BootWare.........Done!
====================<BOOTWARE OPERATION SERIAL SUB-MENU>====================
|<1> Update Full BootWare |
|<2> Update Extended BootWare |
|<3> Update Basic BootWare |
|<4> Modify Serial Interface Parameter |
|<0> Exit To Main Menu |
============================================================================
Enter your choice(0-4):
18. Enter 0 to return to the BootWare Operation menu.
19. Enter 0 in the BootWare Operation menu to return to the EXTENDED-BOOTWARE menu.
20. Enter 0 in the EXTENDED-BOOTWARE menu to reboot the switch.
21. Change the baud rate of the HyperTerminal back to 9600 bps, and reconnect to the switch.
Handling upgrade failures
If an upgrade failure occurs, the device runs the original software version.
To handle upgrade failure:
1. Check that physical ports are correctly connected.
2. If Xmodem is used, verify that the HyperTerminal settings are correct, including the baudrate and data bits.
3. Check the HyperTerminal output for typing errors:
¡ If Xmodem is used, verify that the baud rate is the same on the console port and the HyperTerminal.
¡ If TFTP is used, verify that you entered the correct TFTP server IP address, filename, and file path.
¡ If FTP is used, verify that you entered the correct FTP server IP address, filename, file path, and FTP username and password.
4. Verify that FTP or TFTP server software is running and has correct settings.
5. Verify that the flash memory is sufficient for storing the downloaded files.
6. Verify that the upgrading file is applicable to the device and the file type is correct.
7. Verify that the versions of Comware software and BootWare are correct. For the compatibility between the Comware software and BootWare, see the hardware and software compatibility matrix in Release Notes.
You can use the BootWare menus to upgrade the switch and maintain files when the CLI is not accessible.
Accessing the BootWare menu
Table 4 lists the menus that each segment provides and the major tasks you can perform with these menus. You can access these menus only during system startup.
|
BootWare segment |
Menu |
Tasks |
Reference |
|
Basic |
BASIC-BOOTWARE |
· Modify serial port parameters. · Upgrade BootWare. · Start the primary or backup BootWare extended segment. |
|
|
Basic |
BASIC ASSISTANT |
Perform RAM test. |
|
|
Extended |
EXTENDED-BOOTWARE |
· Upgrade Comware software. · Manage files. · Access the system when the console login password is lost. · Clear user privilege passwords. |
|
|
Extended |
EXTENDED ASSISTANT |
· Examine system memory. · Search system memory. |
|
|
NOTE: Availability of some menu options depends on the password recovery capability state. For more information about the feature and its relevant menu options, see "Disabling password recovery capability." |
BootWare provides the shortcut keys in Table 5.
Table 5 BootWare shortcut keys
|
Shortcut key |
Prompt message |
Function |
|
Ctrl+B |
Press Ctrl+B to access EXTENDED-BOOTWARE MENU |
Accesses the EXTENDED-BOOTWARE menu while the device is starting up. |
|
Ctrl+C |
Please Start To Transfer File, Press <Ctrl+C> To Exit |
Stops the ongoing file transfer and exits the current operation interface. |
|
Info: Press Ctrl+C to abort or return to EXTENDED ASSISTANT MENU |
Returns to the EXTENDED ASSISTANT menu. If the system is outputting the result of an operation, this shortcut key combination aborts the display first. |
|
|
Ctrl+D |
Press Ctrl+D to access BASIC-BOOTWARE MENU |
Accesses the BASIC-BOOTWARE menu. |
|
Ctrl+D = Quit |
Exits the parameter settings menu. |
|
|
Ctrl+E |
Memory Test(press Ctrl+C to skip it,press Ctrl+E to ECHO INFO) |
Displays the test process. |
|
Ctrl+F |
Ctrl+F: Format File System |
Formats the current storage medium. |
|
Ctrl+T |
Press Ctrl+T to start memory test |
Starts a RAM test before the extended BootWare segment starts to run. |
|
Ctrl+U |
Access BASIC ASSISTANT MENU |
Accesses the BASIC ASSISTANT menu from the BASIC-BOOTWARE menu. |
|
Ctrl+V |
Press Ctrl+V to start heavy memory test |
Performs a memory pressure test. |
|
Ctrl+Z |
Ctrl+Z: Access EXTENDED ASSISTANT MENU |
Accesses the EXTENDED ASSISTANT menu from the EXTENDED-BOOTWARE menu. |
Using the BASIC-BOOTWARE menu
To access the BASIC-BOOTWARE menu:
1. Power on the device.
2. Press Ctrl + D within 4 seconds after the "Press Ctrl+D to access BASIC-BOOTWARE MENU" prompt message appears. If you fail to do this within the time limit, the system starts to run the extended BootWare segment.
======================<BASIC-BOOTWARE MENU(Ver 1.39)>=======================
|<1> Modify Serial Interface Parameter |
|<2> Update Extended BootWare |
|<3> Update Full BootWare |
|<4> Boot Extended BootWare |
|<5> Boot Backup Extended BootWare |
|<0> Reboot |
============================================================================
Ctrl+U: Access BASIC ASSISTANT MENU
Enter your choice(0-5):
Table 6 BASIC-BOOTWARE menu options
|
Option |
Task |
|
<1> Modify Serial Interface Parameter |
Change the baud rate of the console port. Perform this task before downloading an image through the console port for software upgrade. |
|
<2> Update Extended BootWare |
Update the extended BootWare segment. If the corrupted extended segment has corrupted, choose this option to repair it. |
|
<3> Update Full BootWare |
Update the entire BootWare, including the basic segment and the extended segment. |
|
<4> Boot Extended BootWare |
Run the primary extended BootWare segment. |
|
<5> Boot Backup Extended BootWare |
Run the backup extended BootWare segment. |
|
<0> Reboot |
Reboot the device. |
|
Ctrl+U: Access BASIC ASSISTANT MENU |
Press Ctrl + U to access the BASIC ASSISTANT menu. |
Modifying serial port parameters
When you use the console port to access the system, make sure the port parameters are consistent with the serial port settings on the configuration terminal, including the baud rate, data bits, parity check, stop bits, flow control, and emulation. If the settings are inconsistent, communication will fail.
You can change the baud rate from the BootWare menus. H3C recommends that you change the default baud rate (9600 bps) to a higher baud rate for faster file transfer before downloading a Comware image file with XMODEM through the console port.
To change the baud rate of the console port:
1. Enter 1 in the BASIC-BOOTWARE menu.
Enter your choice(0-5): 1
===============================<BAUDRATE SET>===============================
|Note:'*'indicates the current baudrate |
| Change The HyperTerminal's Baudrate Accordingly |
|---------------------------<Baudrate Available>---------------------------|
|<1> 9600(Default)* |
|<2> 19200 |
|<3> 38400 |
|<4> 57600 |
|<5> 115200 |
|<0> Exit |
============================================================================
Enter your choice(0-5):
2. Enter the number that represents the baud rate you want to choose. For example, enter 5 to set the baud rate to 115200 bps.
|
|
NOTE: The baud rate change is a one-time operation. The baud rate will restore to the default (9600 bps) at reboot. To set up a console session with the device after a reboot, you must change the baud rate setting on the configuration terminal back to 9600 bps. |
Updating the extended BootWare segment
If the extended BootWare segment is corrupted, enter 2 in the BASIC-BOOTWARE menu to update it.
Enter your choice(0-5): 2
Please Start To Transfer File, Press <Ctrl+C> To Exit.
Waiting ...CCCCC
Updating the entire BootWare
To update the entire BootWare, enter 3 in the BASIC-BOOTWARE menu.
Enter your choice(0-5): 3
Please Start To Transfer File, Press <Ctrl+C> To Exit.
Waiting ...CCCCC
Running the primary extended BootWare segment
To bootstrap the Comware images with the primary extended BootWare segment, enter 4 in the BASIC-BOOTWARE menu.
Enter your choice(0-5): 4
Booting Normal Extended BootWare....
The Extended BootWare is self-decompressing.........Done.
****************************************************************************
* *
* BootWare, Version 1.39 *
* *
****************************************************************************
Compiled Date : Sep 4 2014
CPU Type : XLP316
CPU Clock Speed : 1200MHz
Memory Type : DDR3 SDRAM
Memory Size : 8192MB
Memory Speed : 667MHz
BootWare Size : 1536KB
Flash Size : 500MB
BASIC CPLD Version : 3.0
EXTENDED CPLD Version: 3.0
PCB Version : Ver.A
BootWare Validating...
Press Ctrl+B to access EXTENDED-BOOTWARE MENU...
Password recovery capability is enabled.
Note: The current operating device is flash
Enter < Storage Device Operation > to select device.
Running the backup extended BootWare segment
To bootstrap the Comware images with the backup extended BootWare segment, enter 5 in the BASIC-BOOTWARE menu. For information about backing up the extended BootWare segment, see "Managing the BootWare image."
Enter your choice(0-5): 5
Booting Backup Extended BootWare....
The Extended BootWare is self-decompressing.........Done.
Accessing the BASIC ASSISTANT menu
|
|
IMPORTANT: Memory tests must be performed under the guidance of H3C technical support engineers. |
To access the BASIC ASSISTANT menu, press Ctrl+U while you are in the BASIC-BOOTWARE menu.
===========================<BASIC ASSISTANT MENU>===========================
|<1> RAM Test |
|<0> Exit To Main Menu |
============================================================================
Enter your choice(0-1):
|
Option |
Task |
|
<1> RAM Test |
Perform a RAM test. |
|
<0> Exit to Main Menu |
Return to the BASIC-BOOTWARE menu. |
To perform a RAM test, press Ctrl+T within 4 seconds after the prompt message "Press Ctrl+T to start memory test" appears.
To perform a RAM pressure test, press Ctrl+V within 4 seconds after the prompt message "Press Ctrl+V to start heavy memory test" appears.
Using the EXTENDED-BOOTWARE menu
To access the EXTENDED-BOOTWARE menu:
1. Reboot the device or run the primary or backup extended BootWare segment from the BASIC-BOOTWARE menu.
2. Press Ctrl+B within 5 seconds after the "Press Ctrl+B to access EXTENDED-BOOTWARE MENU..." prompt message appears. If you fail to do this, the system starts decompressing the Comware software file.
Password recovery capability is enabled.
Note: The current operating device is flash
Enter < Storage Device Operation > to select device.
3. Press Enter at the prompt for password.
The EXTENDED-BOOTWARE menu appears.
===========================<EXTENDED-BOOTWARE MENU>===========================
|<1> Boot System |
|<2> Enter Serial SubMenu |
|<3> Enter Ethernet SubMenu |
|<4> File Control |
|<5> Restore to Factory Default Configuration |
|<6> Skip Current System Configuration |
|<7> BootWare Operation Menu |
|<8> Skip Authentication for Console Login |
|<9> Storage Device Operation |
|<0> Reboot |
============================================================================
Ctrl+Z: Access EXTENDED ASSISTANT MENU
Ctrl+F: Format File System
Enter your choice(0-9):
Availability of some options in this menu depends on the password recovery capability state (displayed on top of the EXTENDED-BOOTWARE menu). For more information about the feature, see "Disabling password recovery capability."
Table 8 EXTENDED-BOOTWARE menu options
|
Option |
Tasks |
Reference |
|
<1> Boot System |
Run the Comware software without rebooting the device. Choose this option after completing operations in the EXTENDED-BOOTWARE menu. |
N/A |
|
<2> Enter Serial SubMenu |
Download files with XMODEM and upgrade Comware software through the console port. |
|
|
<3> Enter Ethernet SubMenu |
Download files with FTP or TFTP and upgrade Comware software through the management Ethernet interface. |
|
|
<4> File Control |
· Display files on the current storage medium. · Set a Comware image file as the main or backup startup software image. |
See "Managing files." |
|
<5> Restore to Factory Default Configuration |
Restore the factory-default configuration. This option is available only if password recovery capability is disabled. |
|
|
<6> Skip Current System Configuration |
Start the device with the factory-default configuration without loading any configuration file. This is a one-time operation and takes effect only for the first system startup or reboot after you choose this option. This option is available only if password recovery capability is enabled. |
|
|
<7> BootWare Operation Menu |
Back up, recover, and upgrade the BootWare image. |
See "Managing the BootWare image." |
|
<8> Skip Authentication for Console Login |
Skip console login authentication. This option is available only if password recovery capability is enabled. |
|
|
<9> Storage Device Operation |
Set the storage medium from which the device will start up. Set the storage medium where file operations are performed. This storage medium is referred to as the "current storage medium" in this chapter. |
See "Managing storage media." |
|
<0> Reboot |
Reboot the device. |
N/A |
Disabling password recovery capability
Password recovery capability controls console user access to the device configuration and SDRAM from BootWare menus.
If password recovery capability is enabled, console users can do the following:
· If console users forget their user privilege level passwords, they can skip the current configuration file to configure new passwords.
· If console users forget their console login passwords, they can skip login authentication or the current configuration file to configure new passwords.
If password recovery capability is disabled, console users must restore the factory-default configuration before they can configure new passwords. Restoring the factory-default configuration deletes the next-startup configuration files.
To enhance system security, disable password recovery capability.
To disable password recovery capability:
|
Step |
Command |
Remarks |
|
1. Enter system view. |
system-view |
N/A |
|
2. Disable password recovery capability. |
undo password-recovery enable |
By default, password recovery capability is enabled. |
|
|
NOTE: To avoid version compatibility problems, use compatible Comware software and BootWare. |
Running the Comware software
To run the Comware software after completing all operations, enter 1 in the EXTENDED-BOOTWARE menu.
Enter your choice(0-9): 1
Loading file flash:/S12500X-CMW710-SYSTEM-R1135.bin.......................
............................................................................
............................................................................
............................................................................
............................................................................
............................................................................
...................................................Done.
Loading file flash:/S12500X-CMW710-BOOT-R1135.bin.........................
............................................................................
...........................................Done.
Image file flash:/S12500X-CMW710-SYSTEM-R1135.bin is self-decompressing.....
............................................................................
...............Done.
System image is starting...
Waiting for StackBoard to insert, this process may occupy time up to 300 seconds
.
STM Init Start.
User interface aux1/1 is available.
Press ENTER to get started.
Upgrading Comware software through the console port
You can upgrade the Comware software through the console port or modify the baud rate of the console port from the Serial submenu.
To upgrade Comware software through the console port, enter 2 in the EXTENDED-BOOTWARE menu to access the Serial submenu.
Enter your choice(0-9): 2
===========================<Enter Serial SubMenu>===========================
|Note:the operating device is flash |
|<1> Download Image Program To SDRAM And Run |
|<2> Update Main Image File |
|<3> Update Backup Image File |
|<4> Modify Serial Interface Parameter |
|<0> Exit To Main Menu |
============================================================================
Enter your choice(0-4):
Table 9 Serial submenu options
|
Option |
Tasks |
|
<1> Download Image Program To SDRAM And Run |
Load and run a Comware software image in SDRAM. If password recovery capability is disabled, this option is not available. |
|
<2> Update Main Image File |
Download a Comware software image to the current storage medium as the main image (the file attribute is set to M). If a main system image already exists, the M file attribute of the original image is removed. |
|
<3> Update Backup Image File |
Download a Comware software image to the current storage medium as the backup image (the file attribute is set to B). If a backup system image already exists, the B file attribute of the original image is removed. |
|
<4> Modify Serial Interface Parameter |
Change the baud rate of the console port. The baud rate change is a one-time operation. The baud rate will restore to the default (9600 bps) at reboot. To set up a console session with the device after a reboot, you must change the baud rate setting on the configuration terminal to 9600 bps. |
|
<0> Exit To Main Menu |
Return to the EXTENDED-BOOTWARE menu. |
|
|
NOTE: To set the current storage medium, see "Managing storage media." |
Upgrading Comware software through an Ethernet port
You can upgrade Comware software with FTP or TFTP through an Ethernet port from the Ethernet submenu.
To update Comware software through an Ethernet port from the Ethernet submenu:
1. Enter 3 in the EXTENDED-BOOTWARE menu to access the Ethernet submenu.
Enter your choice(0-9):3
==========================<Enter Ethernet SubMenu>==========================
|Note:the operating device is flash |
|<1> Download Image Program To SDRAM And Run |
|<2> Update Main Image File |
|<3> Update Backup Image File |
|<4> Modify Ethernet Parameter |
|<0> Exit To Main Menu |
|<Ensure The Parameter Be Modified Before Downloading!> |
============================================================================
Enter your choice(0-4):
Table 10 Ethernet submenu options
|
Option |
Tasks |
|
<1> Download Image Program To SDRAM And Run |
Load and run a Comware software image in SDRAM. If password recovery capability is disabled, this option is not available. |
|
<2> Update Main Image File |
Download a Comware software image to the current storage medium as the main image (the file attribute is set to M). If a main system image already exists, the M file attribute of the original image is removed. |
|
<3> Update Backup Image File |
Download a Comware software image to the current storage medium as the backup image (the file attribute is set to B). If a backup system image already exists, the B file attribute of the original image is removed. |
|
<4> Modify Ethernet Parameter |
Configure FTP or TFTP file transfer settings. |
|
<0> Exit To Main Menu |
Return to the EXTENDED-BOOTWARE menu. |
2. Enter 4 in the Ethernet submenu to configure file transfer settings.
Enter your choice(0-4):4
======================<CORE 0 ETHERNET PARAMETER SET>=======================
|Note: '.' = Clear field. |
| '-' = Go to previous field. |
| Ctrl+D = Quit. |
============================================================================
Protocol (FTP or TFTP) :tftp
Load File Name : newest.ipe
:
Target File Name : newest.ipe
:
Server IP Address :192.168.0.23
Local IP Address :192.168.0.105
Subnet Mask :255.255.255.0
Gateway IP Address :0.0.0.0
Table 11 Setting file transfer parameters
|
Field |
Description |
|
'.' = Clear field |
Press the dot (.), and then press Enter to clear the setting for a field. |
|
'-' = Go to previous field |
Press the hyphen (-), and then press Enter to return to the previous field. |
|
Ctrl+D = Quit |
Press Ctrl + D to exit the Ethernet parameter settings menu. |
|
Protocol (FTP or TFTP) |
Set the file transfer protocol to FTP or TFTP. |
|
Load File Name |
Set the name of the file to be downloaded. |
|
Target File Name |
Set a file name for saving the file in the current storage medium on the device. The target file name must have the same suffix as the source file. By default, the target file name is the same as the source file name. |
|
Server IP Address |
Set the IP address of the FTP or TFTP server. |
|
Local IP Address |
Set the IP address of the switch. This IP address must be unique in its network segment and can communicate with the FTP or TFTP server. |
|
Subnet Mask |
Set the IP subnet mask of the switch. |
|
Gateway IP Address |
Set a gateway IP address if the switch is on a different network than the server. |
|
FTP User Name |
Set the username for accessing the FTP server. This username must be the same as the one configured on the FTP server. This field is not available for TFTP. |
|
FTP User Password |
Set the password for accessing the FTP server. This password must be the same as the one configured on the FTP server. This field is not available for TFTP. |
Managing files
To change the type of a Comware software image, retrieve files, or delete files, enter 4 in the EXTENDED-BOOTWARE menu.
Enter your choice(0-9):4
The following FILE CONTROL submenu appears:
===============================<File CONTROL>===============================
|Note:the operating device is flash |
|<1> Display All File(s) |
|<2> Set Image File type |
|<3> Set Bin File type |
|<4> Delete File |
|<0> Exit To Main Menu |
============================================================================
Enter your choice(0-4):
Table 12 FILE CONTROL submenu options
|
Option |
Task |
|
<1> Display All File(s) |
Display all files on the current storage medium. |
|
<2> Set Image File type |
Set the type of a Comware software image. The file is a .ipe file. |
|
<3> Set Bin File type |
Set the type of a .bin Comware software image. |
|
<4> Delete File |
Delete a file from the current storage medium. |
|
<0> Exit To Main Menu |
Return to the EXTENDED-BOOTWARE menu. |
Displaying all files
To display all files on the current storage medium, enter 1 in the FILE CONTROL submenu:
Enter your choice(0-4):1
Display all file(s) in flash:
'M' = MAIN 'B' = BACKUP 'N/A' = NOT ASSIGNED
============================================================================
|NO. Size(B) Time Type Name |
|1 2022 Aug/07/2013 09:13:48 N/A flash:/startup.cfg |
|2 33368 Aug/07/2013 09:13:48 N/A flash:/startup.mdb |
|3 110083072 Aug/06/2013 17:23:20 M flash:/s12500x-cmw710-system-r11|
|35.bin |
|4 60577 Aug/07/2013 09:13:50 N/A flash:/logfile/logfile.log |
|5 815 Aug/06/2013 17:26:38 N/A flash:/license/DeviceID.did |
|6 16 Aug/06/2013 17:26:40 N/A flash:/versionInfo/versionCtl.da|
|t |
|7 536 Aug/06/2013 17:26:40 N/A flash:/versionInfo/version0.dat |
|8 42 Aug/07/2013 09:13:48 N/A flash:/ifindex.dat |
|9 14908416 Aug/06/2013 17:21:31 M flash:/s12500x-cmw710-boot-r1135|
|.bin |
============================================================================
Changing the Comware software image type
To change the type of a Comware software image:
1. Enter 2 in the FILE CONTROL submenu.
===============================<File CONTROL>===============================
|Note:the operating device is flash |
|<1> Display All File(s) |
|<2> Set Image File type |
|<3> Set Bin File type |
|<4> Delete File |
|<0> Exit To Main Menu |
============================================================================
Enter your choice(0-4):2
'M' = MAIN 'B' = BACKUP 'N/A' = NOT ASSIGNED
============================================================================
|NO. Size(B) Time Type Name |
|1 119947264 Feb/27/2013 15:08:22 N/A flash:/newest.ipe |
|0 Exit |
============================================================================
2. Enter the number of the file you are working with.
Enter file No.:1
Modify the file attribute:
============================================================================
|<1>+Main |
|<2>+Backup |
|<0> Exit |
============================================================================
Enter your choice(0-2):
3. Enter a number in the range of 1 to 2 to add or delete a file attribute for the file. For example, enter 1 to set the file as the main image file.
Enter your choice(0-2):1
This operation may take several minutes. Please wait....
Image file S12500X-CMW710-BOOT-R1135 is self-decompressing...
Saving file flash:/ S12500X-CMW710-BOOT-R1135 .........................
.................................................Done.
Image file S12500X-CMW710-SYSTEM-R1135.bin is self-decompressing...
Saving file flash:/ S12500X-CMW710-SYSTEM-R1135.bin .......................
............................................................................
............................................................................
............................................................................
.................................... ......Done.
Set the file attribute success!
Changing the .bin Comware software image type
To change the type of a .bin Comware software image, enter 3 in the FILE CONTROL submenu:
Enter your choice(0-4): 3
'M' = MAIN 'B' = BACKUP 'N/A' = NOT ASSIGNED
============================================================================
|NO. Size(B) Time Type Name |
|1 110083072 Aug/06/2013 17:23:20 M flash:/s12500x-cmw710-system-r11|
|35.bin |
|2 14908416 Aug/06/2013 17:21:31 M flash:/s12500x-cmw710-boot-r1135|
|.bin |
|0 Exit |
============================================================================
Note:Select .bin files. One but only one boot image and system image must
be included.
Enter file No.(Allows multiple selection):1
Enter another file No.(0-Finish choice):2
Enter another file No.(0-Finish choice):0
You have selected:
flash:/s12500x-cmw710-boot-r1135.bin
flash:/s12500x-cmw710-system-r1135.bin
Modify the file attribute:
============================================================================
|<1>+Main |
|<2>+Backup |
|<0> Exit |
============================================================================
Enter your choice(0-2):1
This operation may take several minutes. Please wait....
Set the file attribute success!
Deleting a file
To delete a file when the storage medium is insufficient:
1. Enter 3 in the FILE CONTROL menu.
Enter your choice(0-4): 4
Deleting the file in flash:
'M' = MAIN 'B' = BACKUP 'N/A' = NOT ASSIGNED
============================================================================
|NO. Size(B) Time Type Name |
|1 1982 Aug/07/2013 08:55:30 N/A flash:/startup.cfg |
|2 33368 Aug/07/2013 08:55:31 N/A flash:/startup.mdb |
|3 15827 Sep/28/2012 12:29:00 N/A flash:/my_archive_1.cfg |
|4 110083072 Aug/06/2013 17:23:20 M flash:/s12500x-cmw710-system-r113|
|5.bin |
|5 57476 Aug/07/2013 08:58:10 N/A flash:/logfile/logfile.log |
|6 815 Aug/06/2013 17:26:38 N/A flash:/license/DeviceID.did |
|7 16 Aug/06/2013 17:26:40 N/A flash:/versionInfo/versionCtl.da |
|t |
|8 536 Aug/06/2013 17:26:40 N/A flash:/versionInfo/version0.dat |
|9 42 Aug/07/2013 08:55:30 N/A flash:/ifindex.dat |
|10 14908416 Aug/06/2013 17:21:31 M flash:/s12500x-cmw710-boot-r1135|
|.bin |
|0 Exit |
============================================================================
Enter file No.:
2. Enter the number of the file to delete. For example, enter 3 to delete my_archive_1.cfg.
Enter file No: 3
3. When the following prompt appears, enter Y.
The file you selected is flash:/my_archive_1.cfg,Delete it? [Y/N]y
Deleting.....Done!
|
|
NOTE: For information about managing files from the CLI, see H3C S12500-X & S12500X-AF Switch Series Fundamentals Configuration Guide. |
Restoring the factory-default configuration
|
|
CAUTION: Performing this task can cause all next-startup configuration files to be permanently deleted. |
To restore the factory-default configuration from the EXTENDED-BOOTWARE menu, make sure password recovery capability is disabled. If the capability is enabled, you cannot perform the task.
Disabling password recovery capability can protect your system from unauthorized console access to configuration. However, if you have only console access to the system but you have lost the console login password, you can only access the system after restoring the factory-default configuration.
To enable the system to start up with the factory-default configuration instead of a next-startup configuration file:
1. Enter 5 in the EXTENDED-BOOTWARE menu.
Enter your choice(0-9):5
2. Follow the system instruction to complete the task.
¡ If password recovery capability is enabled, first disable the capability from the CLI, and then reboot the device to access the EXTENDED-BOOTWARE menu.
Password recovery capability is enabled. To perform this operation, first
disable the password recovery capability using the undo password-recovery
enable command in CLI.
¡ If password recovery capability is disabled, enter Y at the prompt to complete the task.
Because the password recovery capability is disabled, this operation can
cause the configuration files to be deleted, and the system will start up
with factory defaults. Are you sure to continue?[Y/N]Y
Setting...Done.
Starting up without loading the configuration file
You can perform this task only if password recovery capability is enabled.
To ignore all configuration files and start up with the empty configuration, enter 6 in the EXTENDED-BOOTWARE menu.
Enter your choice(0-9): 6
Flag Set Success.
This is a one-time operation. It takes effect only for the first system startup or reboot (option 1 or option 0 in the EXTENDED-BOOTWARE menu) after you select the option.
Managing the BootWare image
You can use BootWare Operation menu to back up, recover, and upgrade the BootWare image.
To access the BootWare Operation menu, enter 7 in the EXTENDED-BOOTWARE menu.
Enter your choice(0-9): 7
=========================<BootWare Operation Menu>==========================
|Note:the operating device is flash |
|<1> Backup Full BootWare |
|<2> Restore Full BootWare |
|<3> Update BootWare By Serial |
|<4> Update BootWare By Ethernet |
|<0> Exit To Main Menu |
============================================================================
Enter your choice(0-4):
Table 13 BootWare Operation menu options
|
Option |
Tasks |
|
<1> Backup Full BootWare |
Back up the entire BootWare image. When the BootWare image is corrupted, you could use the backup image for recovery. |
|
<2> Restore Full BootWare |
Recover the entire BootWare image. If the BootWare image has been corrupted, you can use a backup BootWare image to recover it. |
|
<3> Update BootWare By Serial |
Update the BootWare from the console port. |
|
<4> Update BootWare By Ethernet |
Update the BootWare from an Ethernet port. |
|
<0> Exit To Main Menu |
Return to the EXTENDED-BOOTWARE menu. |
Skipping console login authentication
|
|
IMPORTANT: · To perform this task, make sure password recovery capability is enabled. If the capability is disabled, you cannot perform this task. · Skipping console login authentication applies only to console login users. · Skipping console login authentication is a one-time operation. It takes effective only for the first system boot or reboot (option 1 and option 0 in the EXTENDED-BOOTWARE menu) after you perform the operation. If you do not configure a new login password, the original setting continues to take effect for the subsequent reboot. |
If you cannot remember the console login password, enter 8 in the EXTENDED-BOOTWARE menu so you can log in to the device through the console port without login authentication.
Enter your choice(0-9): 8
Clear Image Password Success!
Managing storage media
To get information about available storage media, and set the storage medium you want to use for file operations, enter 9 in the EXTENDED-BOOTWARE menu.
Enter your choice(0-9): 9
The following DEVICE CONTROL menu appears:
==============================<DEVICE CONTROL>==============================
|<1> Display All Available Nonvolatile Storage Device(s) |
|<2> Set The Operating Device |
|<3> Set The Default Boot Device |
|<0> Exit To Main Menu |
============================================================================
Enter your choice(0-3):
Table 14 DEVICE CONTROL menu options
|
Option |
Task |
|
<1> Display All Available Nonvolatile Storage Device(s) |
Display all available storage media. |
|
<2> Set The Operating Device |
Set the current storage medium. All file operations performed using BootWare menus are performed on the current storage medium. |
|
<3> Set The Default Boot Device |
Set the default storage medium from which the system will start up. |
|
<0> Exit To Main Menu |
Return to the EXTENDED-BOOTWARE menu. |
Using the EXTENDED ASSISTANT menu
In the EXTENDED-BOOTWARE menu, press Ctrl+Z to access the EXTENDED ASSISTANT menu.
==========================<EXTENDED ASSISTANT MENU>===========================
|<1> Display Memory |
|<2> Search Memory |
|<0> Exit To Main Menu |
============================================================================
Enter your choice(0-2):
Formatting the file system
|
|
CAUTION: Formatting the file system of a storage medium can cause the loss of all files. |
To format the file system of the current storage medium:
1. Press Ctrl + F while you are in the EXTENDED-BOOTWARE menu.
2. Enter Y when the prompt for confirmation appears.
Warning:All files on flash will be lost! Are you sure to format? [Y/N]y
Disabling password recovery capability,40
Formatting the file system,50
Managing files,44
Managing storage media,49
Managing the BootWare image,48
Modifying serial port parameters,36
Restoring the factory-default configuration,47
Running the backup extended BootWare segment,38
Running the Comware software,41
Running the primary extended BootWare segment,37
Skipping console login authentication,49
Software file naming conventions,1
Software types,1
Starting up without loading the configuration file,48
Updating the entire BootWare,37
Updating the extended BootWare segment,37
Upgrade methods,1
Upgrading a standalone switch,3
Upgrading an IRF fabric,8
Upgrading Comware software through an Ethernet port,42
Upgrading Comware software through the console port,41
Using FTP to upgrade through the management Ethernet port (Upgrading Comware software),18
Using FTP to upgrade through the management Ethernet port (Upgrading BootWare),27
Using TFTP to upgrade through the management Ethernet port (Upgrading BootWare),25
Using TFTP to upgrade through the management Ethernet port (Upgrading Comware software),16
Using the EXTENDED ASSISTANT menu,50
Using Xmodem to upgrade through the console port (Upgrading BootWare),29
Using Xmodem to upgrade through the console port (Upgrading Comware software),21
